 ✕
✕
By Justin SabrinaUpdated on September 01, 2021
"I found that the Mac's hard drive is getting full, and the iTunes library takes up too much space. Is there a way to move my iTunes library to an external hard drive to free up space?"
Your iTunes library, a database that's made up of all of the music and other media that you collect for years and add to iTunes. Photos, music, podcasts, and movies can quickly build up your iTunes library and take up more and more space on your Mac's/PC's hard drive that’s already pretty full. As a result, users have come up with the idea of transferring iTunes multimedia data to an external hard drive. In fact, it's a good idea to move your iTunes library to an external hard drive to free up space on your hard drive or to protect your library in the event of data loss. In this article, we'll give you a detailed tutorial on how to back up your iTunes library to an external hard drive.
CONTENTS
This is a necessary step, this is designed specifically for some people who are not sure where their iTunes media folder is. Please follow our steps to find out your iTunes media folder on your computer. (Mac PC and Windows PC are supported here).
* For Windows users:
Windows XP:
1. Right-click on This PC/My Computer > C:
2. Follow this path and find iTunes media files: \Documents and Settings\username\My Documents\My Music\.
Windows Vista or later: \Users\username\Music\.
* For Mac users:
1. Go to Finder > username;
2. Find Music and then you'll find the iTunes media folder there.
* If the iTunes media folders are not in the default location above, you can also find them in this way:
-> Launch iTunes on your computer.
-> For Mac users, click on "iTunes" > "Preferences" option on top of computer screen; For Windows users, choose "Edit" > "Preferences" option on top of iTunes screen.
- Tap on the "Advanced" > look in the box under "iTunes Media folder location", and you can find out the path to save your iTunes Media folder.
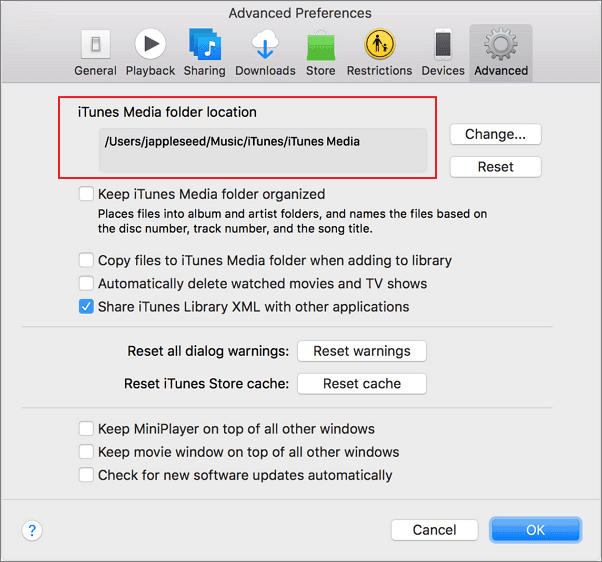
To ensure that you copy everything from iTunes over to an external hard drive, you should first consolidate your library.
Step 1. To consolidate iTunes library, on your Windows, open iTunes > go to "File" > "Library" > "Organize Library" > tick "Consolidate files" > click "OK".
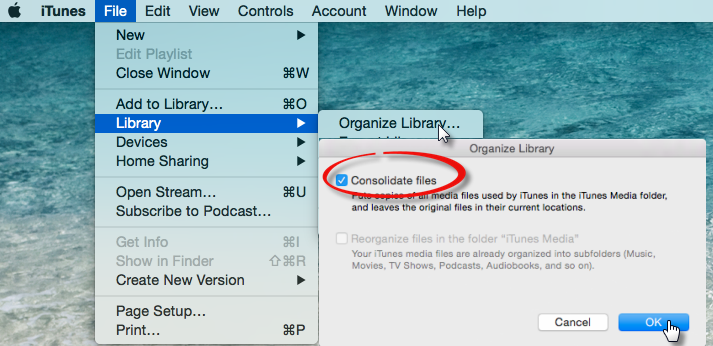
Step 2. Quit iTunes and connect your external hard drive to computer using a USB cable.
Step 3. Turn on the iTunes media folder that you have been found earlier in Part 1.
Step 4. Drag the iTunes folder from its location to an external drive. Your library and media files are now copied to your hard drive.
Once Apple Music, iTunes M4P music and audiobooks are out of iTunes, they will be unplayable because all iTunes music files purchased and rented from the iTunes Store are DRM protected. If you plan to back up your iTunes M4P music and Apple Music to an external hard drive or a new computer, you will need to remove DRM from these files first. In this case, you need to ask UkeySoft Apple Music Converter for help.
UkeySoft Apple Music Converter is an innovative tool as it easily strips DRM protection from iTunes music and makes it DRM free. It supports to remove DRM from Apple Music files, iTunes M4P music and audio books, and converts them to MP3, WAV, FLAC and AAC formats with up to 16X faster speed and all ID tags and metadata kept. Thus you can easily move them to an external hard drive and stream them on any device, such as an Android tablet, a portable MP3 player, iPod nano/shuffle, Xbox One, etc.
Firstly, download and install UkeySoft Apple Music Converter on your Mac or Windows computer first before getting started.
Tip: UkeySoft Apple Music Converter not only removes DRM from Apple Music tracks, but also removes DRM-protected songs purchased from the iTunes Store before April 2009 and audio books from iTunes Store or Audible.
Step 1. Launch UkeySoft Apple Music Converter on PC
Launch UkeySoft Apple Music Converter with your computer and you will get the main interface shown as below. Also, you will see the entire iTunes library is automatically loaded.
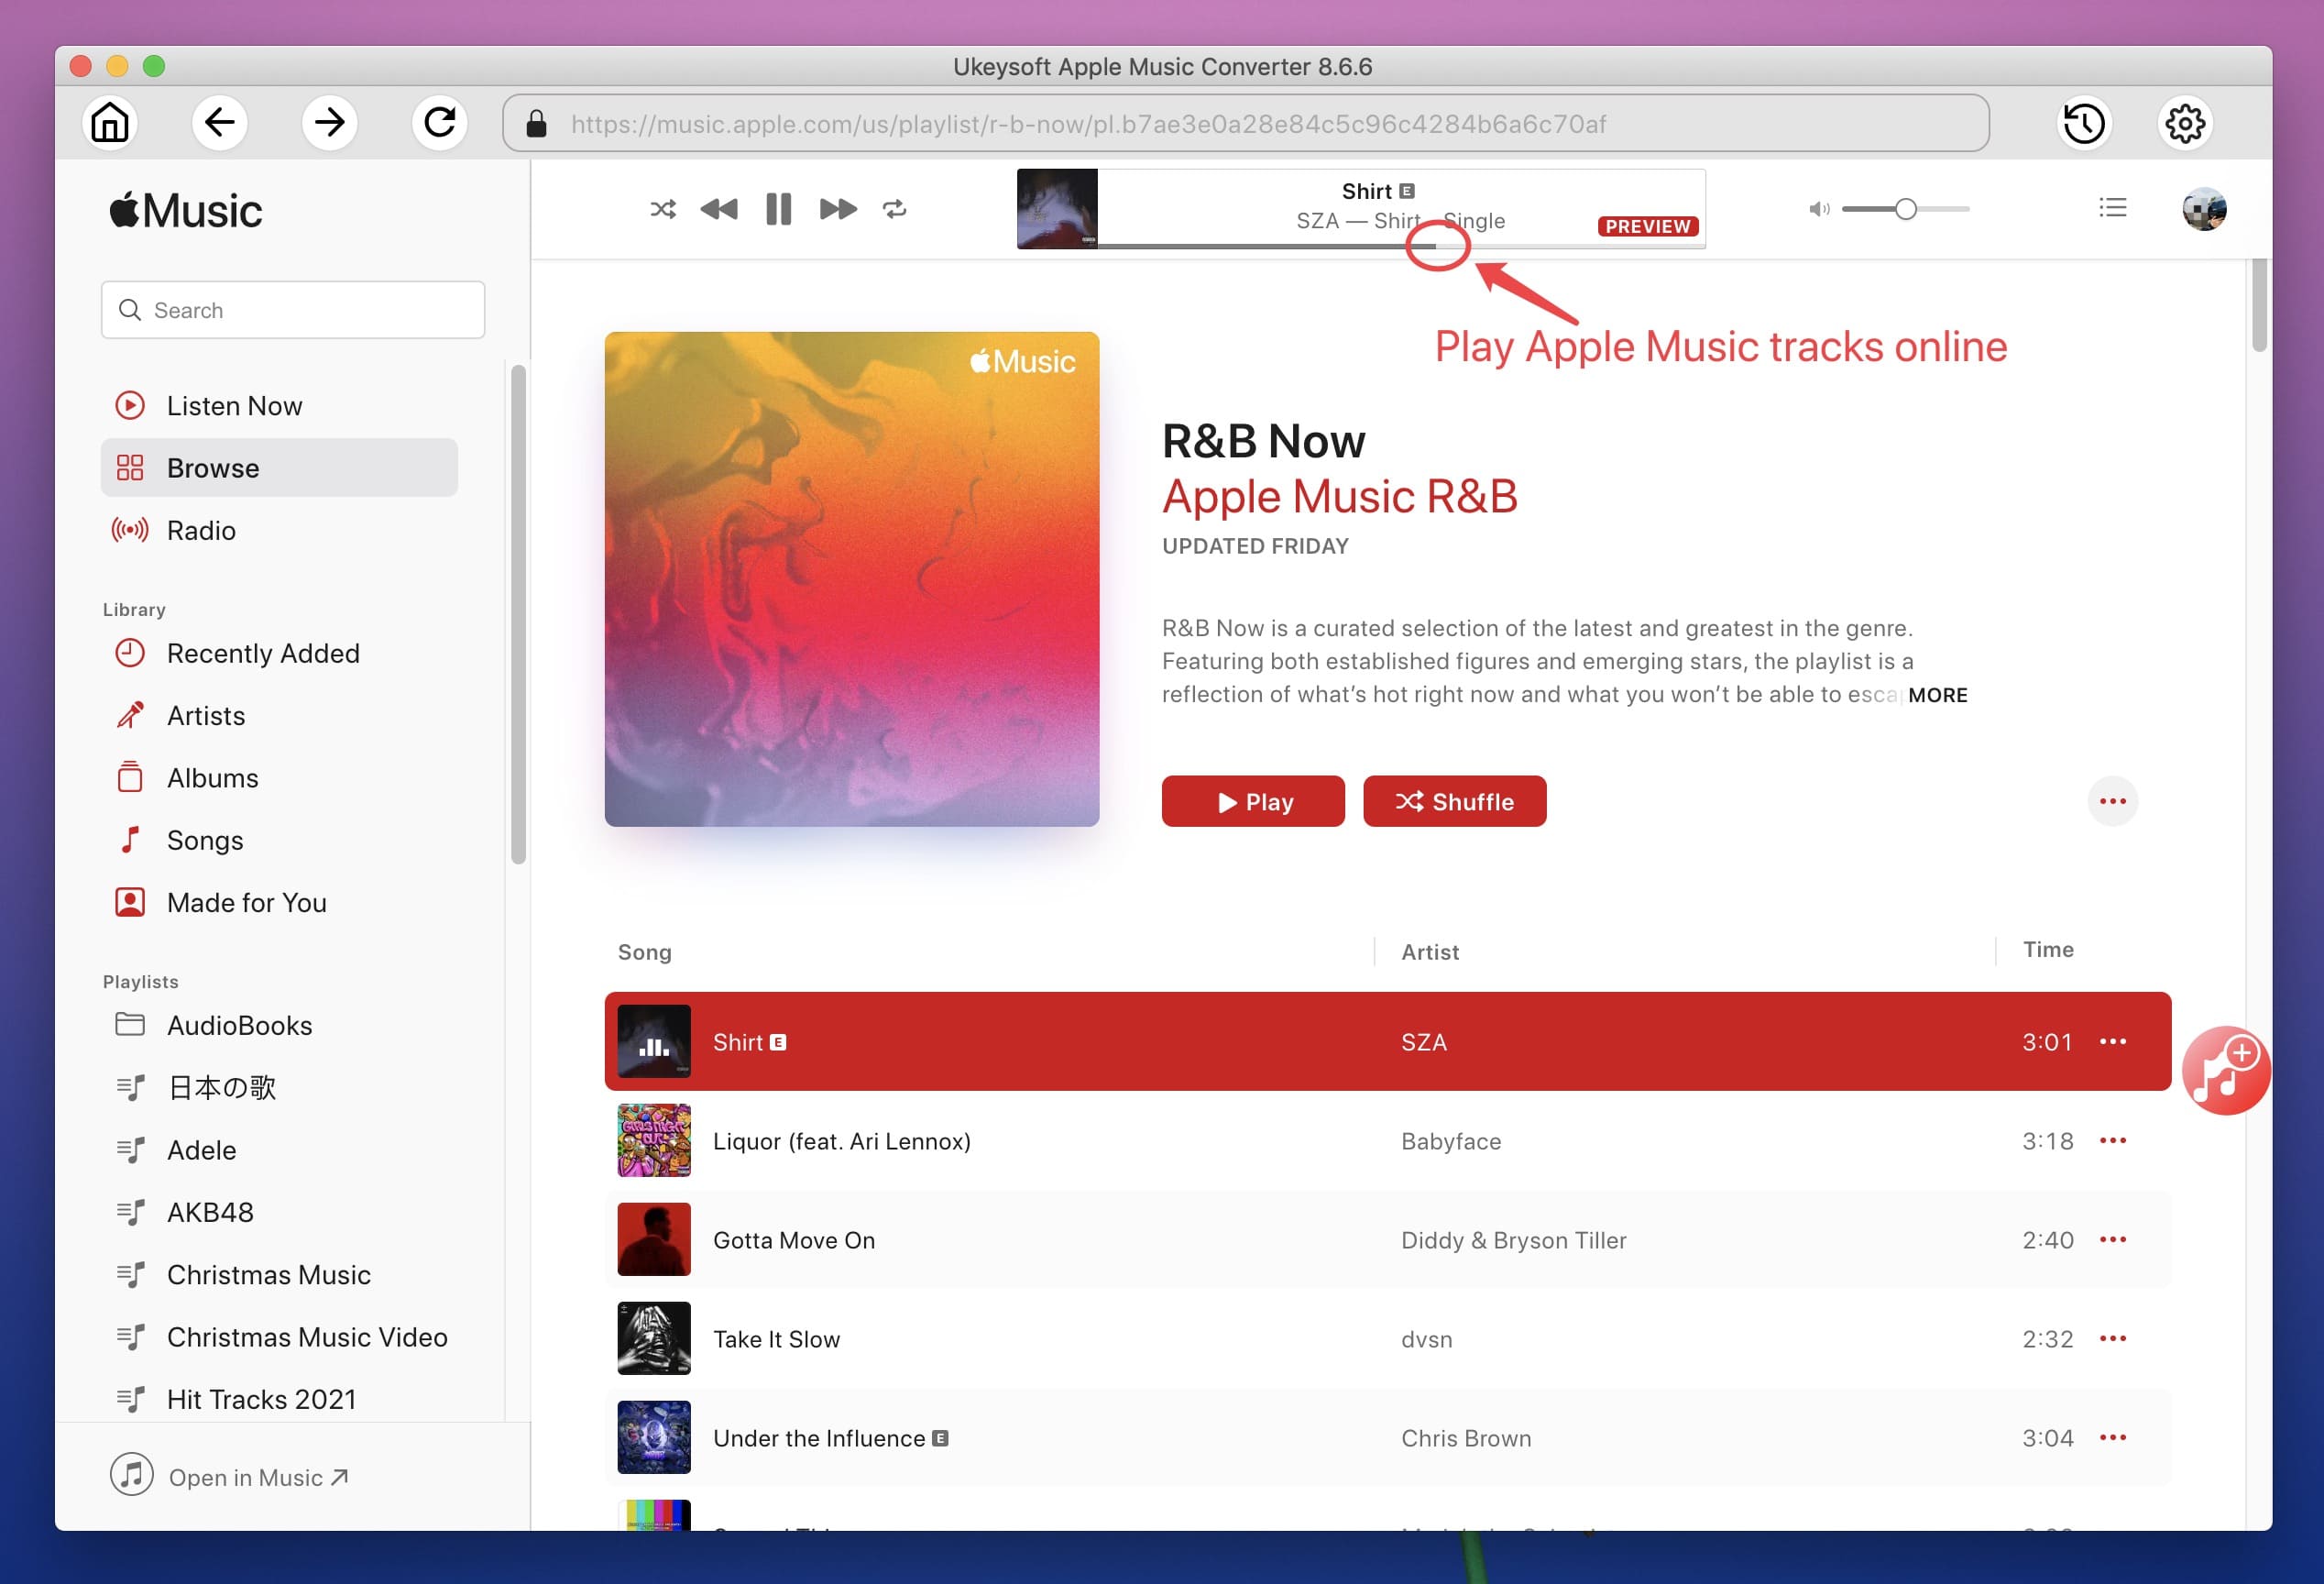
Step 2. Select Apple Music Tracks
Make sure Apple Music tracks, albums and playlists you want to remove DRM from have been added to iTunes Library. Now tick the Apple Music tracks you want to remove DRM from.
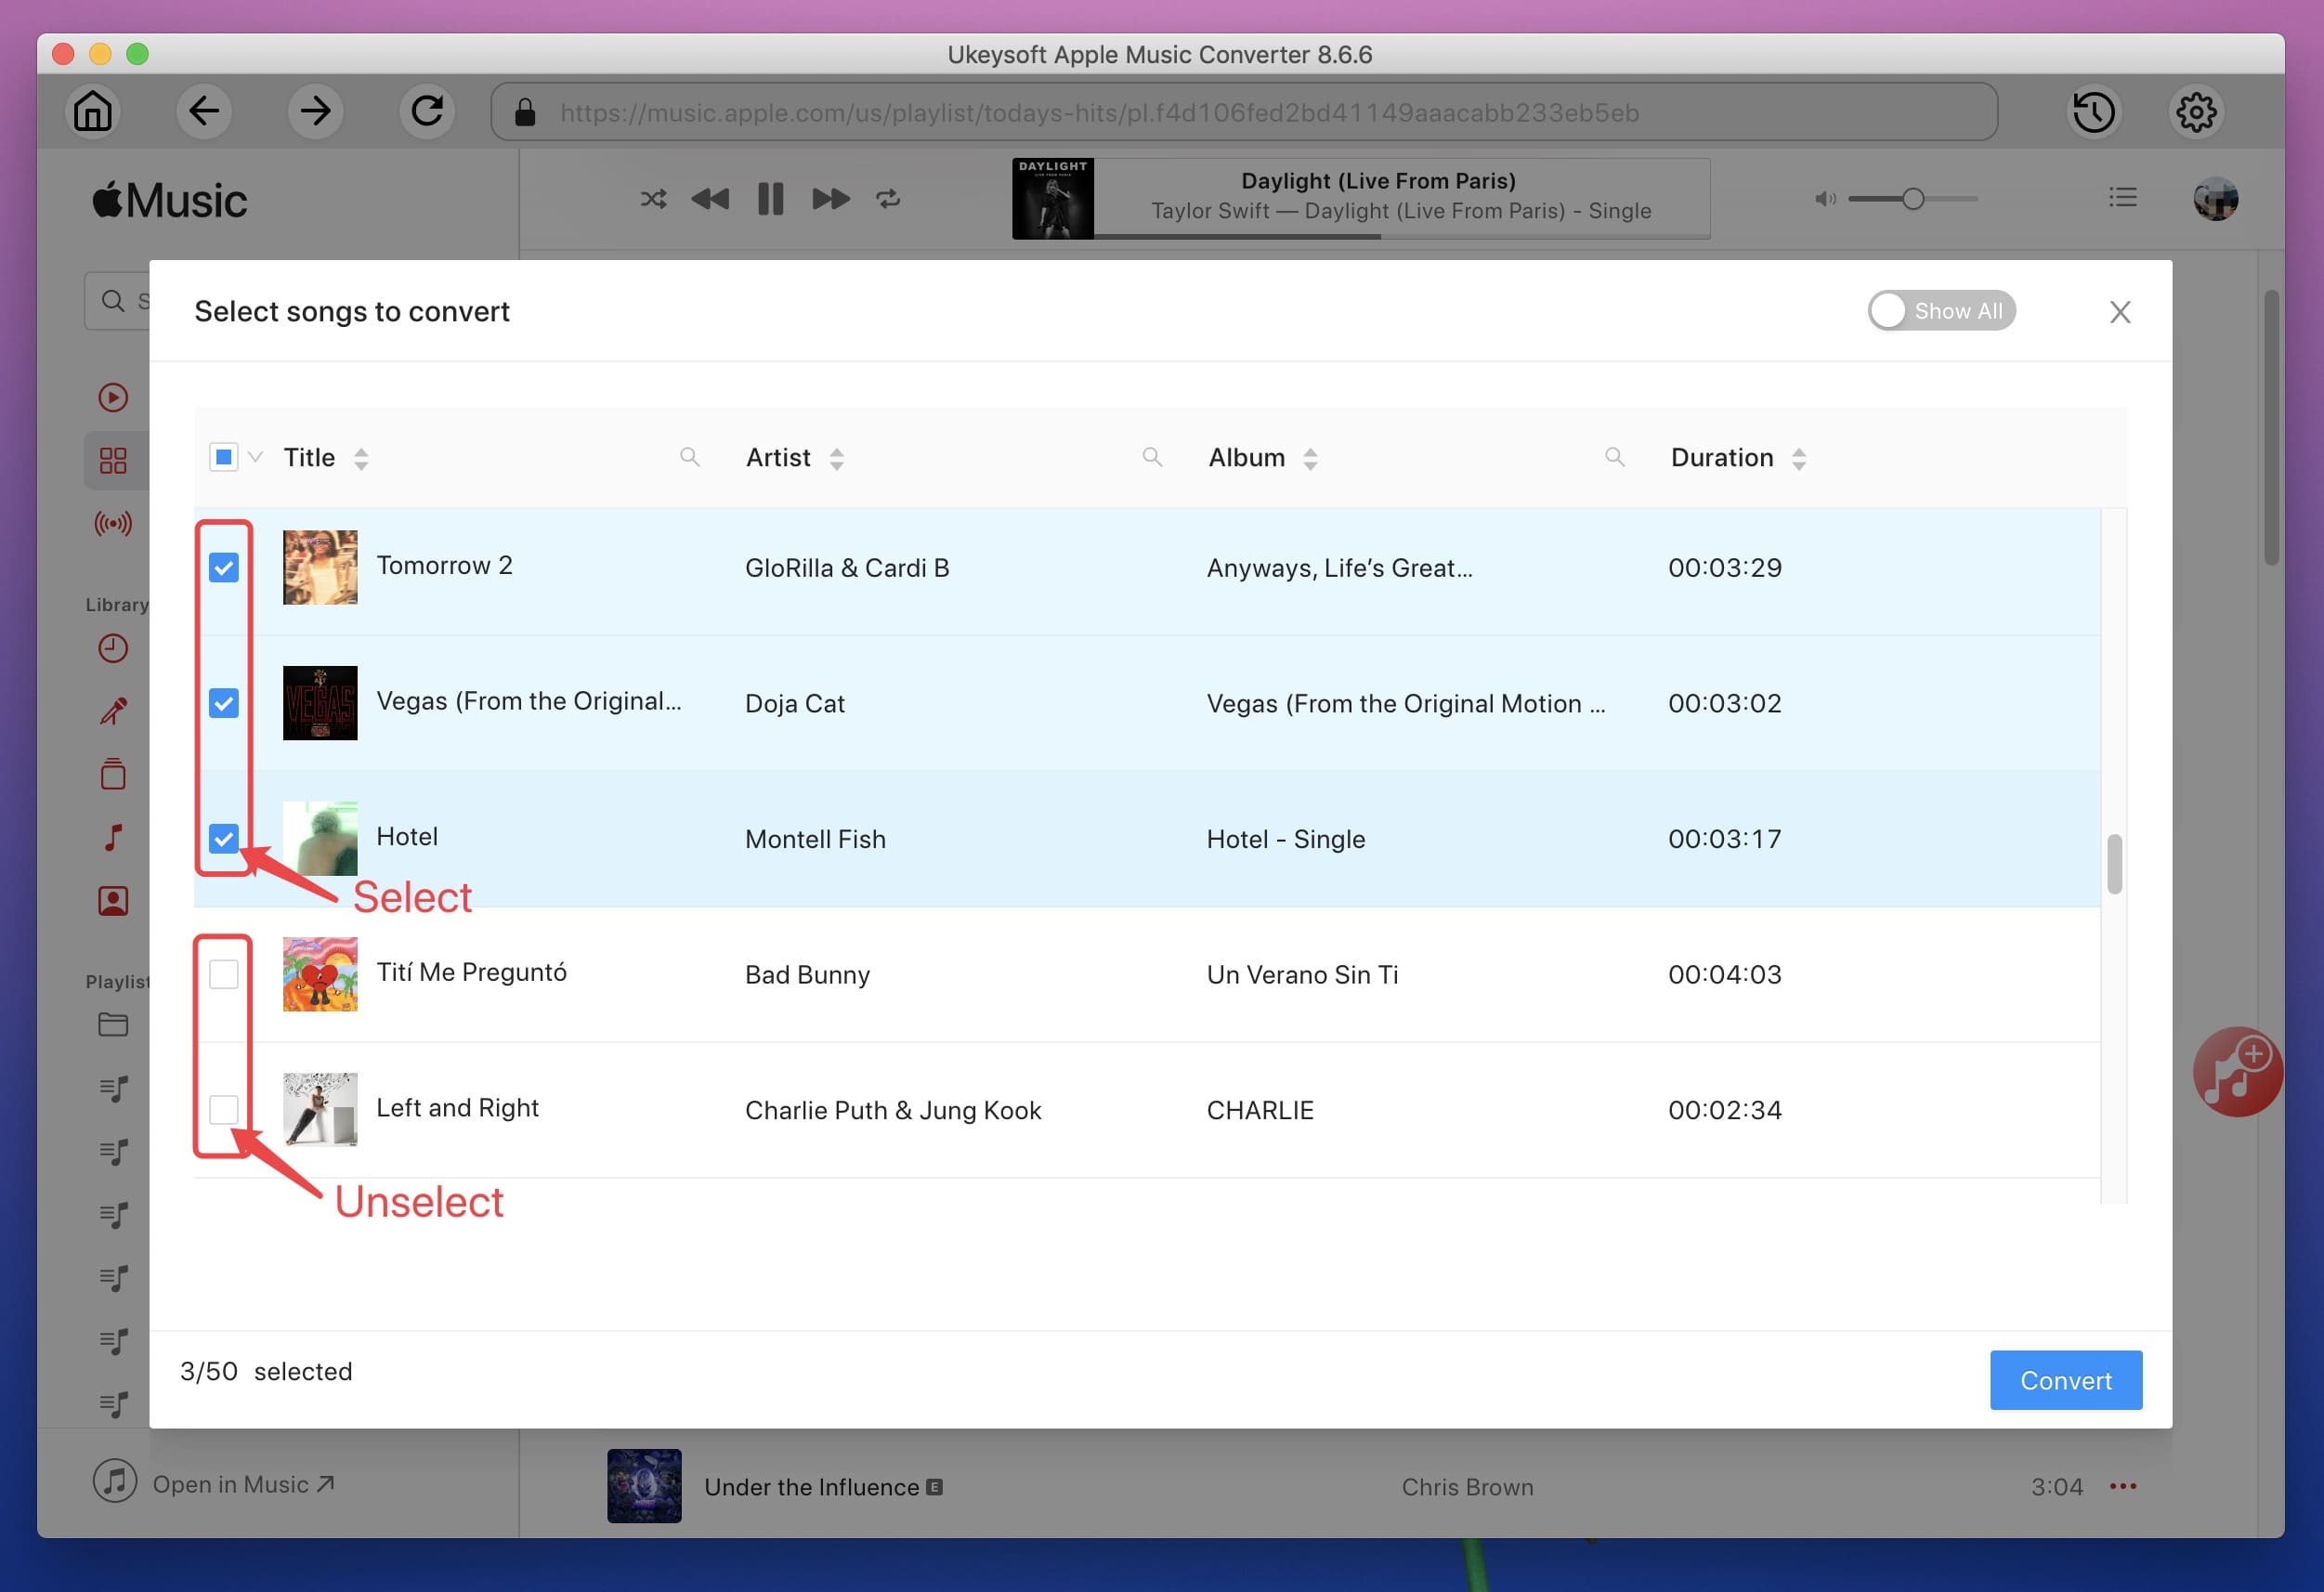
Step 3. Choose Output Format
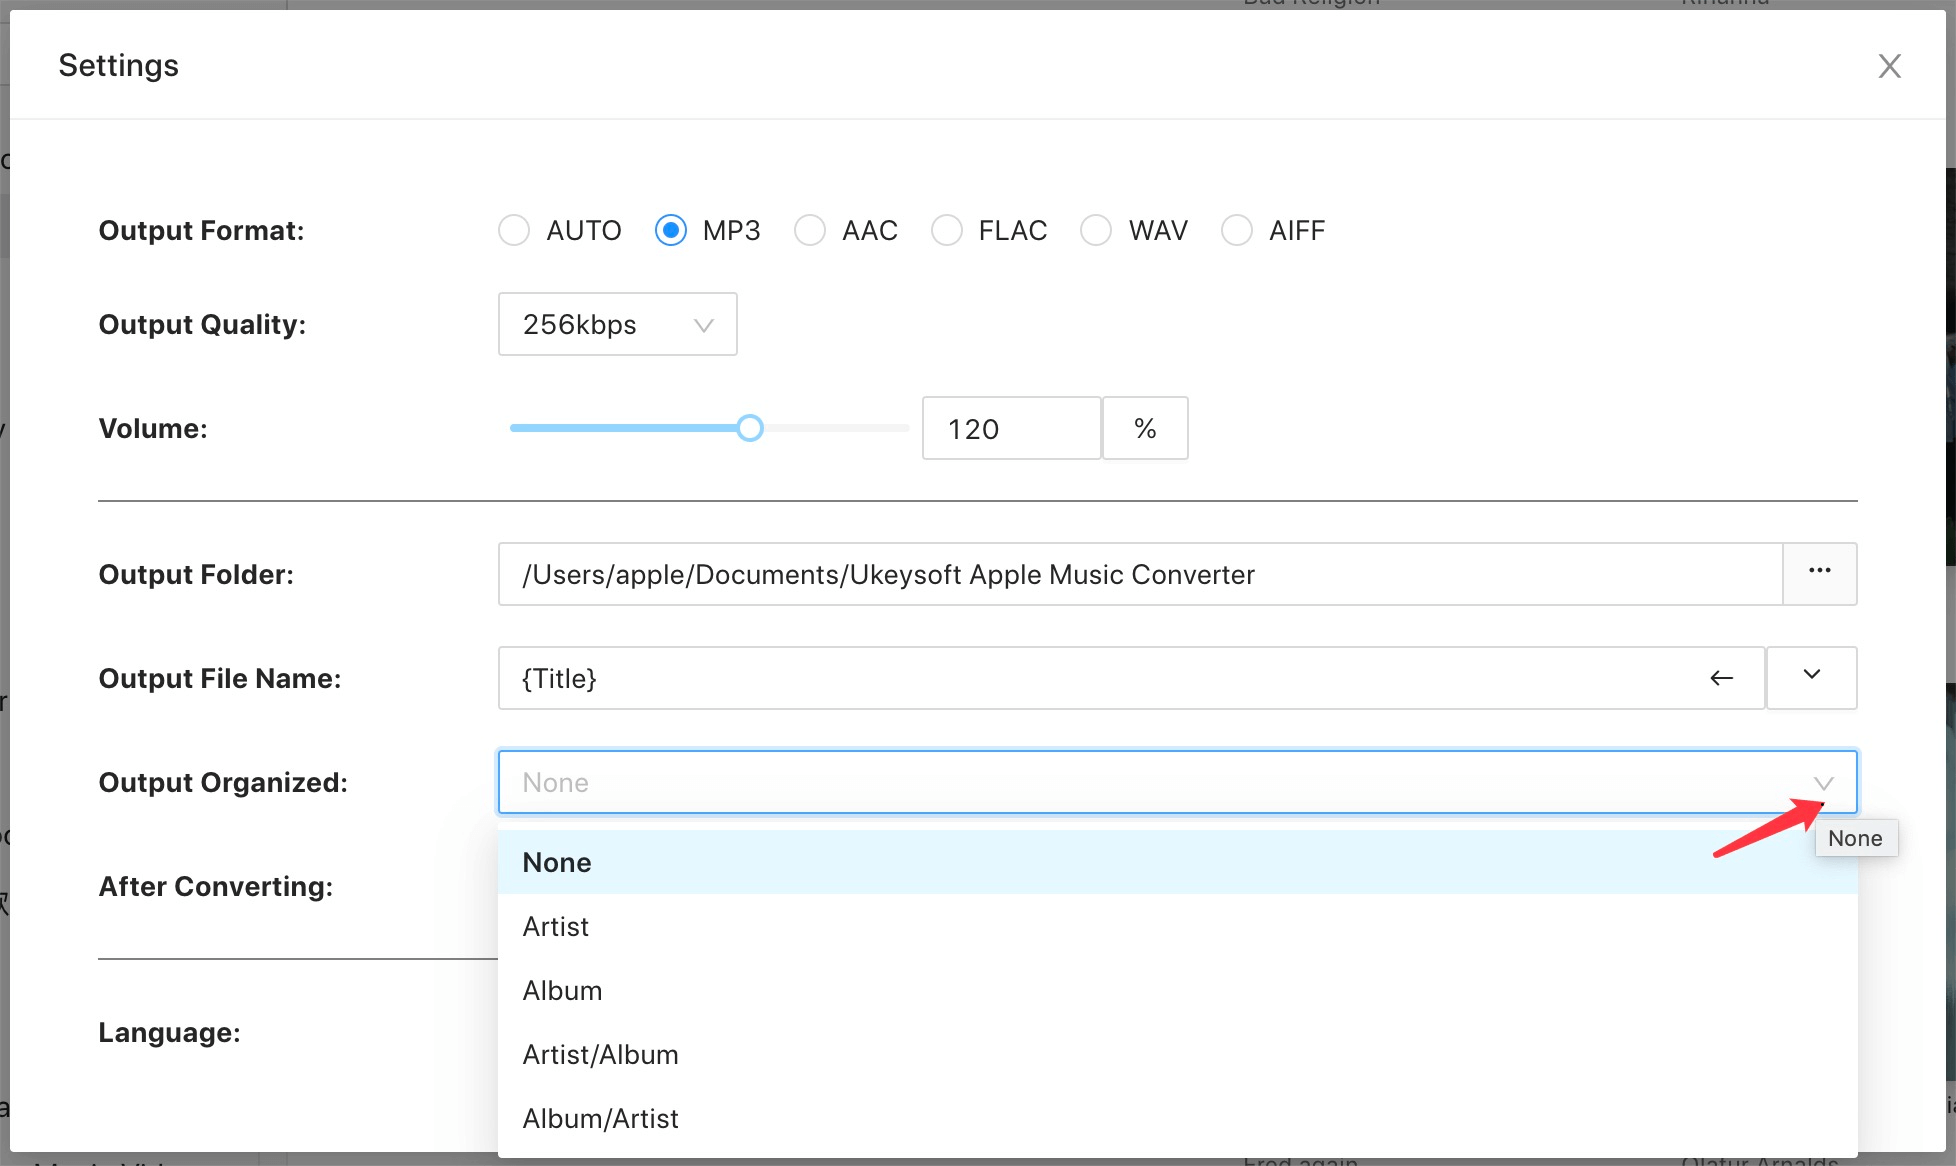
Here you can choose output format as MP3, M4A, WAV, FLAC, set the converting speed up to 10X and adjust the output quality up to 320 Kbps.
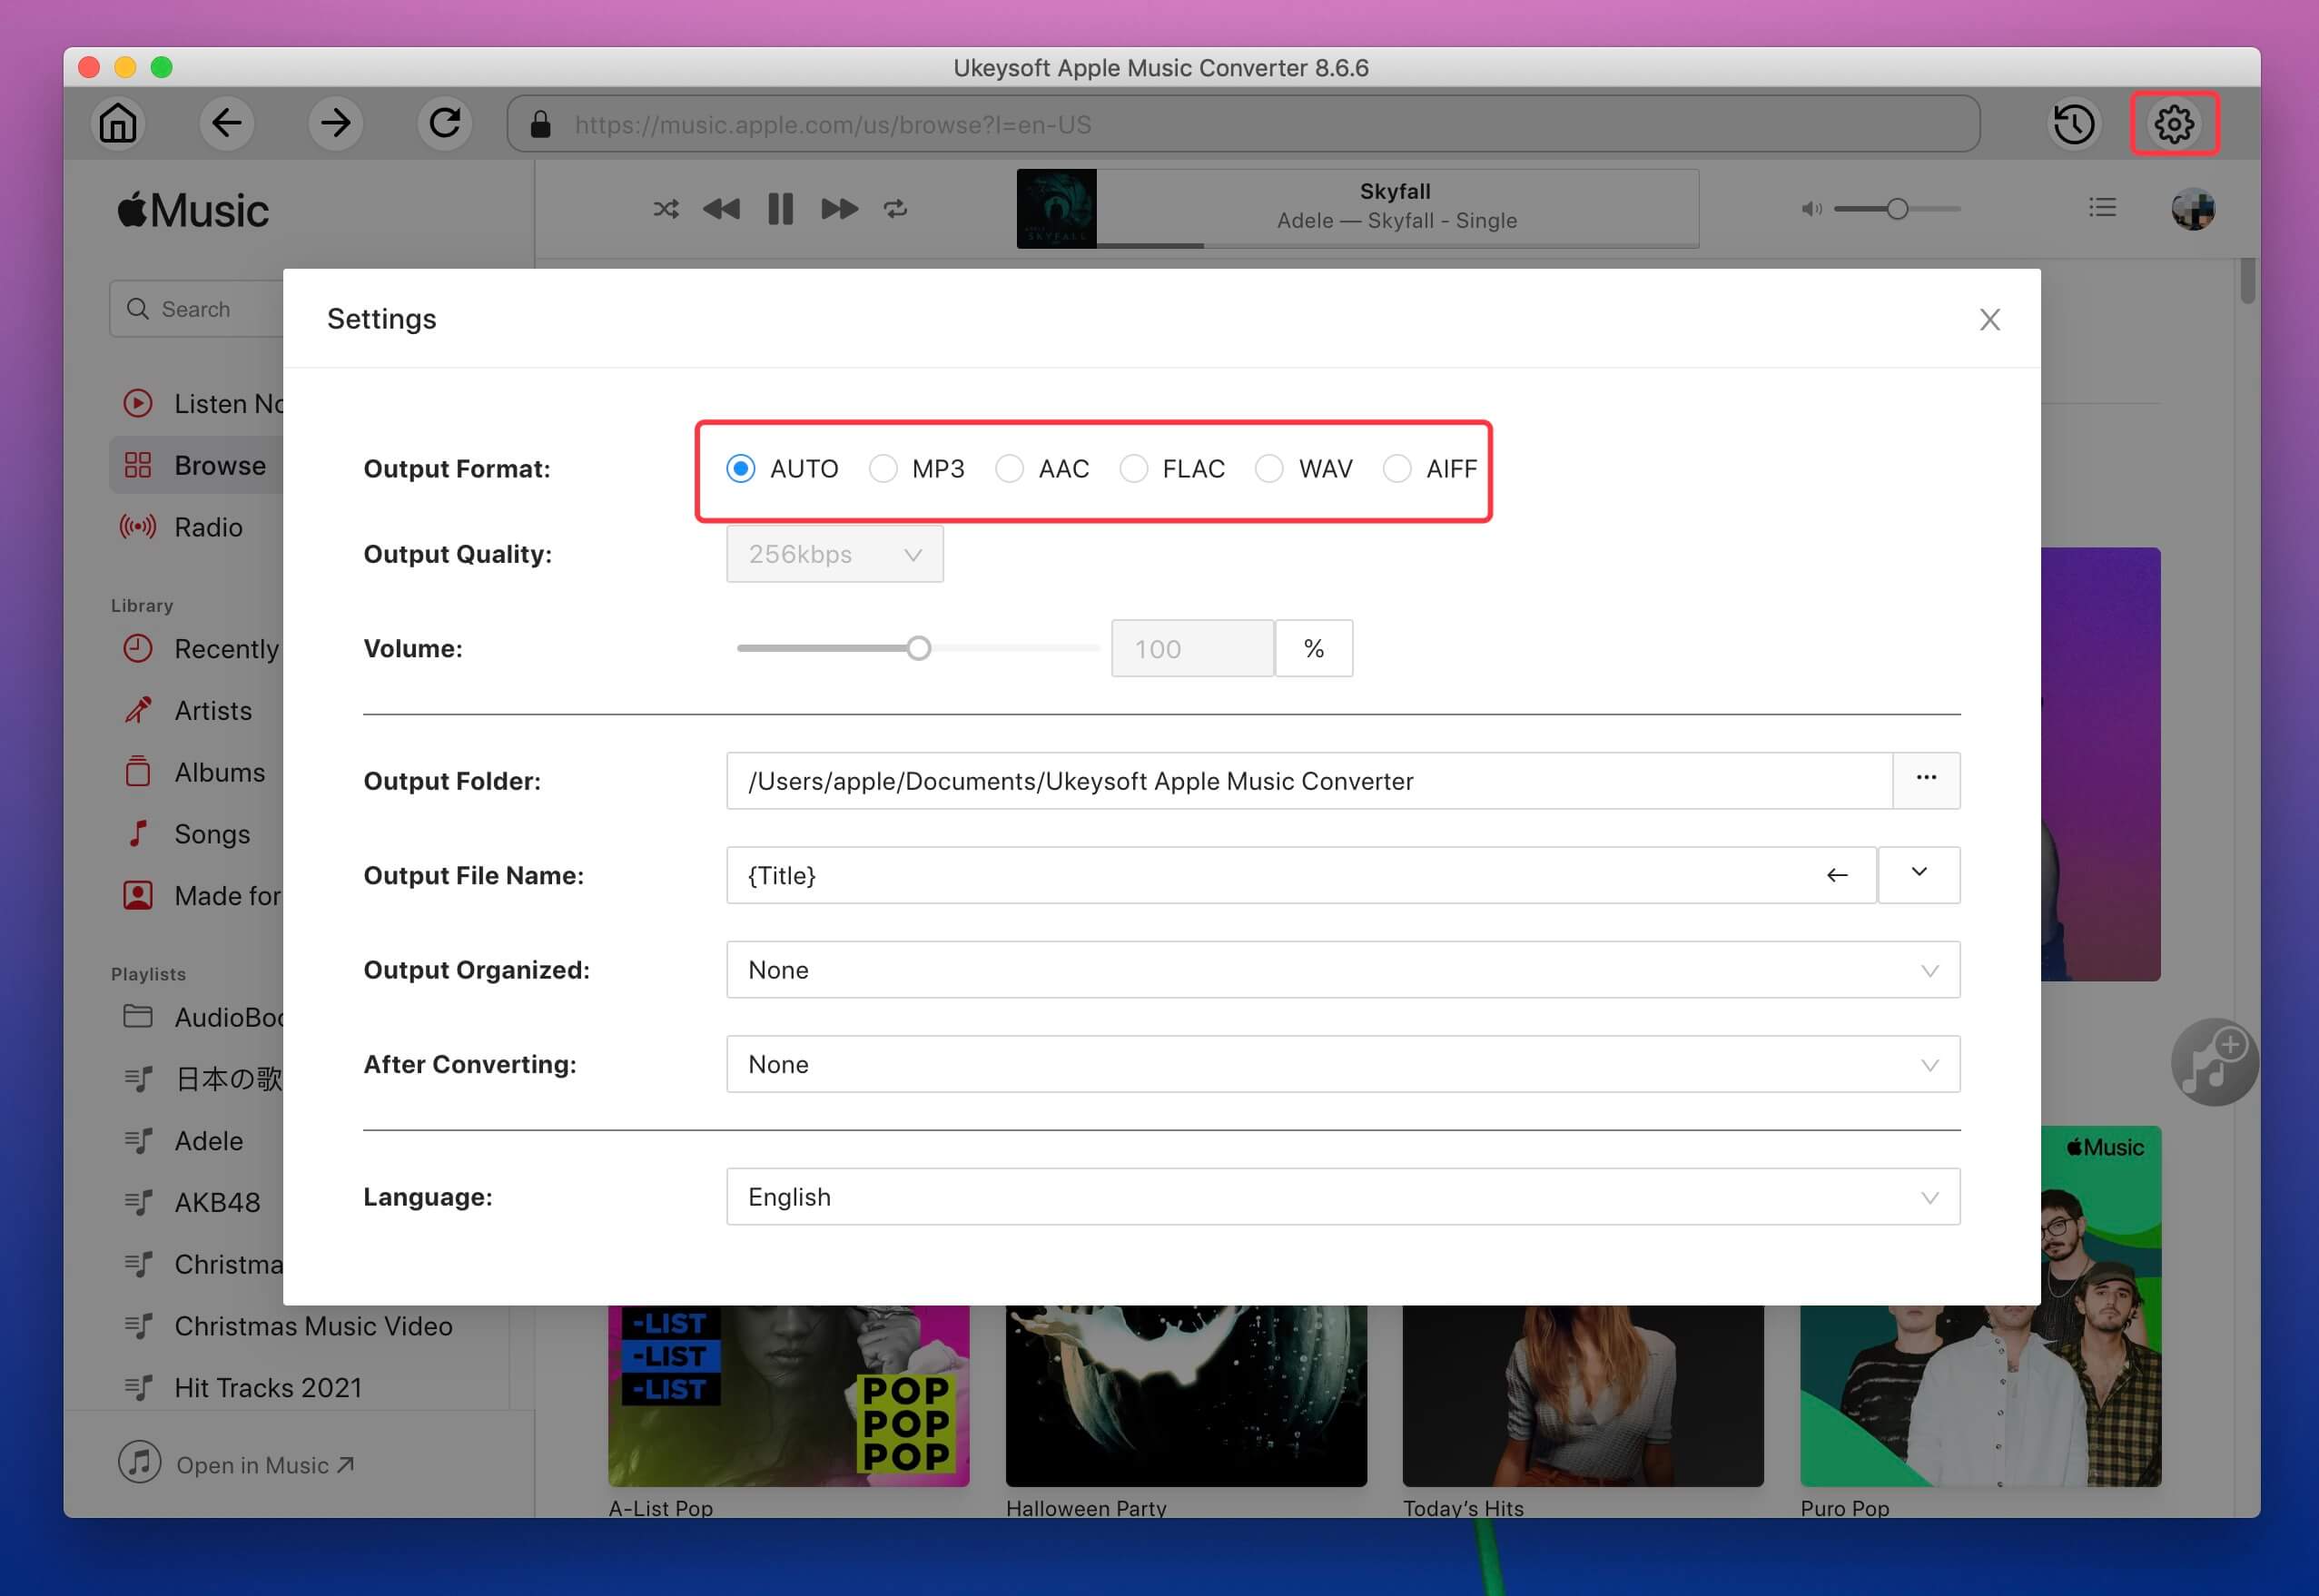
Metadata including Title, Artist, Album, Genre and Artwork will be preserved to output MP3/M4A songs.
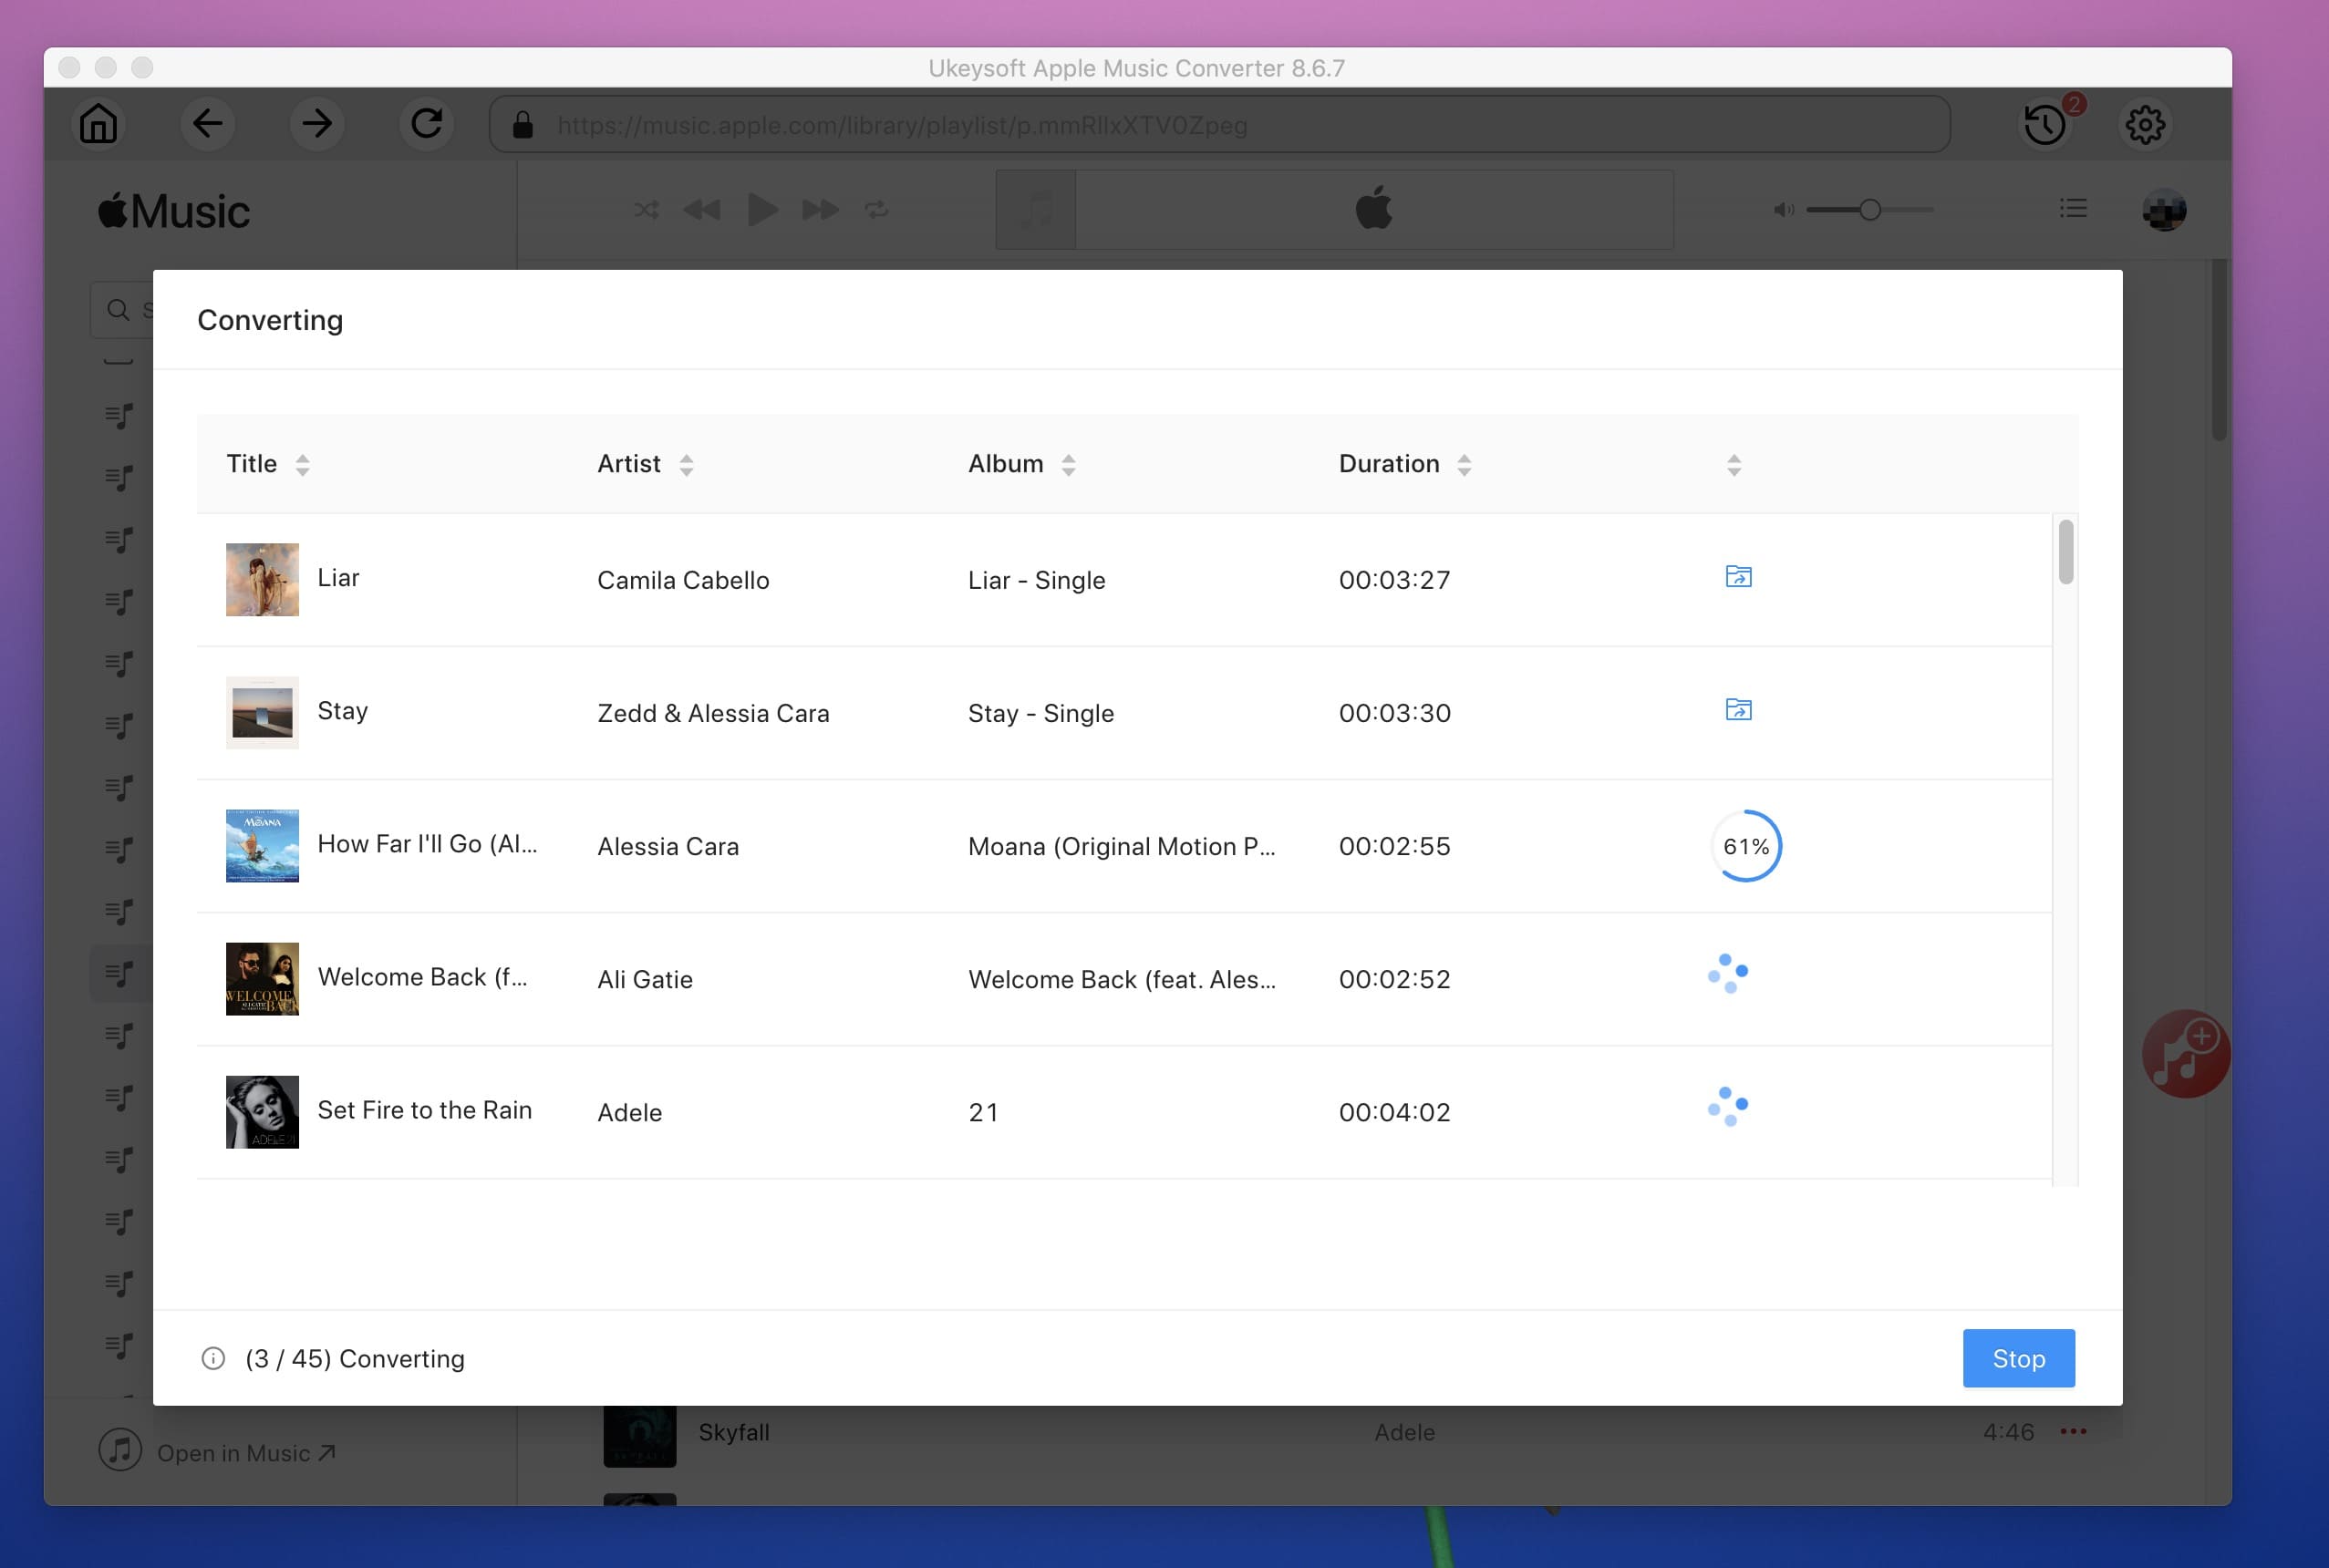
Step 4. Start Conversion
Click “Convert” button to start DRM removal. After conversion, you can click “Open Output File” button to find the converted audio files.
Step 5. Transfer Converted iTunes Music & Apple Music to External Hard Drive
Now, all of DRM-ed iTunes music & Apple Music tracks are converted to common audio files and you can directly transfer all of iTunes music files from computer to your external hard drive for backup or free up space.
Prompt: you need to log in before you can comment.
No account yet. Please click here to register.
Porducts
Solution
Copyright © 2025 UkeySoft Software Inc. All rights reserved.
No comment yet. Say something...