 ✕
✕
✕
✕
By Li ZhangUpdated on January 05, 2024
Sometimes you may need to record audio for personal usage, like make a homework record, meeting record, or only saving music for playback. No matter what cause for recording audio, your Mac can be used as a handy audio recording device. When you look for audio recording on Mac, you may get various of audio recording software on the Internet. However, most of them will not allow you record system sound from Mac, or it will not promise you that output audio with original audio quality kept. In this post we will share 4 methods with you to record audio on Mac, after that you will keep the recorded audio files with high audio quality.
CONTENTS
Users can record audio on Mac with the Voice Memos feature, here are the easy steps shown for you.
Step 1. Open the Voice Memos app on your Mac computer.
Step 2. Click the large red circle button to start recording audio.
Step 3. Click the red pause button to stop recording at anytime.
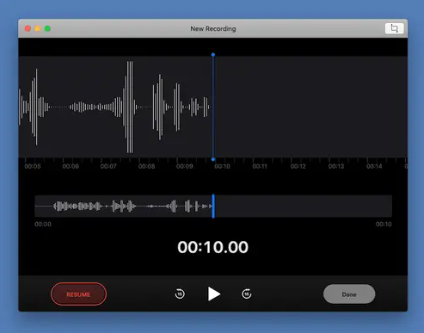
When it finishes, click Done, then click on the words "New Recording" to name the file.
Note: You can access the recorded audio files by opening the Voice Memos app, and you are allowed to edit or add to the recording by clicking on the file, then clicking the Edit button in the top-right corner.
Cons:
*Not promise you that output audio with original audio quality kept.
Being Compare with Voice Memos, it is easier to pick where you save the audio of recording audio using QuickTime, and it is more convenient to share the output files.
Step 1. Open the QuickTime Player on your Mac computer.
Step 2. Click File, then click New Audio Recording.
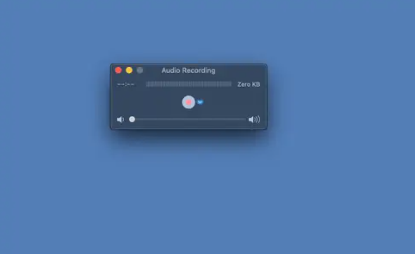
Step 3. Hit the red circle in the middle of the gray circle to start recording. You have to open a new recording from the File menu before recording.
Step 4. Click the dark gray square to stop recording at anytime.
Step 5. Click File, then Save... to choose the name for the recording and where you'll save it. You can then share this recording file through email or other programs that allow you to upload files.
Cons:
*Not allow to edit the recorded audio files.
UkeySoft Screen Recorder is the best recording tool here we strongly recommend for you, it is not only a powerful screen recorder, but also a video editor. Thanks to UkeySoft program, users could record audio on Mac with high audio quality kept. In addition, UkeySoft program is more than a Screen Recorder, features with powerful capture function, capture video with lossless video audio quality, selectable recorded screen area, support various output formats, capture Snapshots, and advanced editing functions, etc,.
Main Features of UkeySoft Screen Recorder
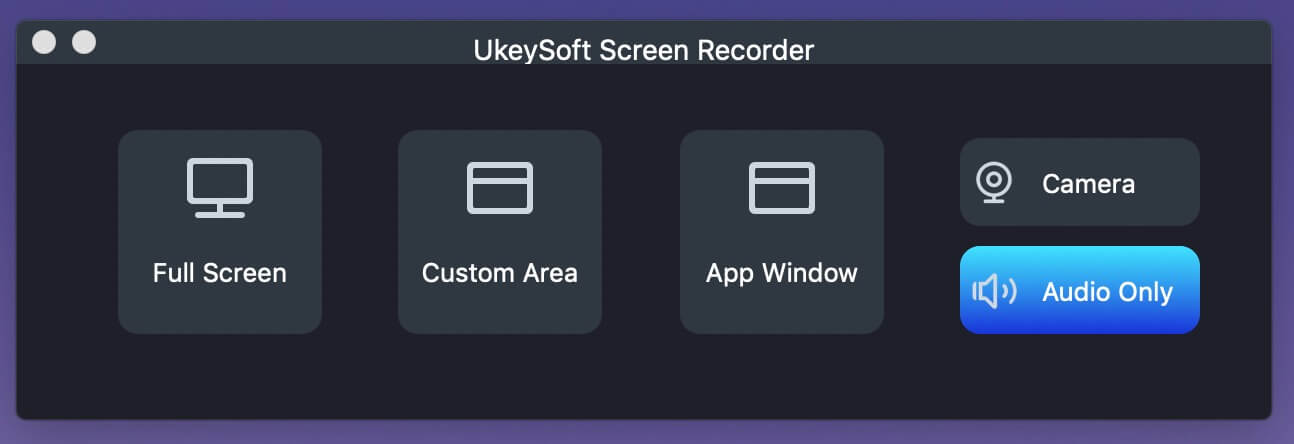
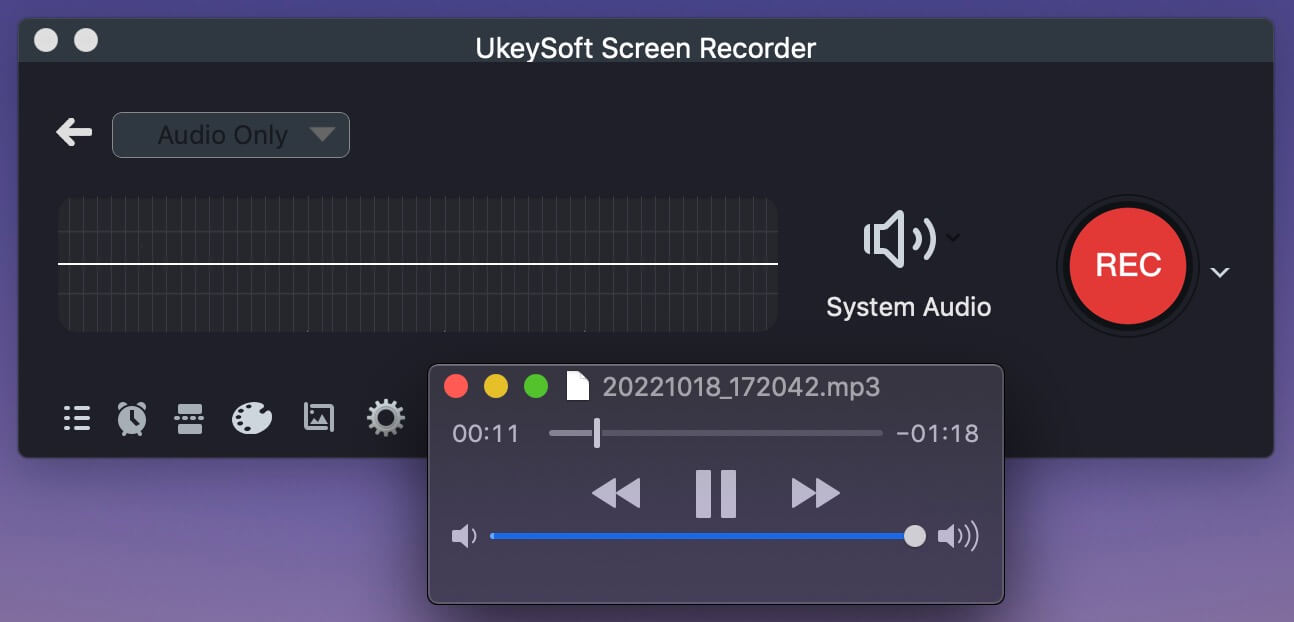
Step 1. Select Audio Recording Mode
First of all, download, install and run UkeySoft Screen Recorder on the computer. To record audio on Mac, please click "Audio Only" function on the main interface of program.
Step 2. Select Input Audio Settings
There are 4 option for adjust input sound, including "System Audio", "Micphone", "System & Mic", "None". Before recording audio, you should set the suitable input audio settings depend on your needs.
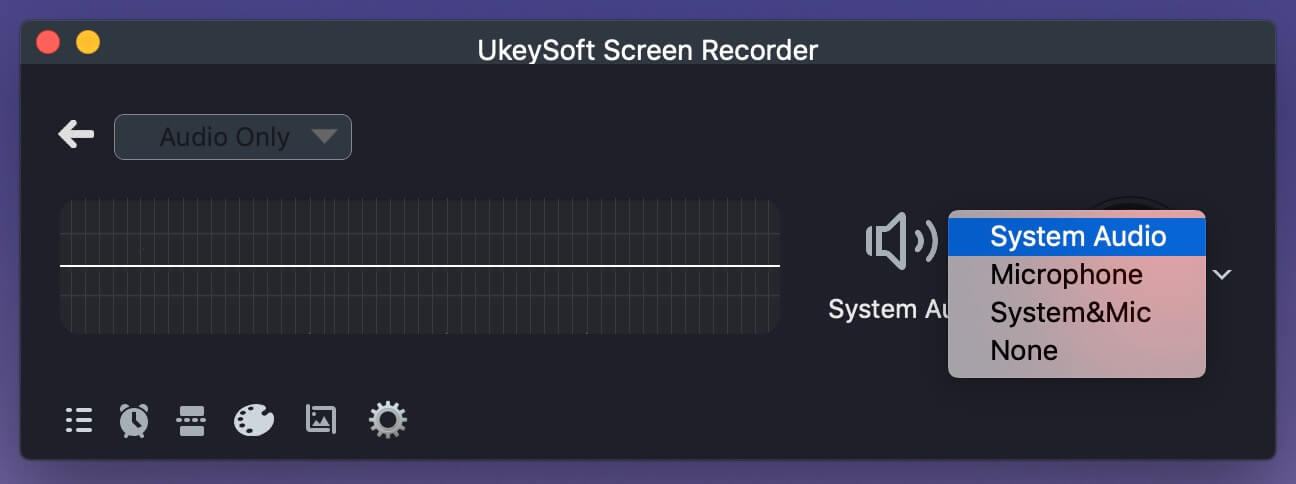
A) If you just want to record audio on Mac, please select “System Audio” only. For example, to record streaming music online, like YouTube music, iTunes music, Amazon Music, etc,.
B) If you just want to record audio with microphone, please select "Micphone" only.
C) If you want to record audio and your voice at the same time, please select "System & Micphone" option.
4) If you want to record a video without any voice, please select “None” option.
Step 3. Select Output Audio Format
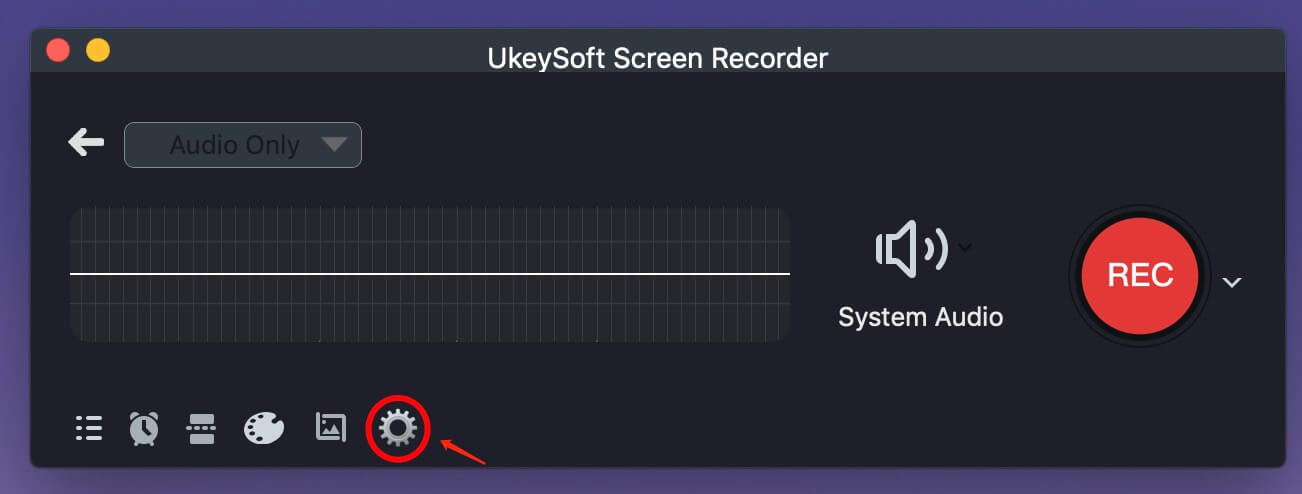
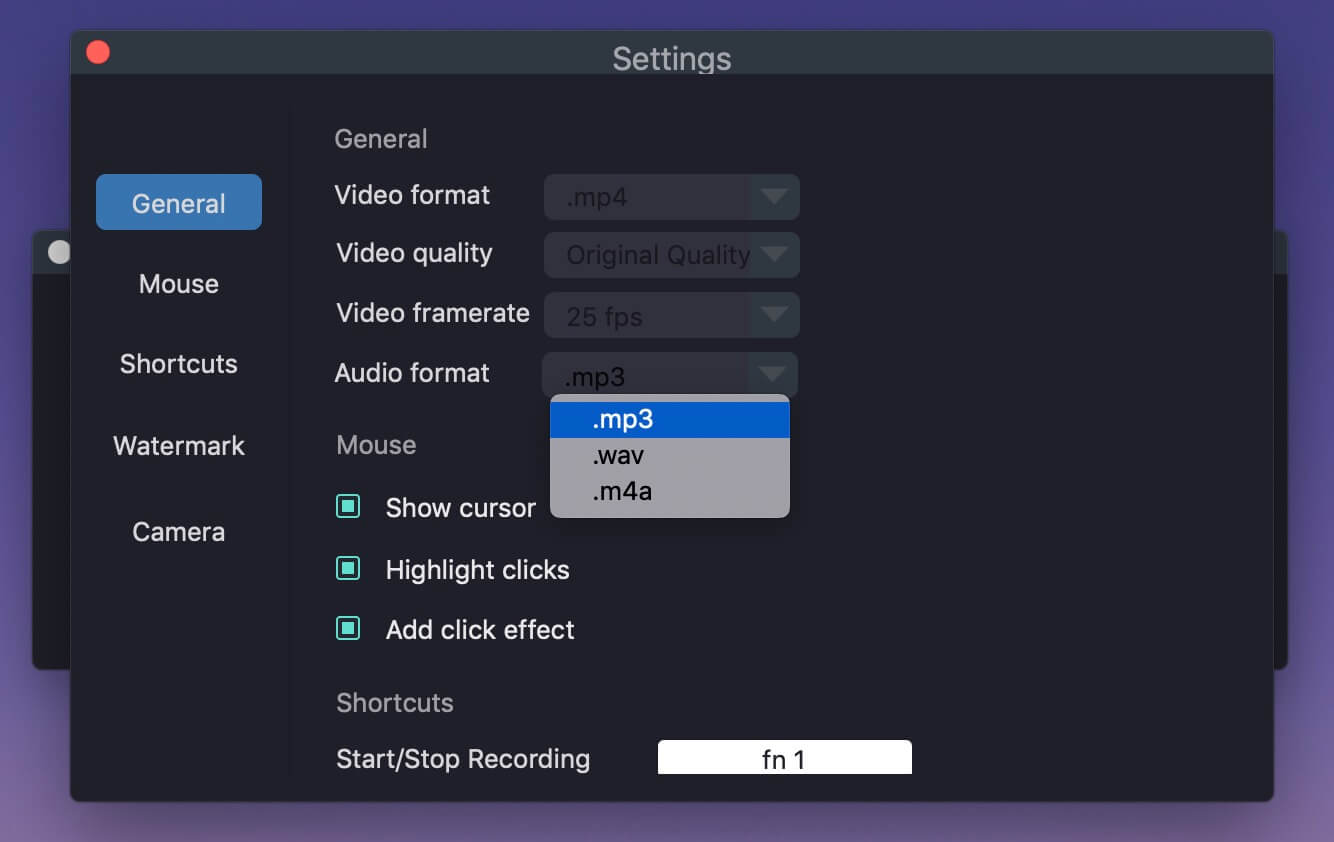
To set the output audio format, please click the "Setting" icon, the program will pop up a new window.
There are three options for selection, including MP3, WAV or M4A. Normally choose "MP3" option.
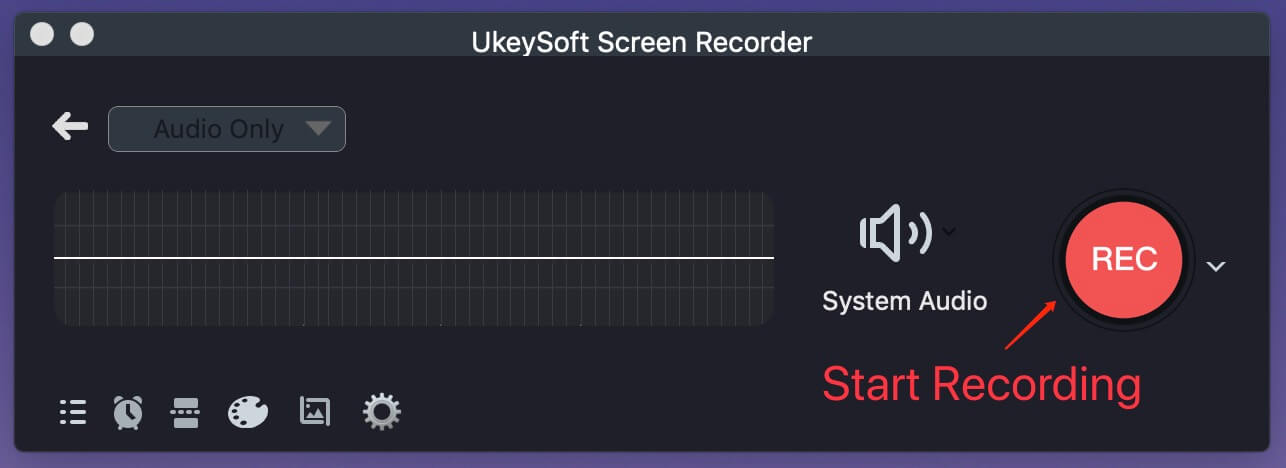
Step 4. Record Audio on Mac with High Quality
When everything is ready, click the left right "REC" button to begin recording audio with high quality.
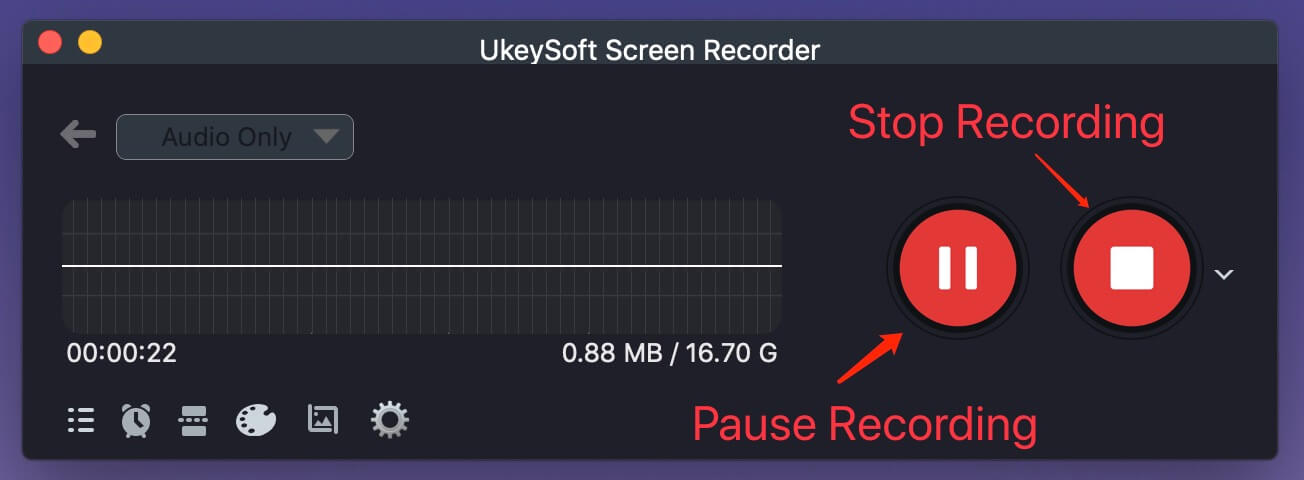
Tips: You could click the red “Pause” record button to interrupt the audio recording, or click the red “End” record button to end the recording at anytime.
Step 5. Get the Recorded Audio File
When the audio recording ends, it will be save onto the computer. Click menu bar (three horizontal) on the bottom left, it will present all recorded audio files for you.
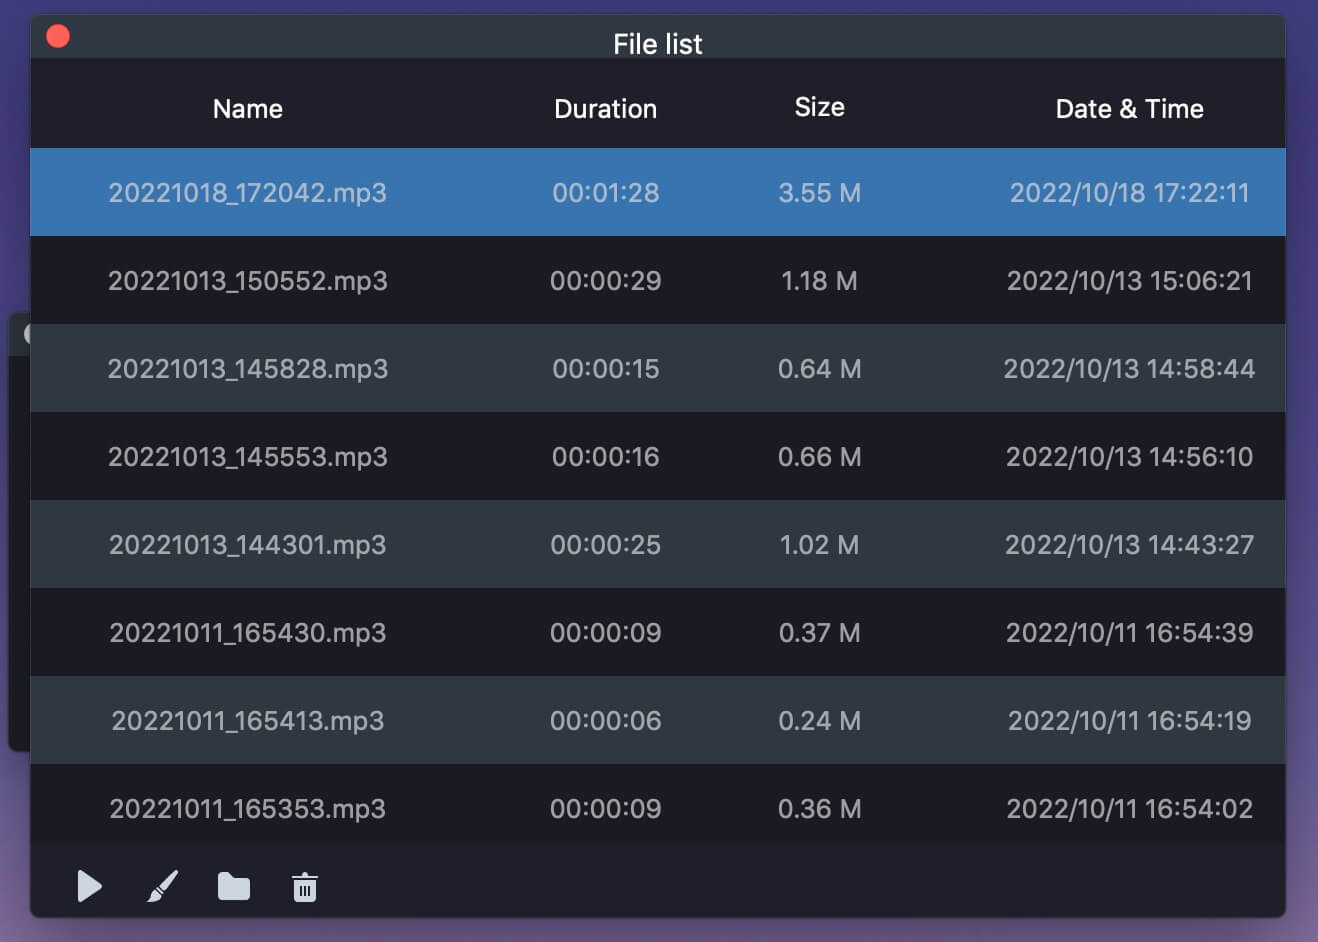
Now, you can play the recorded audio with audio player, you can also use iMovie to edit it as you like.
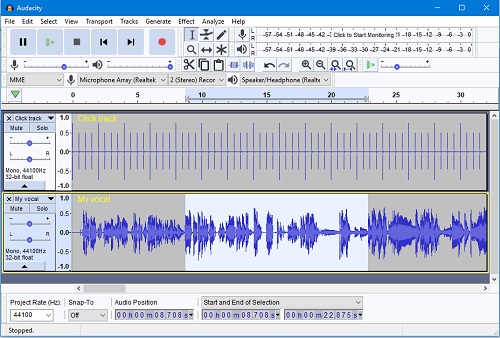
This software works on Macs, PCs, and Linux computers. It allows you to record audio and then edit it with its integrated audio editing tools. Easily save your file to different file formats and then export it. It can be used for recording and editing voice/audio recordings for podcasts, songs, external audio for a video. However, you can't record internal audio without installing another software like Soundflower.
Step 1. Download and install Audacity on your Mac computer.
Step 2. Open the software, check your microphone under Primary Sound Capture.
Step 3. Select Tracks > Add New > Stereo Track in the top dropdown.
Step 4. Click the red circle on the top left-hand side of the screen to begin the recording.
Step 5. Click the pause icon to stop recording at anytime, click the play button to playback. After that, you can also edit or export the recorded audio file.
Cons:
*Need to install plugin.
*Record audio with compress quality.
That's all. Recording audio on Mac is quire easy when you got these 4 methods we have shown you above. To sum up, the best one is get the help of UkeySoft Screen Recorder to record audio on Mac. Thanks to this practical audio recording tool, you will get recorded audio files with lossless audio quality, the whole recording process is simple and efficiently. Additionally, it could finish the recording with advanced editing functions. Why not download it to have a try and share this professional tool with your friends?

Prompt: you need to log in before you can comment.
No account yet. Please click here to register.


Enjoy safe & freely digital life.
Utility
Multimedia
Copyright © 2025 UkeySoft Software Inc. All rights reserved.


No comment yet. Say something...