 ✕
✕
✕
✕
By Li ZhangUpdated on September 09, 2025
“Hi, I want record the company business meeting on my Mac with high quality, I found many recording tools on the Internet claim that it can keep original quality but most don’t. Any reliable audio recording tools for recommendation?”
The voice file can be some fantastic background music, an interesting interview, an audiobook that can’t be downloaded, or everything you’re watching or listening on the computer. You may be need to record voice due to many different causes, for example, record a commentary for video tutorial, record an online interview/meeting on the computer. Well, follow this guide and you will quickly learn how to record voice on the computer with microphone. It's no doubt that the most effectively way is to record voice on the computer with a professional recorder tool. We're going to share the top two high-quality voice recording solutions for PC/Mac with you. The first option use only software which calls UkeySoft Screen Recorder, and the second relies on Quicktime Player.
CONTENTS
UkeySoft Screen Recorder as a top recording tool in the market, it won't let you down if you have a try. As its name, it is a practical screen recorder, capture and record anything on the screen; which is used to record screen activity, online meetings, video calls, videos, gameplay, live streams, streaming music and more. Besides, it is actually an all-in-one recorder, features with recording audio on the computer through microphone, preserve with high audio quality. What's more, the output quality is excellent and it offers output formats for users to choose, including MP3, AAC, WAV, WMA, OGG, FLAC, AC3. As a result, you will get recorded audio files for playback on any device freely. In addition, this program support for video editing, capture Snapshots, zoom in while recording, record screen with watermark.
Main Features of UkeySoft Screen Recorder
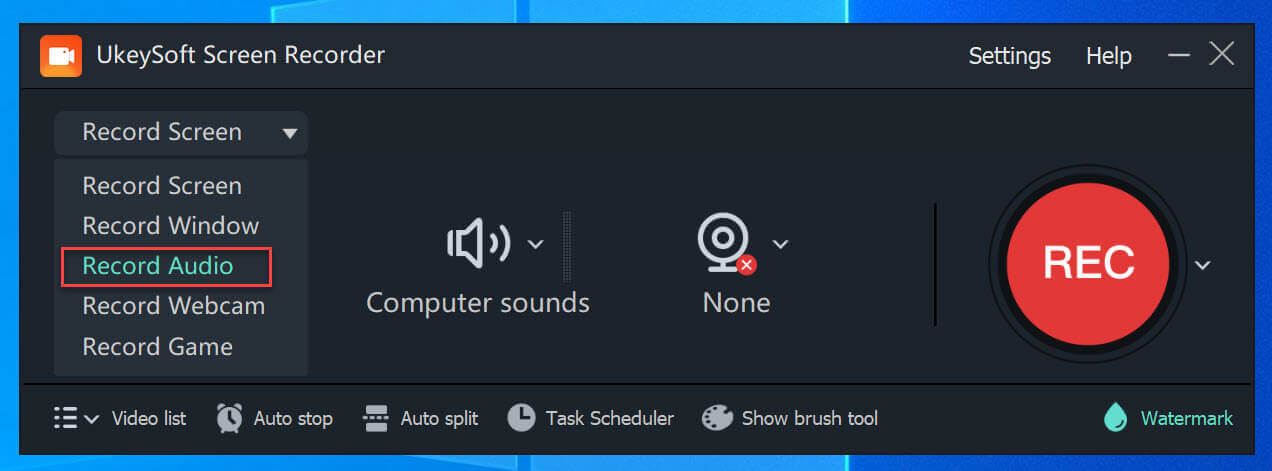
Step 1. Select Record Audio
To record voice on Windows, click the "Record Audio" feature on the main interface.
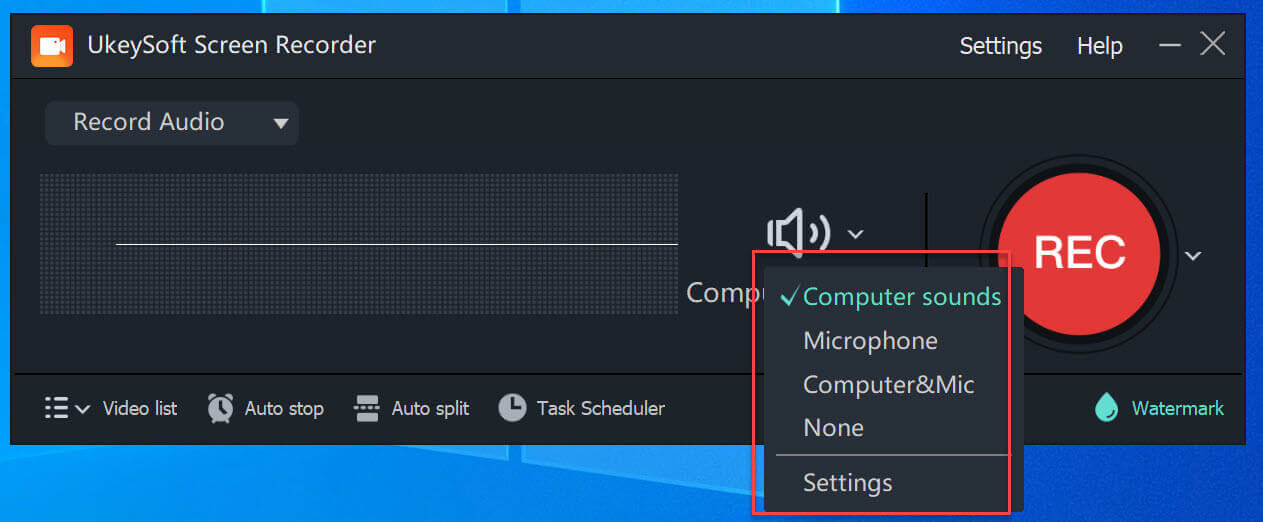
Step 2. Select Input Audio Settings
You have four options to modify input sound: "Computer Sound," "Microphone," "Computer & Mic," and "None." Choose "Microphone" to record voice.
Step 3. Select Output Audio Format
To configure the output audio format, select the "Settings" icon, triggering the appearance of a window. In this window, you can designate your desired audio format (MP3, AAC, WAV, WMA, OGG, FLAC, AC3).

Step 4. Start Recording Voice on PC
Start speaking into your microphone, and simultaneously press the "REC" button to initiate the recording of music in high audio quality.

You have the option to pause the voice recording by clicking the red "Pause" button or terminate the recording at any moment by selecting the red "End" button.
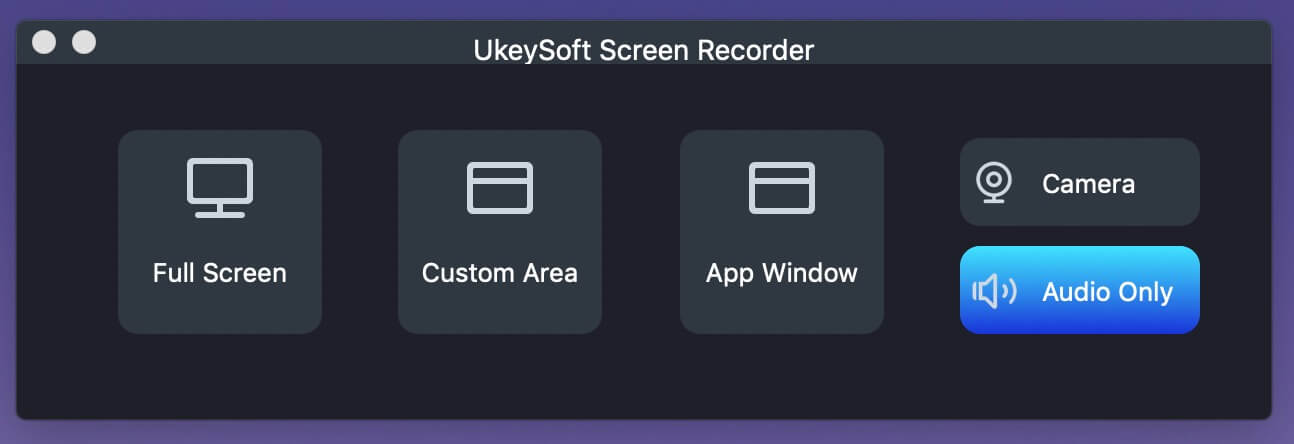
Step 1. Select Audio Recording Mode
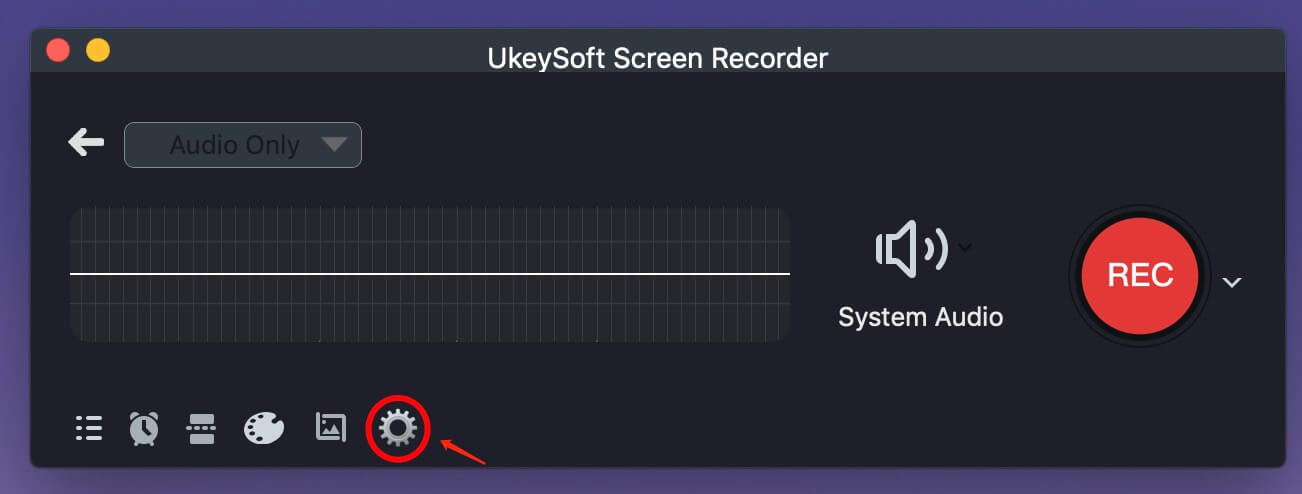
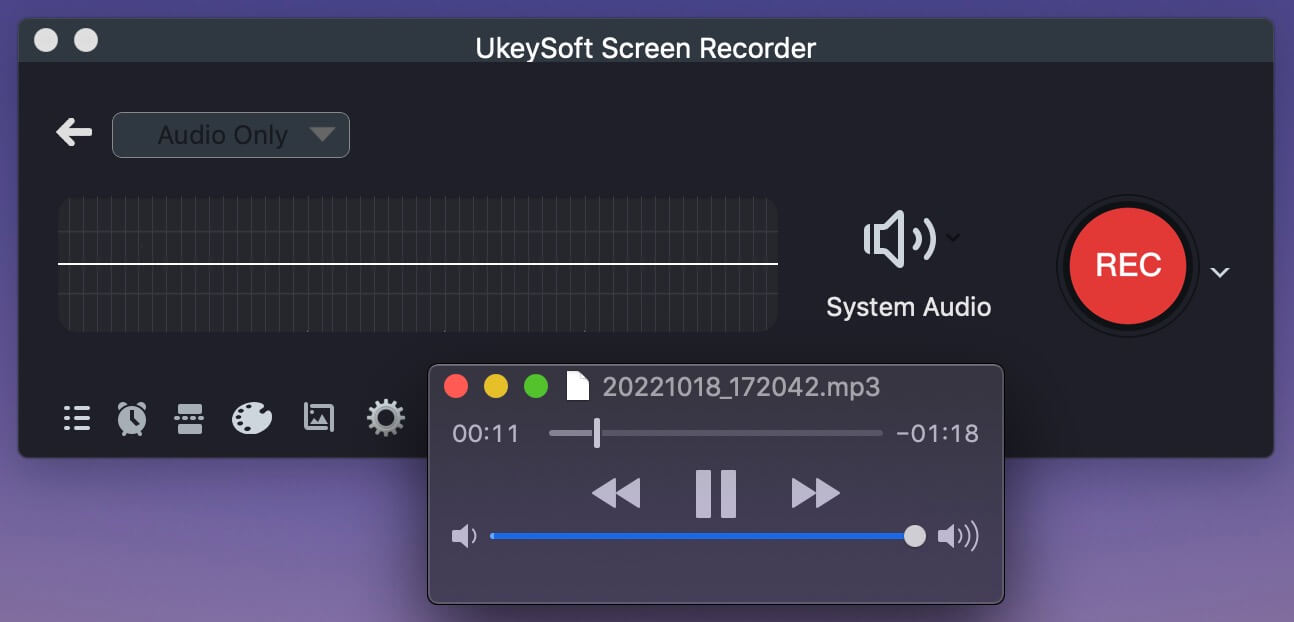
To begin with, download, install and run UkeySoft Screen Recorder on the computer. To record voice on the computer, please click "Audio Only" feature on the main interface of program.
Step 2. Select Input Audio Settings
There are 4 option for adjust input sound, including "System Audio", "Micphone", "System & Mic", "None". Before recording audio, you should set the suitable input audio settings depend on your needs.
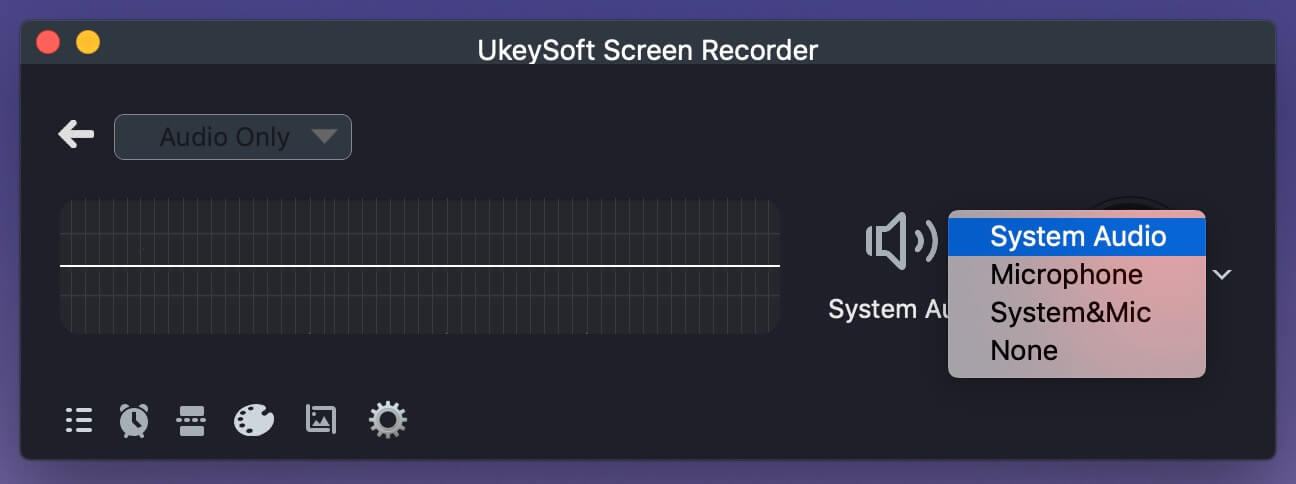
A) If you just want to record your voice with microphone, please select "Micphone" only.
B) If you want to record computer sound and your voice at the same time, please select "System & Micphone" option.
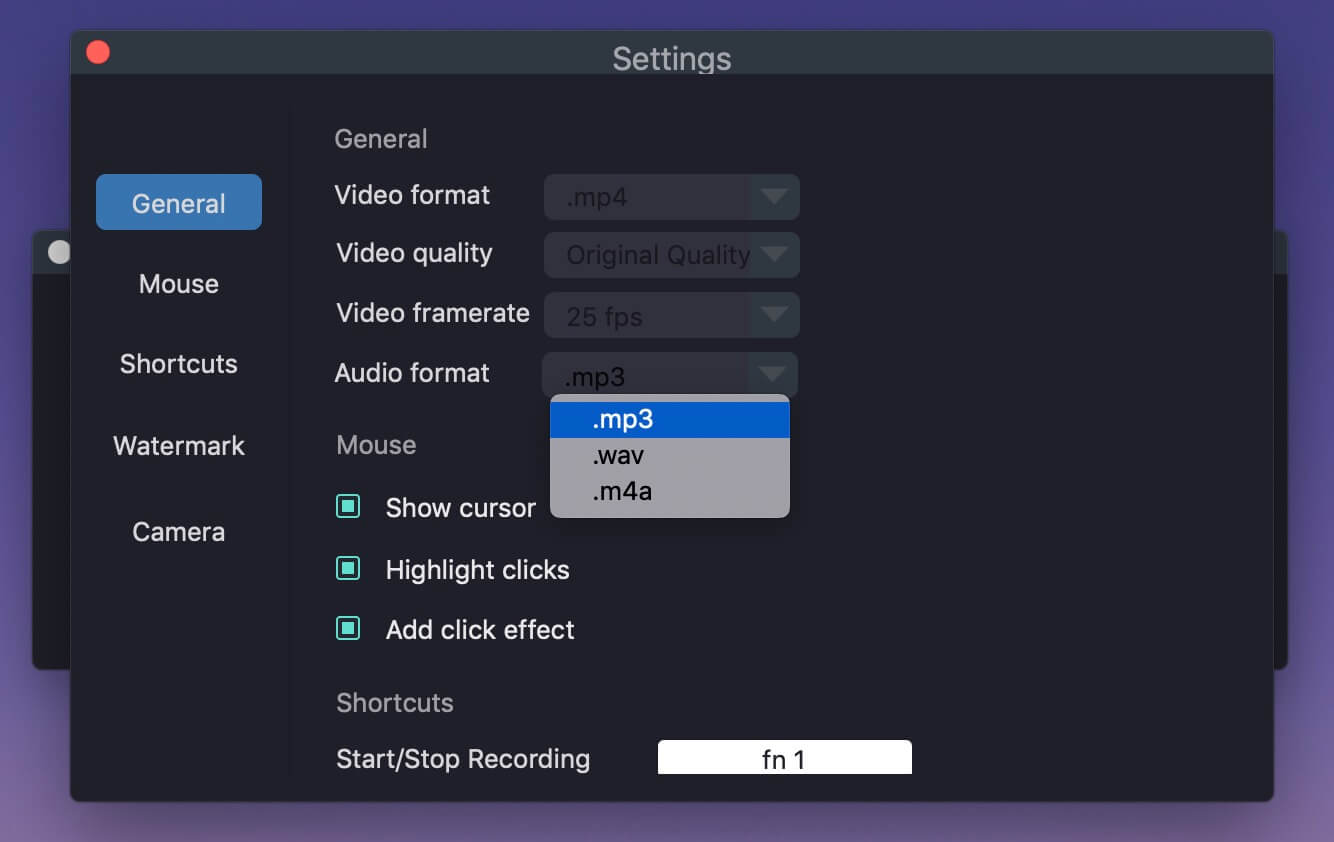
Step 3. Select Output Audio Format
To set the output audio format, please click the "Setting" icon, the program will pop up a new window.
There are three options for selection, including MP3, WAV or M4A. Normally choose "MP3" option.
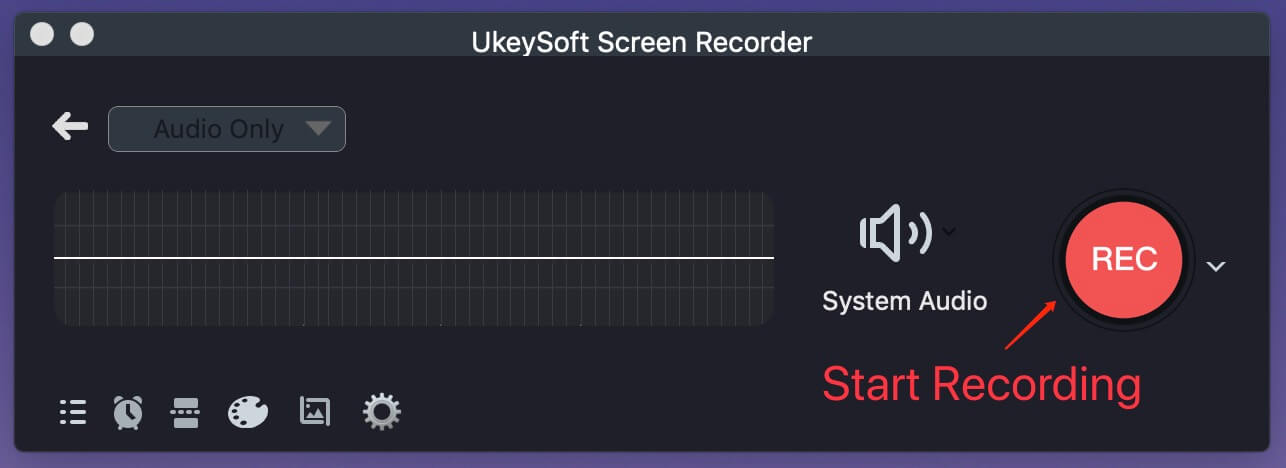
Step 4. Record Voice on the Computer
For example, to record music with UkeySoft program, just play a song on the computer with any music player, at the same time click the left right "REC" button to begin recording music with high audio quality.
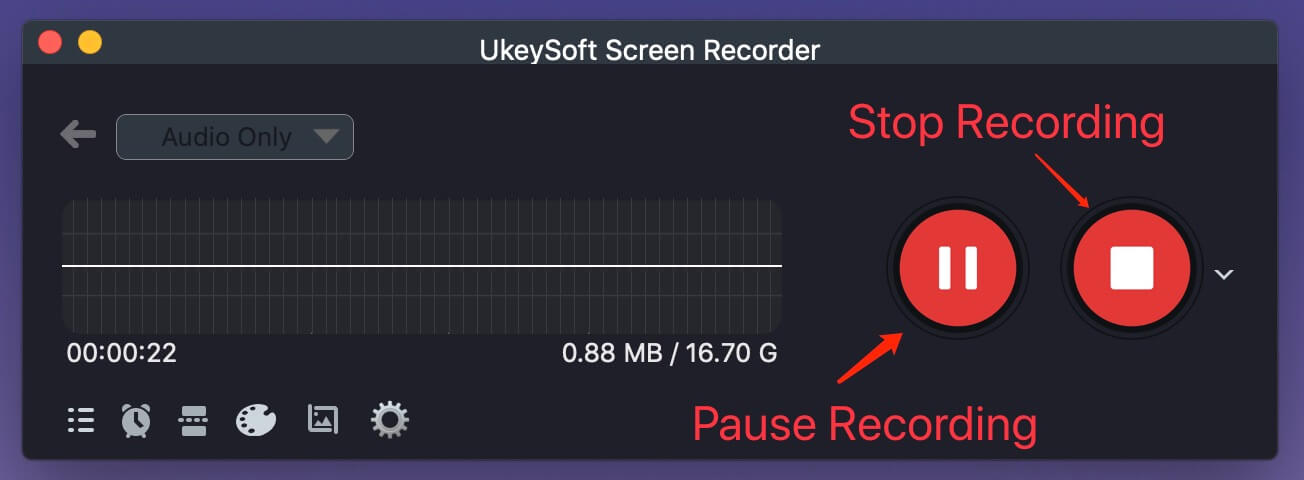
Tips: You could click the red “Pause” record button to interrupt the audio recording, or click the red “End” record button to end the recording at anytime.
Step 5. View and Play the Recorded Audio File
When the audio recording ends, it will be save onto the computer. Click menu bar (three horizontal) on the bottom left, it will present all recorded audio files for you.
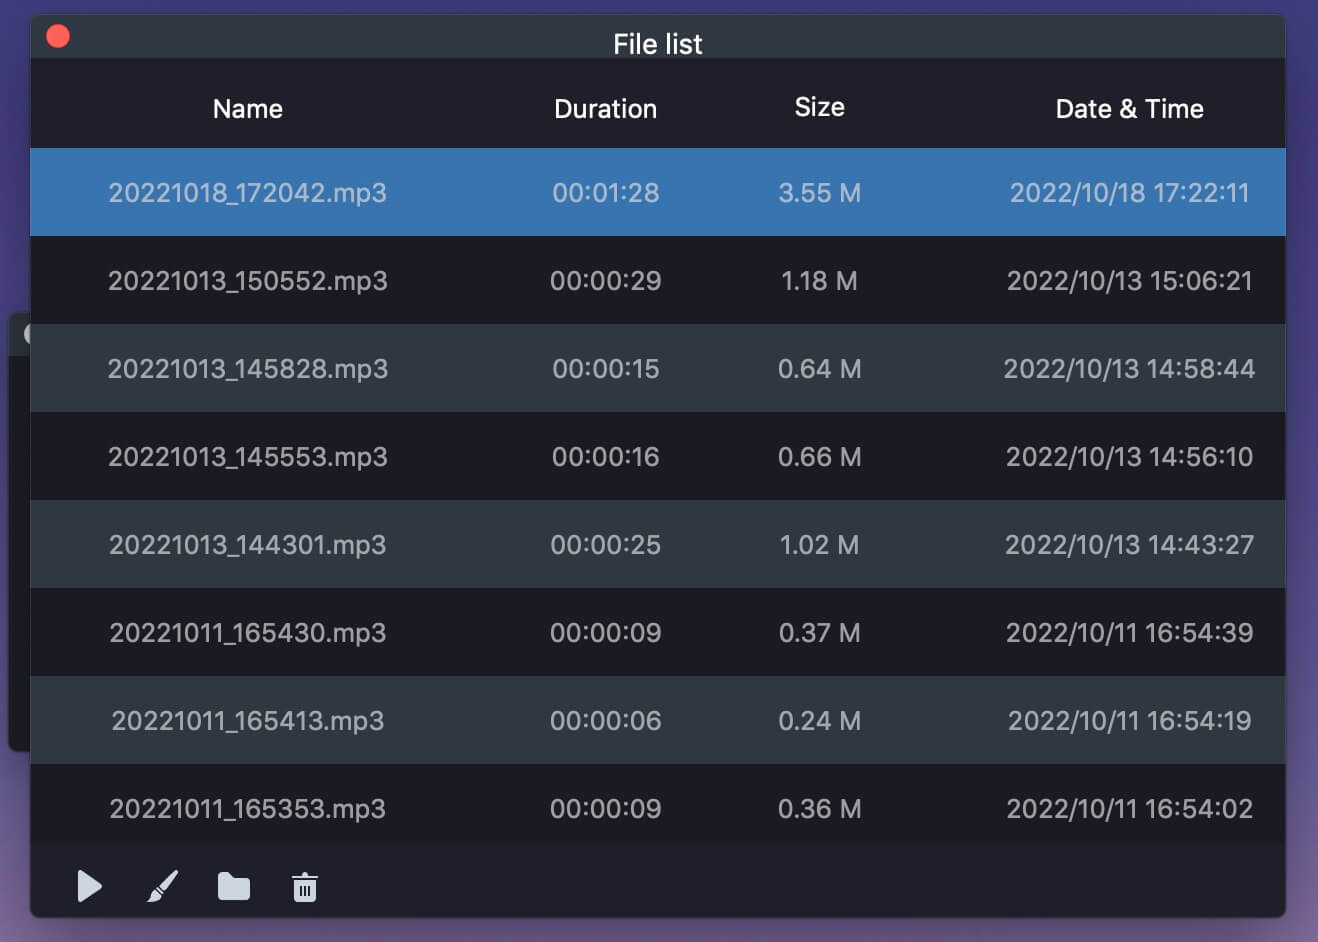
Now, you can play the recorded audio with audio player, you can also use iMovie to edit it as you like.
Here is another way to record voice on the computer via Quicktime Player on Mac. Just be similar with audio recorder tools, QuickTime is a built-in program for Mac. It is a multimedia technology handling not only audio but also video, music and more. With the help of Quicktime Player, you can quickly record voice through microphone on Mac. Follow the easy steps to do the recording.
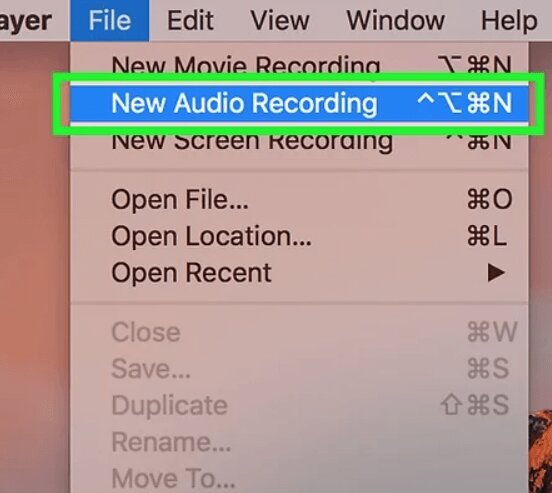
Step 1. Open "QuickTime Player" on Mac in "Applications" folder.
Step 2. Click "File" then "New Audio Recording", then click the red record button to begin recording voice on your computer.
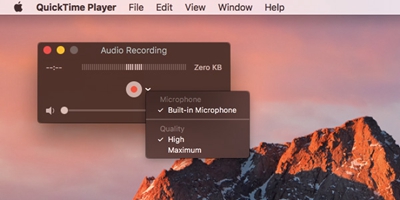
Step 3. Click the black stop recording button to stop recording at anytime.
Step 4. Go to "File" then "Save As" to save the recorded file to the desired location.
Tips: You can drop down the down arrow beside the recording button on the center. Set the audio input (microphone) and quality settings. Drag the slider to adjust the volume on the bottom.
Pros
Cons
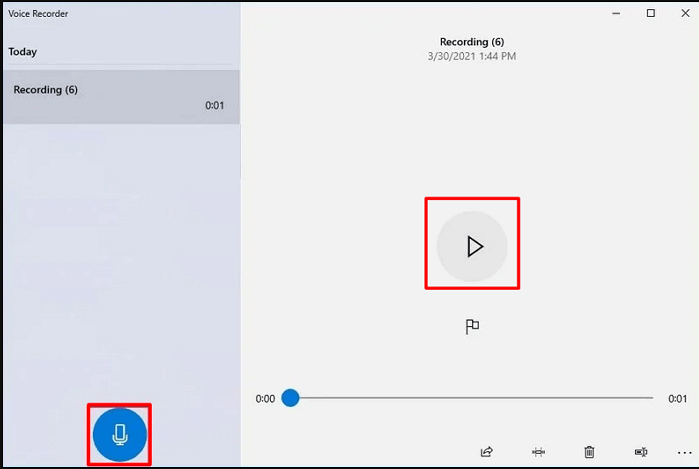
Voice Recorder, formerly known as Sound Recorders, is an integrated voice recording application included in Windows. It provides straightforward functionality and basic recording and editing features. This tool allows you to easily capture your voice or other audio inputs and save the recordings in MP3 format. Whether you're recording a lecture, a meeting, or a musical performance, Voice Recorder is a reliable choice for your needs.
Pros
Cons
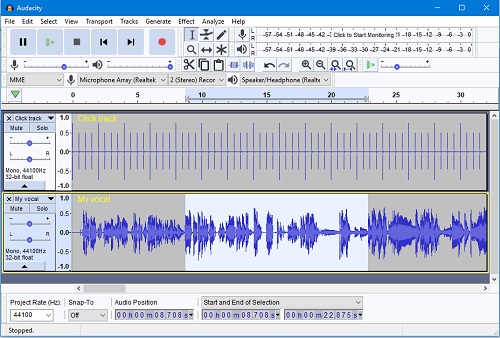
Audacity is a powerful and free audio editing tool to enhance your audio skills. It allows you to capture your voice or any sound with impeccable clarity. Employ its extensive editing tools to refine and perfect your audio tracks. If you wish to add a creative touch, Audacity provides a broad selection of effects, ranging from subtle to extreme.
Pros
Cons
We list four practical ways to record voice on the computer and I believe you may have your own decision. Record audio with QuickTime Player can't output audio file with original audio quality and various output formats. For Voice Recorder and Audacity, they both have certain limitations. To sum up, UkeySoft Screen Recorder is your best choice to complete the recording job no matter under any cases.

Prompt: you need to log in before you can comment.
No account yet. Please click here to register.
Porducts
Solution
Copyright © 2026 UkeySoft Software Inc. All rights reserved.


No comment yet. Say something...