 ✕
✕
✕
✕
By Justin SabrinaUpdated on December 17, 2022
CONTENTS
Is your Apple Music playlist gone for some reason?
The Apple music you downloaded disappeared from your iPhone, why?
Is your Apple Music Library missing? Apple Music is an excellent streaming service that allows users to save and download music and videos to their personal library for $9.99 per month subscription. With Apple Music subscription, you have unlimited access to millions of songs and entire music libraries - no ads at all. Apple Music has always been sought after by users because of its excellent Internet radio station Beats 1, which broadcasts more than 100 countries 24 hours a day. If you have enough space on Windows, Mac, iPhone, iPod, Apple TV, Android phone, you can download these Apple Music files as needed to listen offline. But don't assume that you have downloaded these music files, so you have them all. When you cancel your Apple Music subscription, you won't be able to open the downloaded Apple Music songs and playlists, and all of Apple songs you downloaded will disappear.
We know that Apple Music has a FairPlay DRM limit. FairPlay is a digital rights management (DRM) technology from Apple Inc. based on technology created by Veridisc. FairPlay is built into QuickTime multimedia software for iPhone, iPod, iPad, Apple TV, iTunes, iTunes Store and App Store.
Because of this, all of Apple Music's content can only be played on certain devices via iTunes or the Apple Music app. Even if you have successfully downloaded your favorite Apple music tracks, you can't copy or transfer them to other devices for playback, including mobile phones, MP3 player, game or TV console.
Here you can find some tips for backing up your Apple Music files to a PC. We allow you to back up Apple music songs to your computer before the subscription expires, so that you can keep Apple Music songs & playlists permanently.
If you are an Apple Music subscriber, you can always back up your music library by launching the iCloud Music Library, which gives you access to your entire iTunes library and any music you add from the Apple Music directory on all your devices. One day your Apple music song disappears and you can restore it from here.
On your iPhone, iPad, or iPod touch:
Step 1. Go to Settings > Music, and tap iCloud Music Library to turn it on. And it make take some time for your library to repopulate in the Music app.
Step 2. If you already have music on your iOS device, you'll be asked if you want to keep the music that's on your device.
Note:
If you choose Keep Music, the music from your device adds to your iCloud Music Library.
If you choose Delete & Replace, the music on your device is replaced with the content of your iCloud Music Library.
On your Mac or PC:
Step 1. If you are a Mac user, you should choose iTunes > Preferences from the menu bar at the top of your computer screen; If you are a Windows PC user, you should choose Edit > Preferences from the menu bar at the top of the iTunes window.
Step 2. On the General tab, select iCloud Music Library to turn it on.
Note: You won’t see an option to turn on iCloud Music Library until you sign up for Apple Music or iTunes Match.
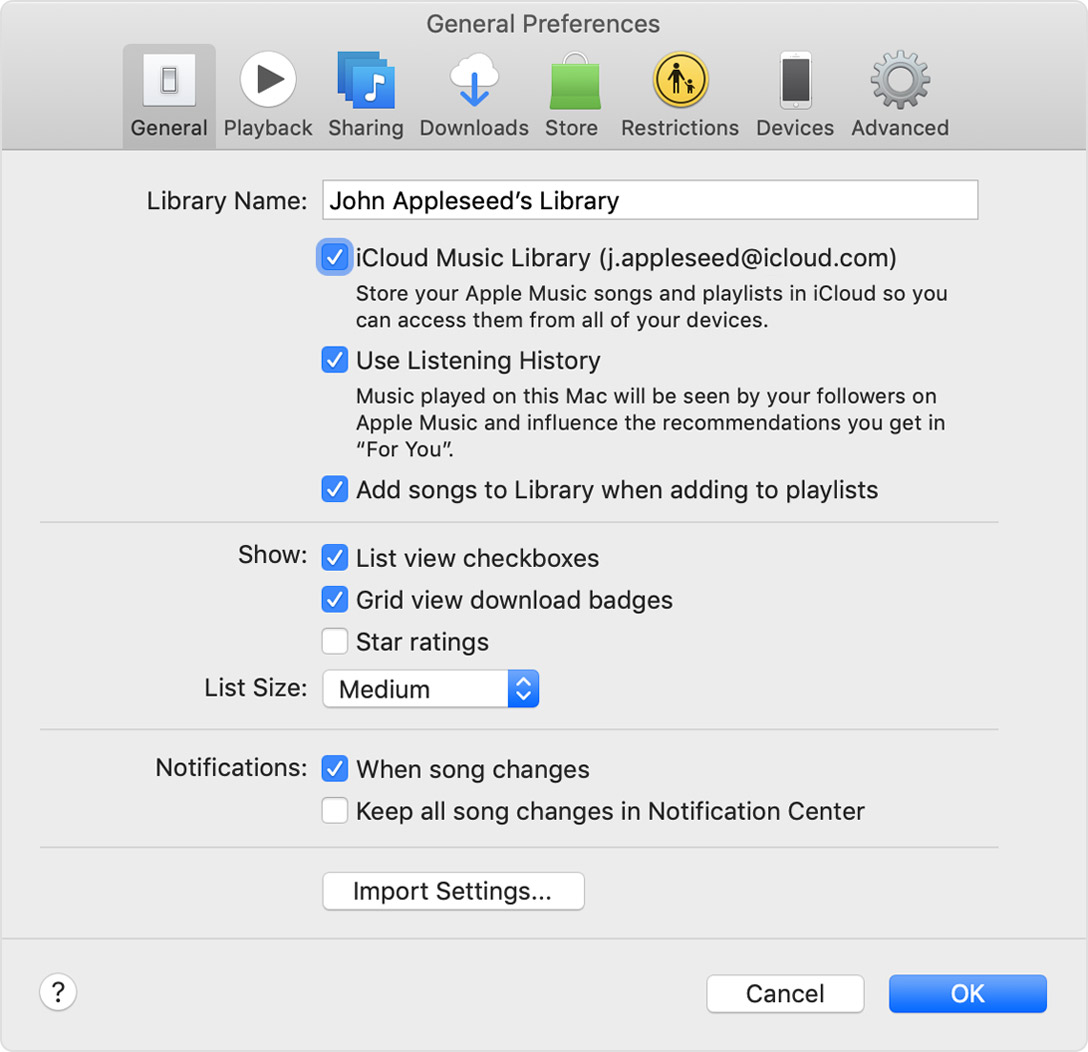
Step 3. Click “OK” and it may take some time for your library to show up in iTunes again.
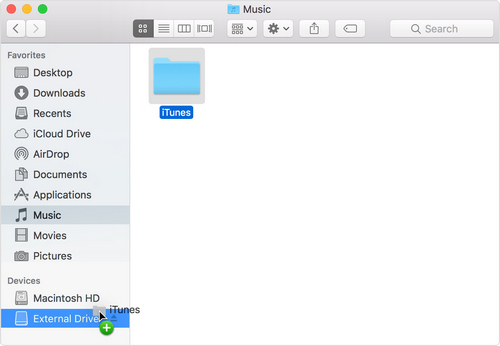
Another alternative to backing up Apple music is to move the iTunes library to an external hard drive. Here's how to get started:
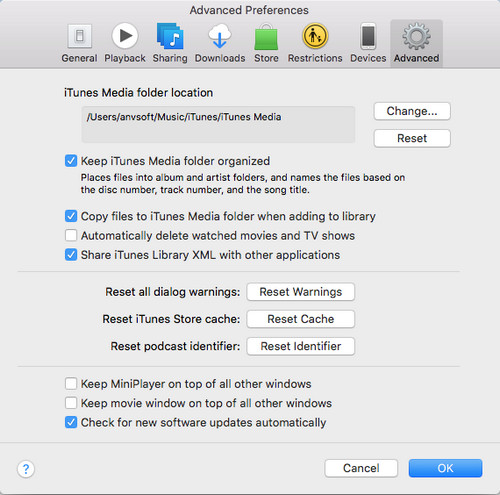
Step 1. Launch iTunes on your PC or Mac and click iTunes > Preferences > Advanced tab to find the iTunes Media folder.
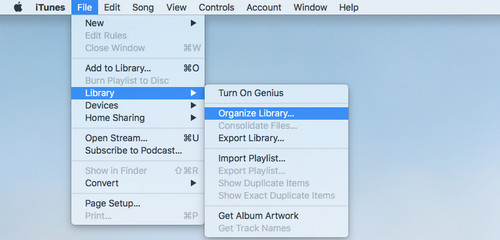
Step 2. Click iTunes > Library > Organize Library to integrate the iTunes library.
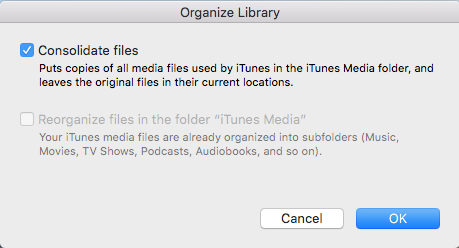
Step 3. Check "Consolidate files" in the next window and click "OK".
Step 4. Exit iTunes and find the iTunes Music folder, then drag the iTunes Music folder to your external hard drive.
Note:
If prompted, click Verify to grant permission to make a copy of the iTunes folder. Then enter the administrator password and click OK.
If your music folder is huge enough, you may have to wait a long time.
The ultimate choice for backing up Apple music is UkeySoft Apple Music Converter, a professional DRM remover and a great Apple music backup tool. With the help of UkeySoft Apple Music Converter, you can really keep the files downloaded from Apple Music before returning to the free trial. Because it is capable of removing DRM protection from Apple Music content while converting Apple music into unprotected audio files including, MP3, AAC, AC3, AIFF, AU, FLAC, M4A, M4R, and MKA, with ID tags preserved. Plus, you don't have to worry about the quality of the audio, it guarantees 100% output with high fidelity audio quality, and you can batch convert all Apple music playlists with up to 16x conversion speed. In this case, you can keep your backups and play Apple Music on an unofficial media player. Now, keep your reading mode ON and learn how to backup Apple Music before songs disappeared.
Let's see how to use UkeySoft Apple Music Converter to back up your Apple Music songs.
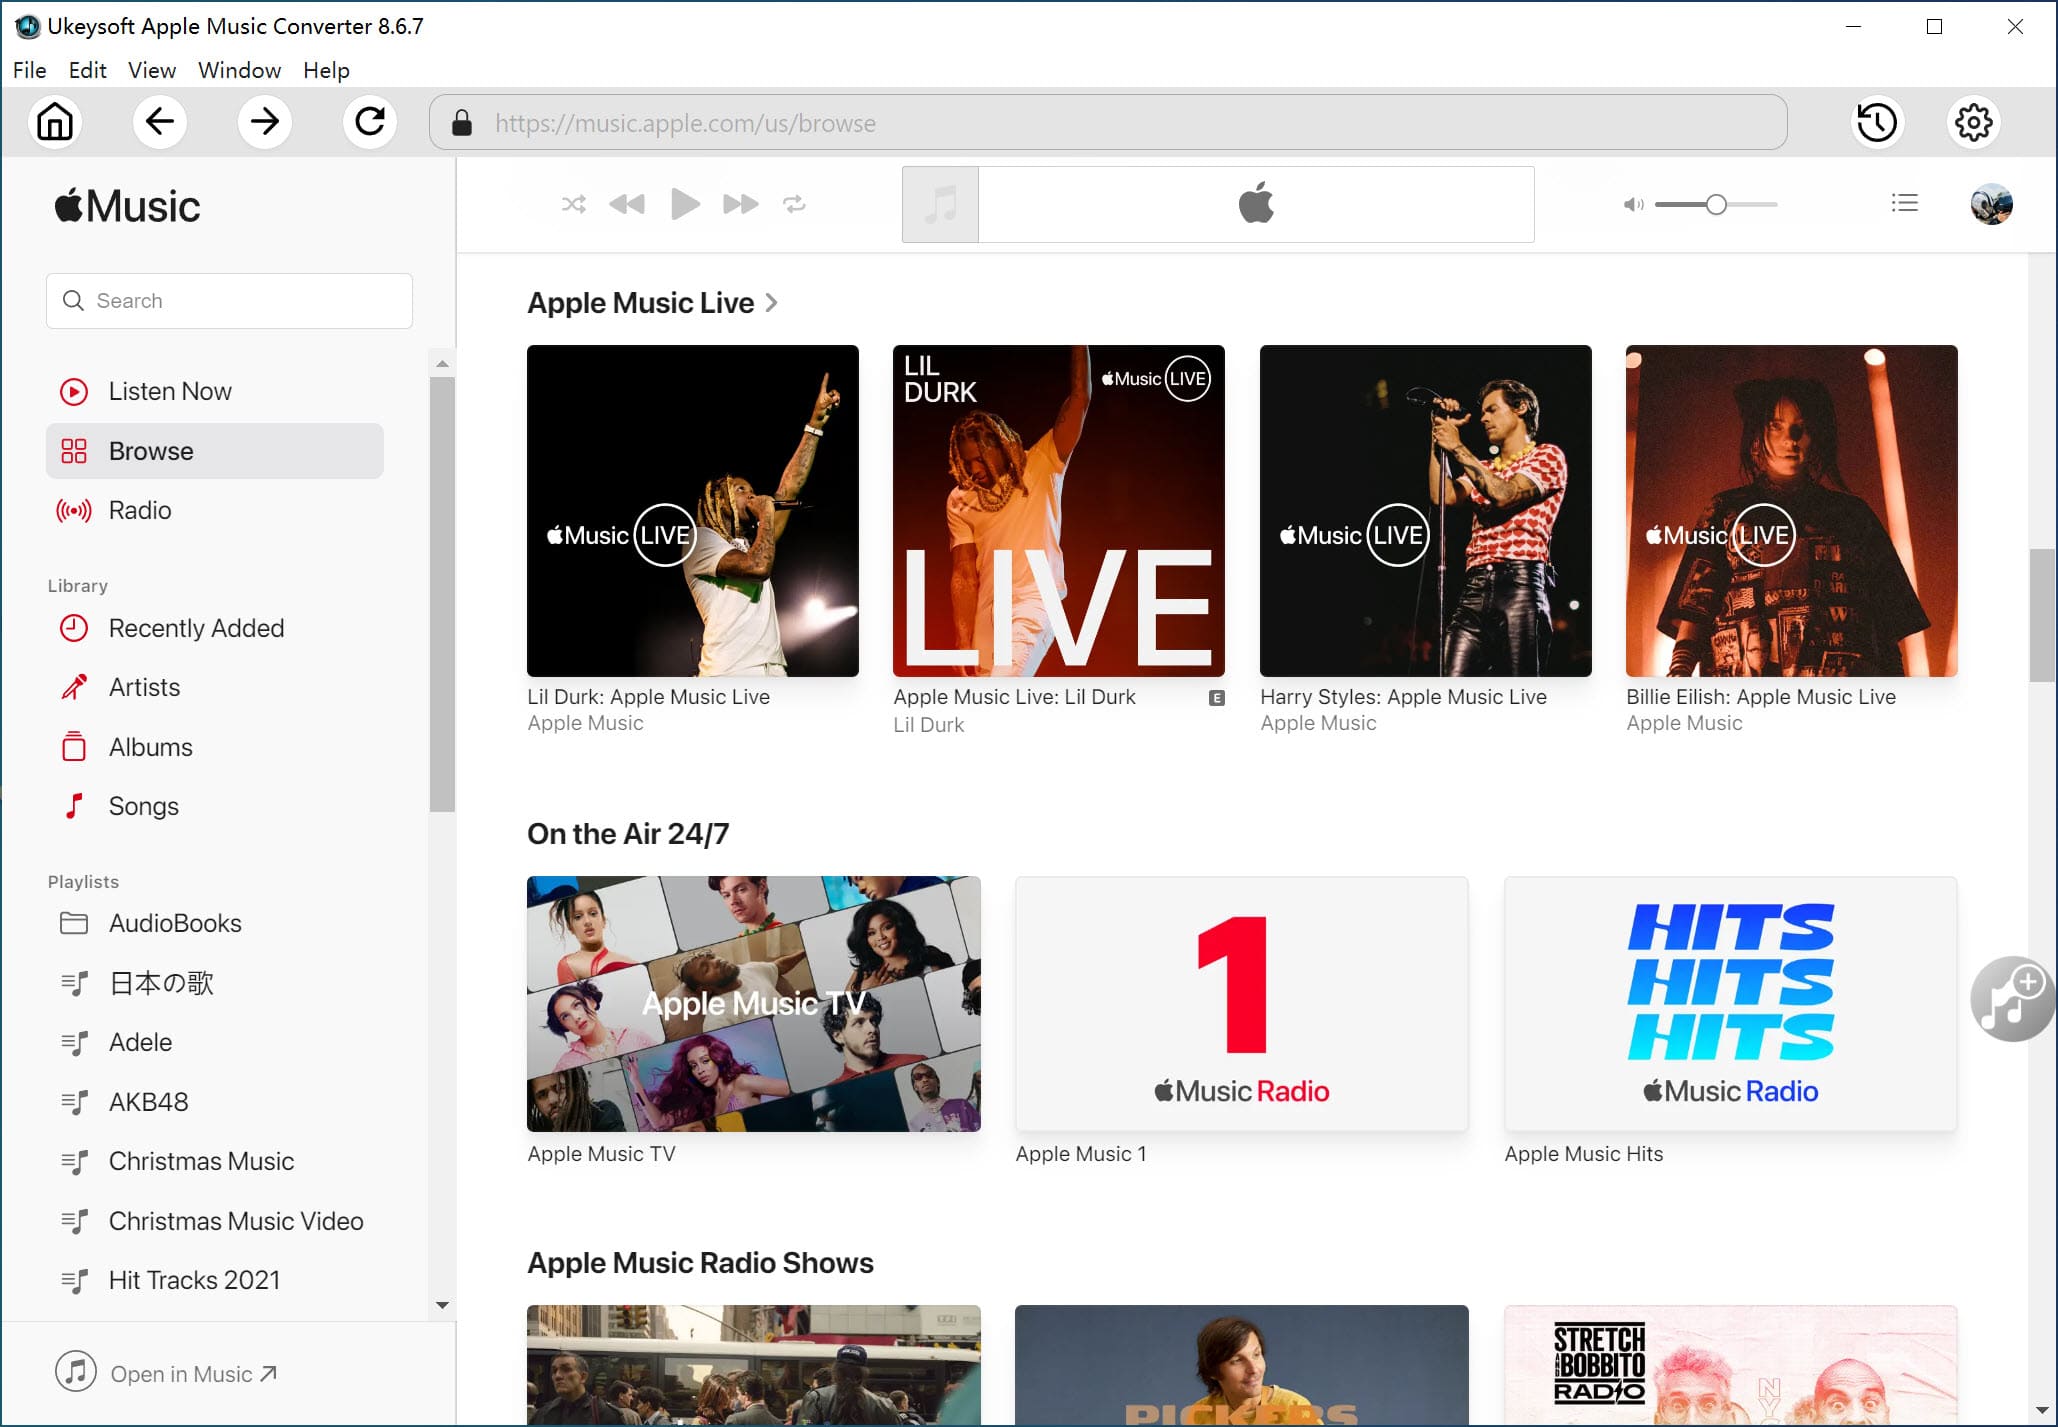
Step 1. Launch UkeySoft Apple Music Converter
After the installation is complete, launch UkeySoft Apple Music Converter on your computer. Then you will notice that iTunes will also start automatically.
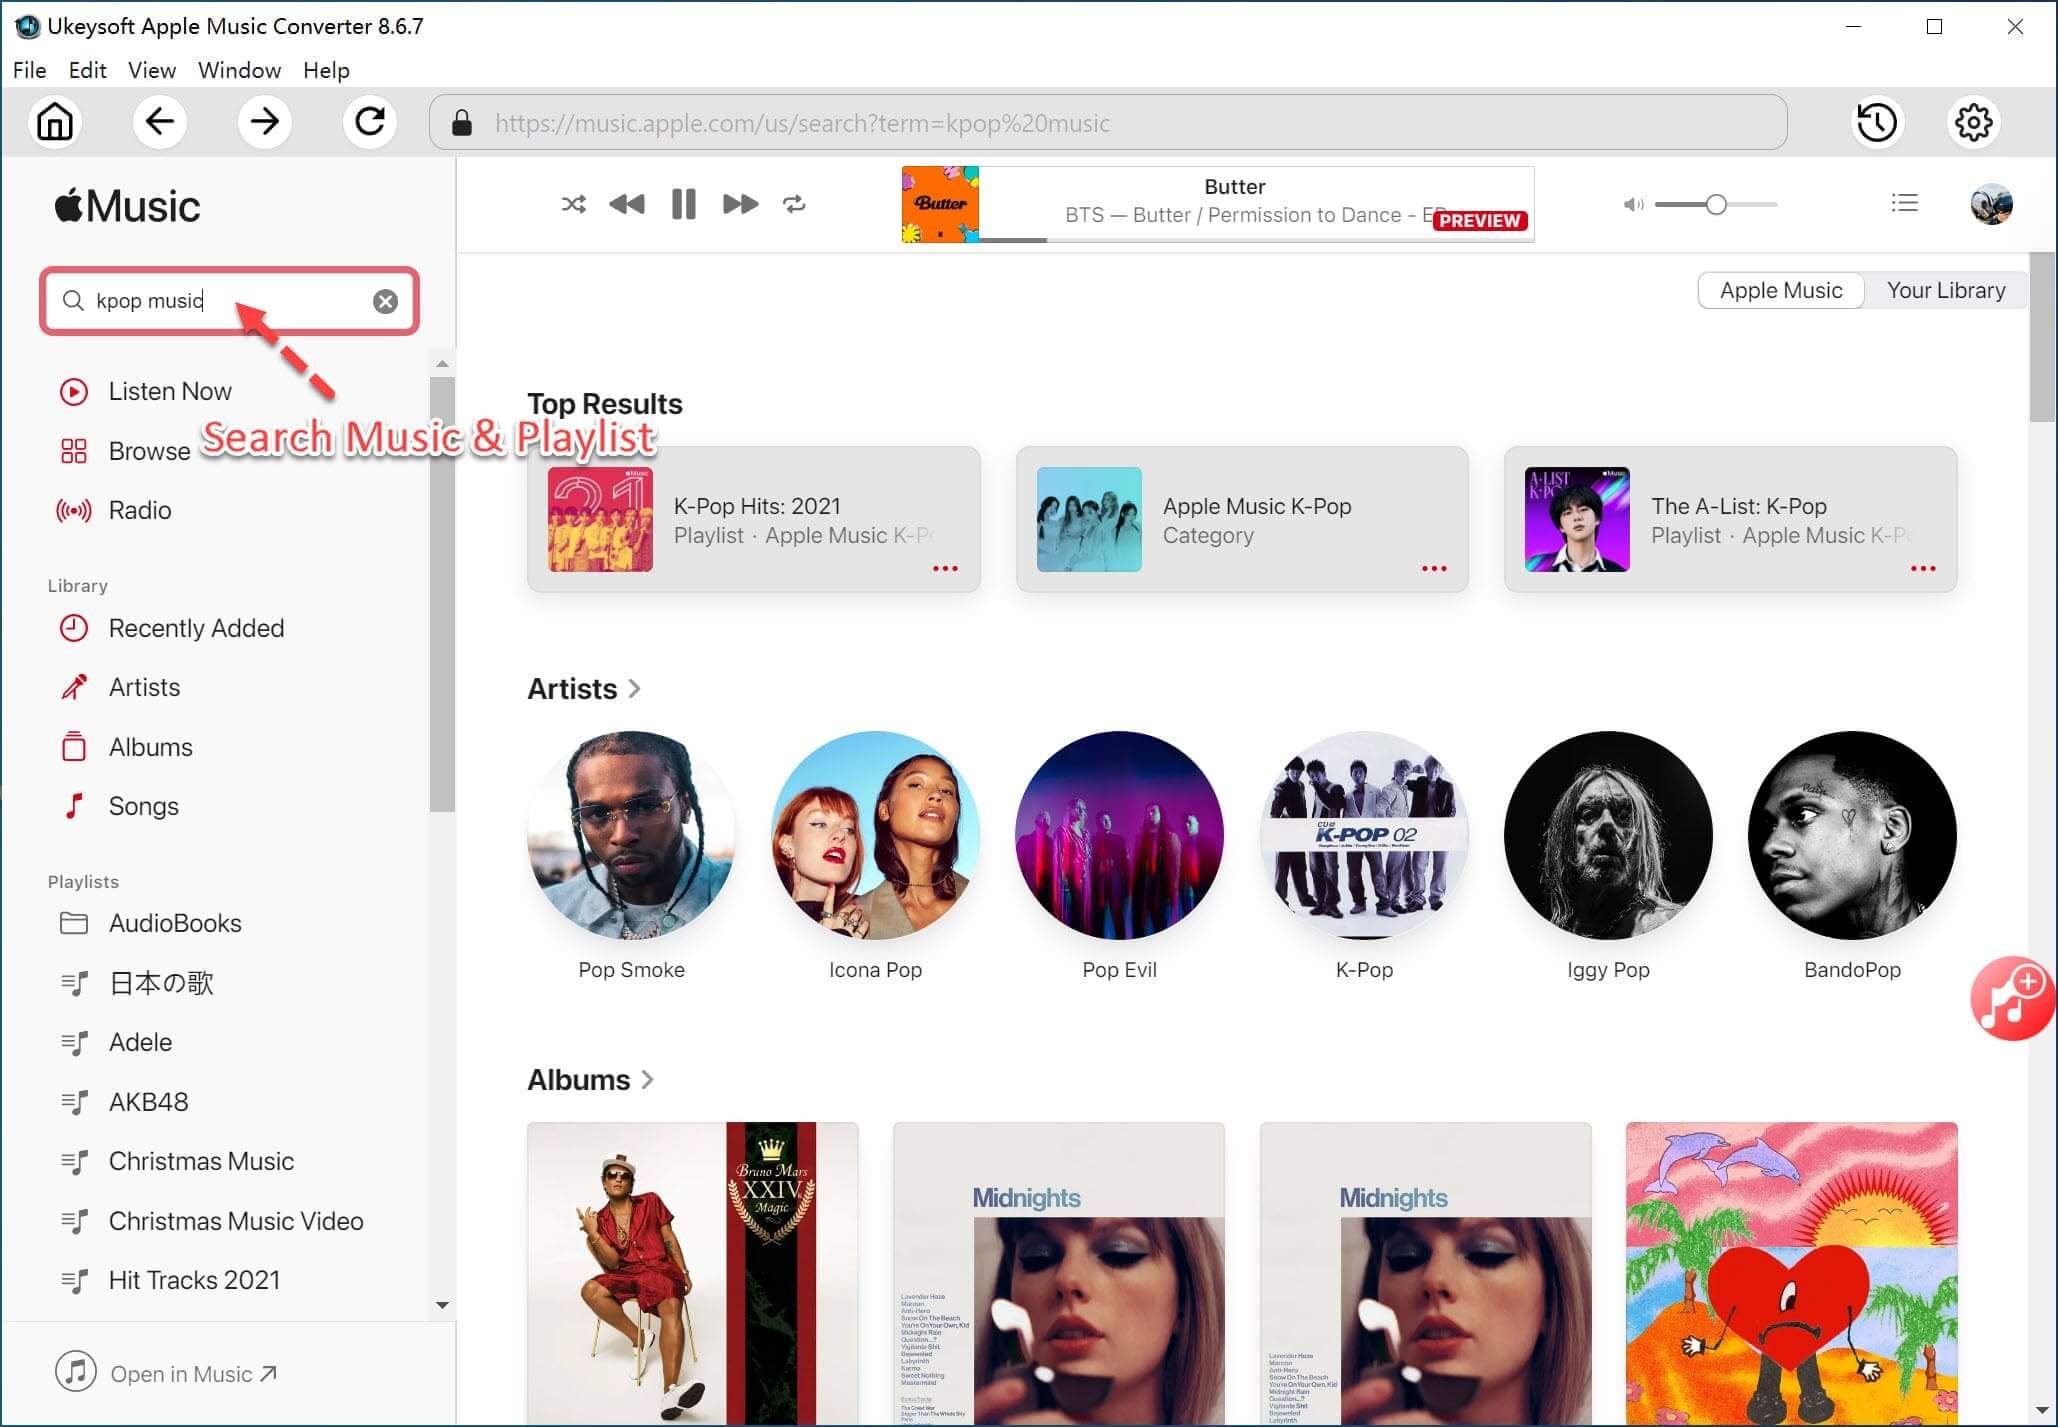
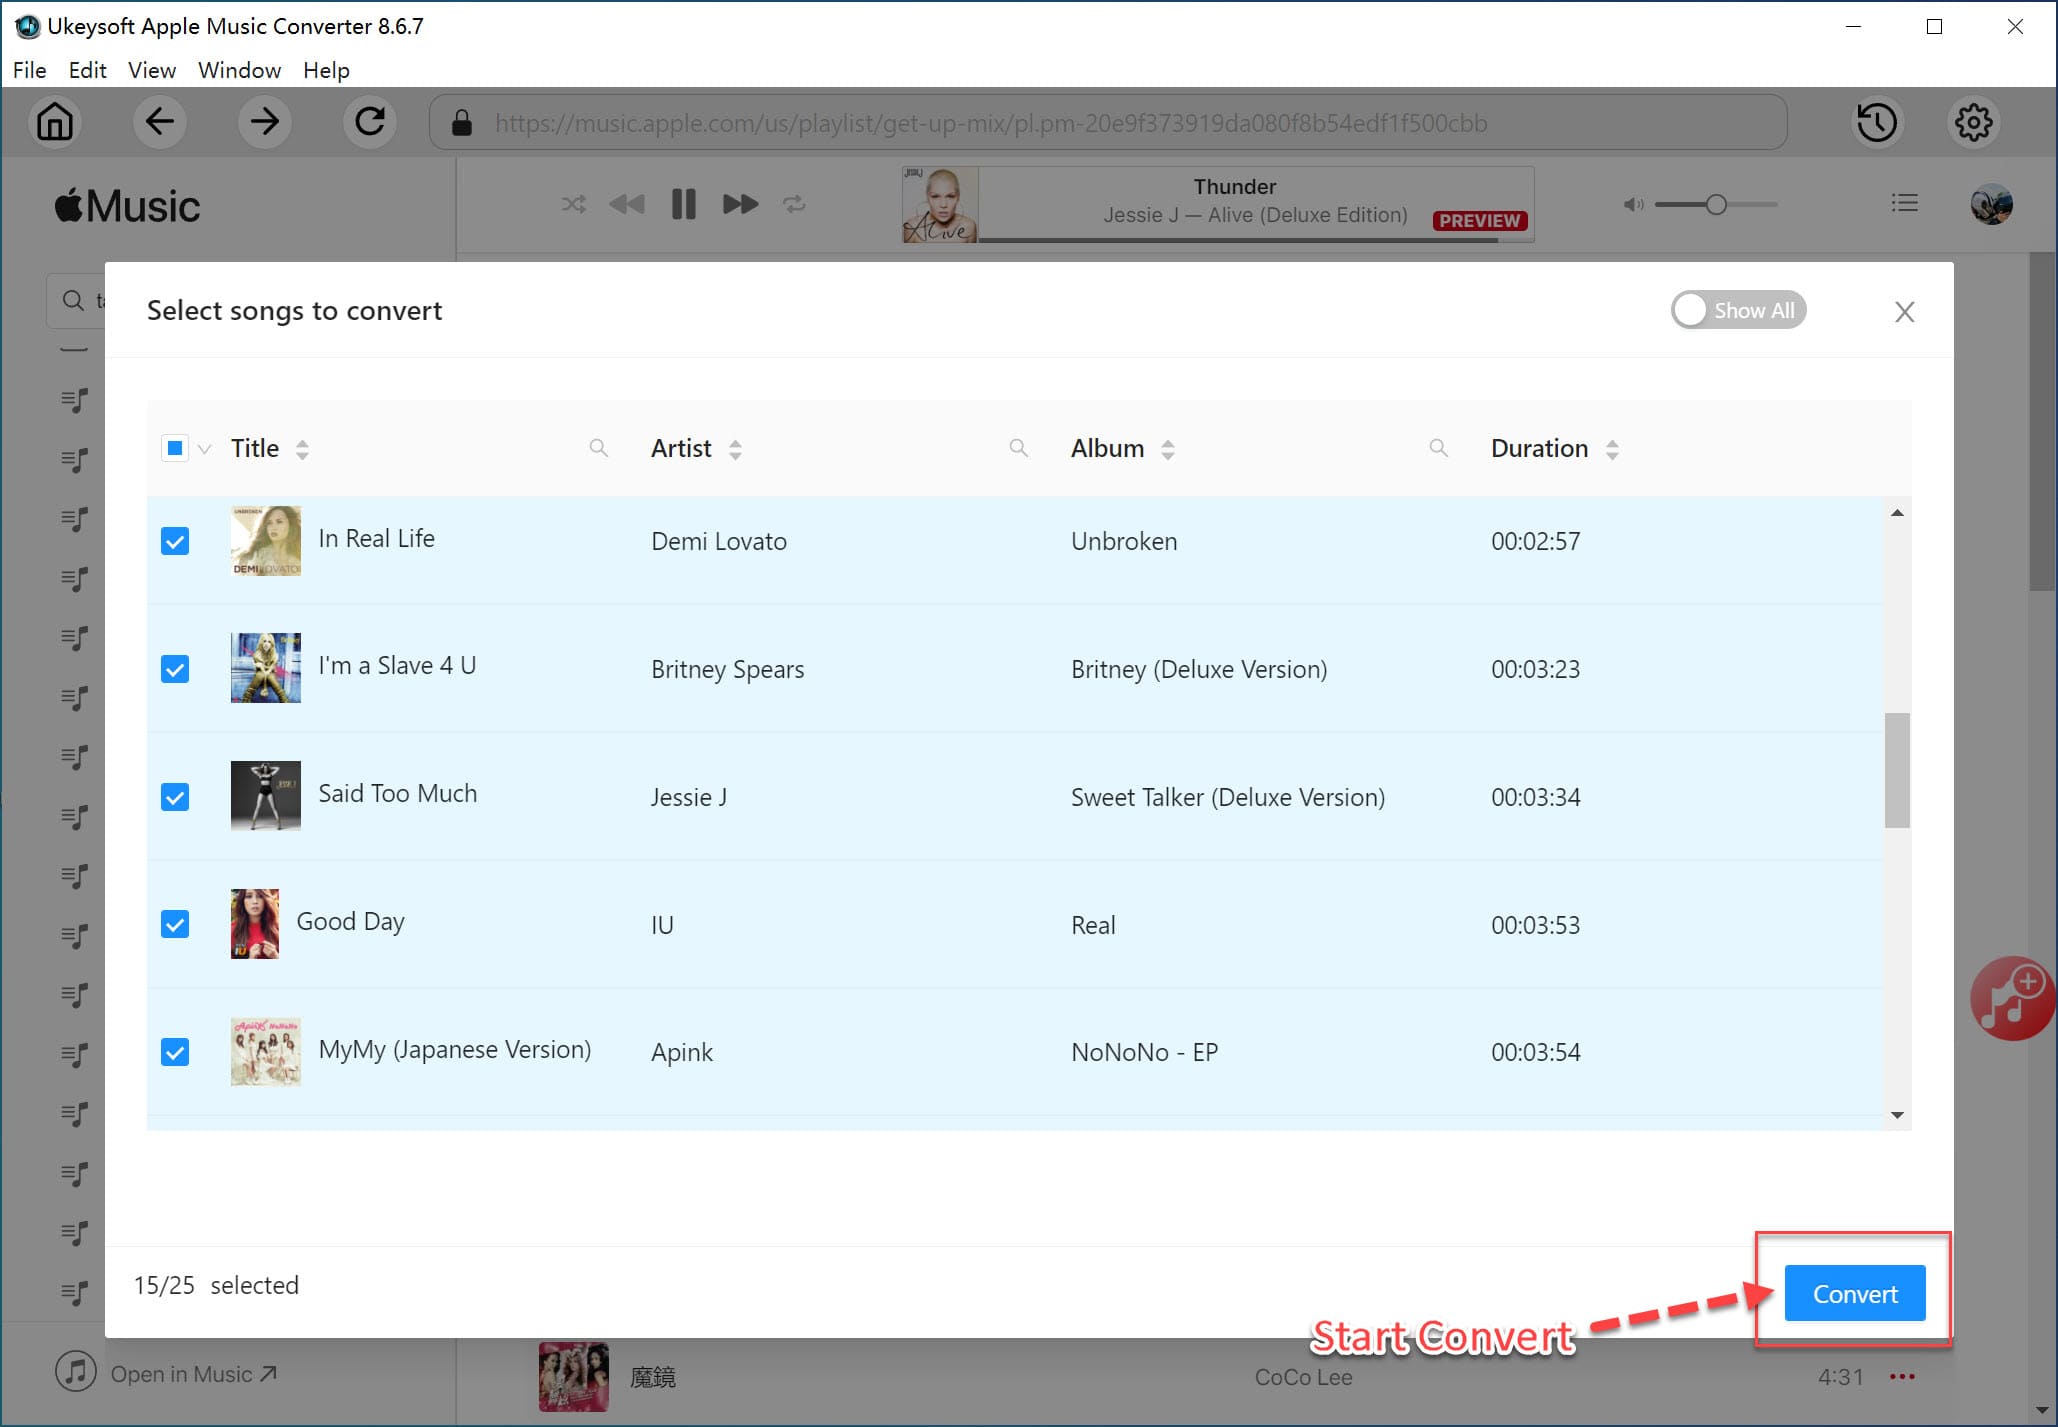
Step 2. Choose the eager Apple music song
Next, click on the relevant playlist category and select the M4P Apple music you desire in the file list. Note that you only need to add Apple music tracks to the iTunes library because UkeySoft will automatically load the contents of the library.
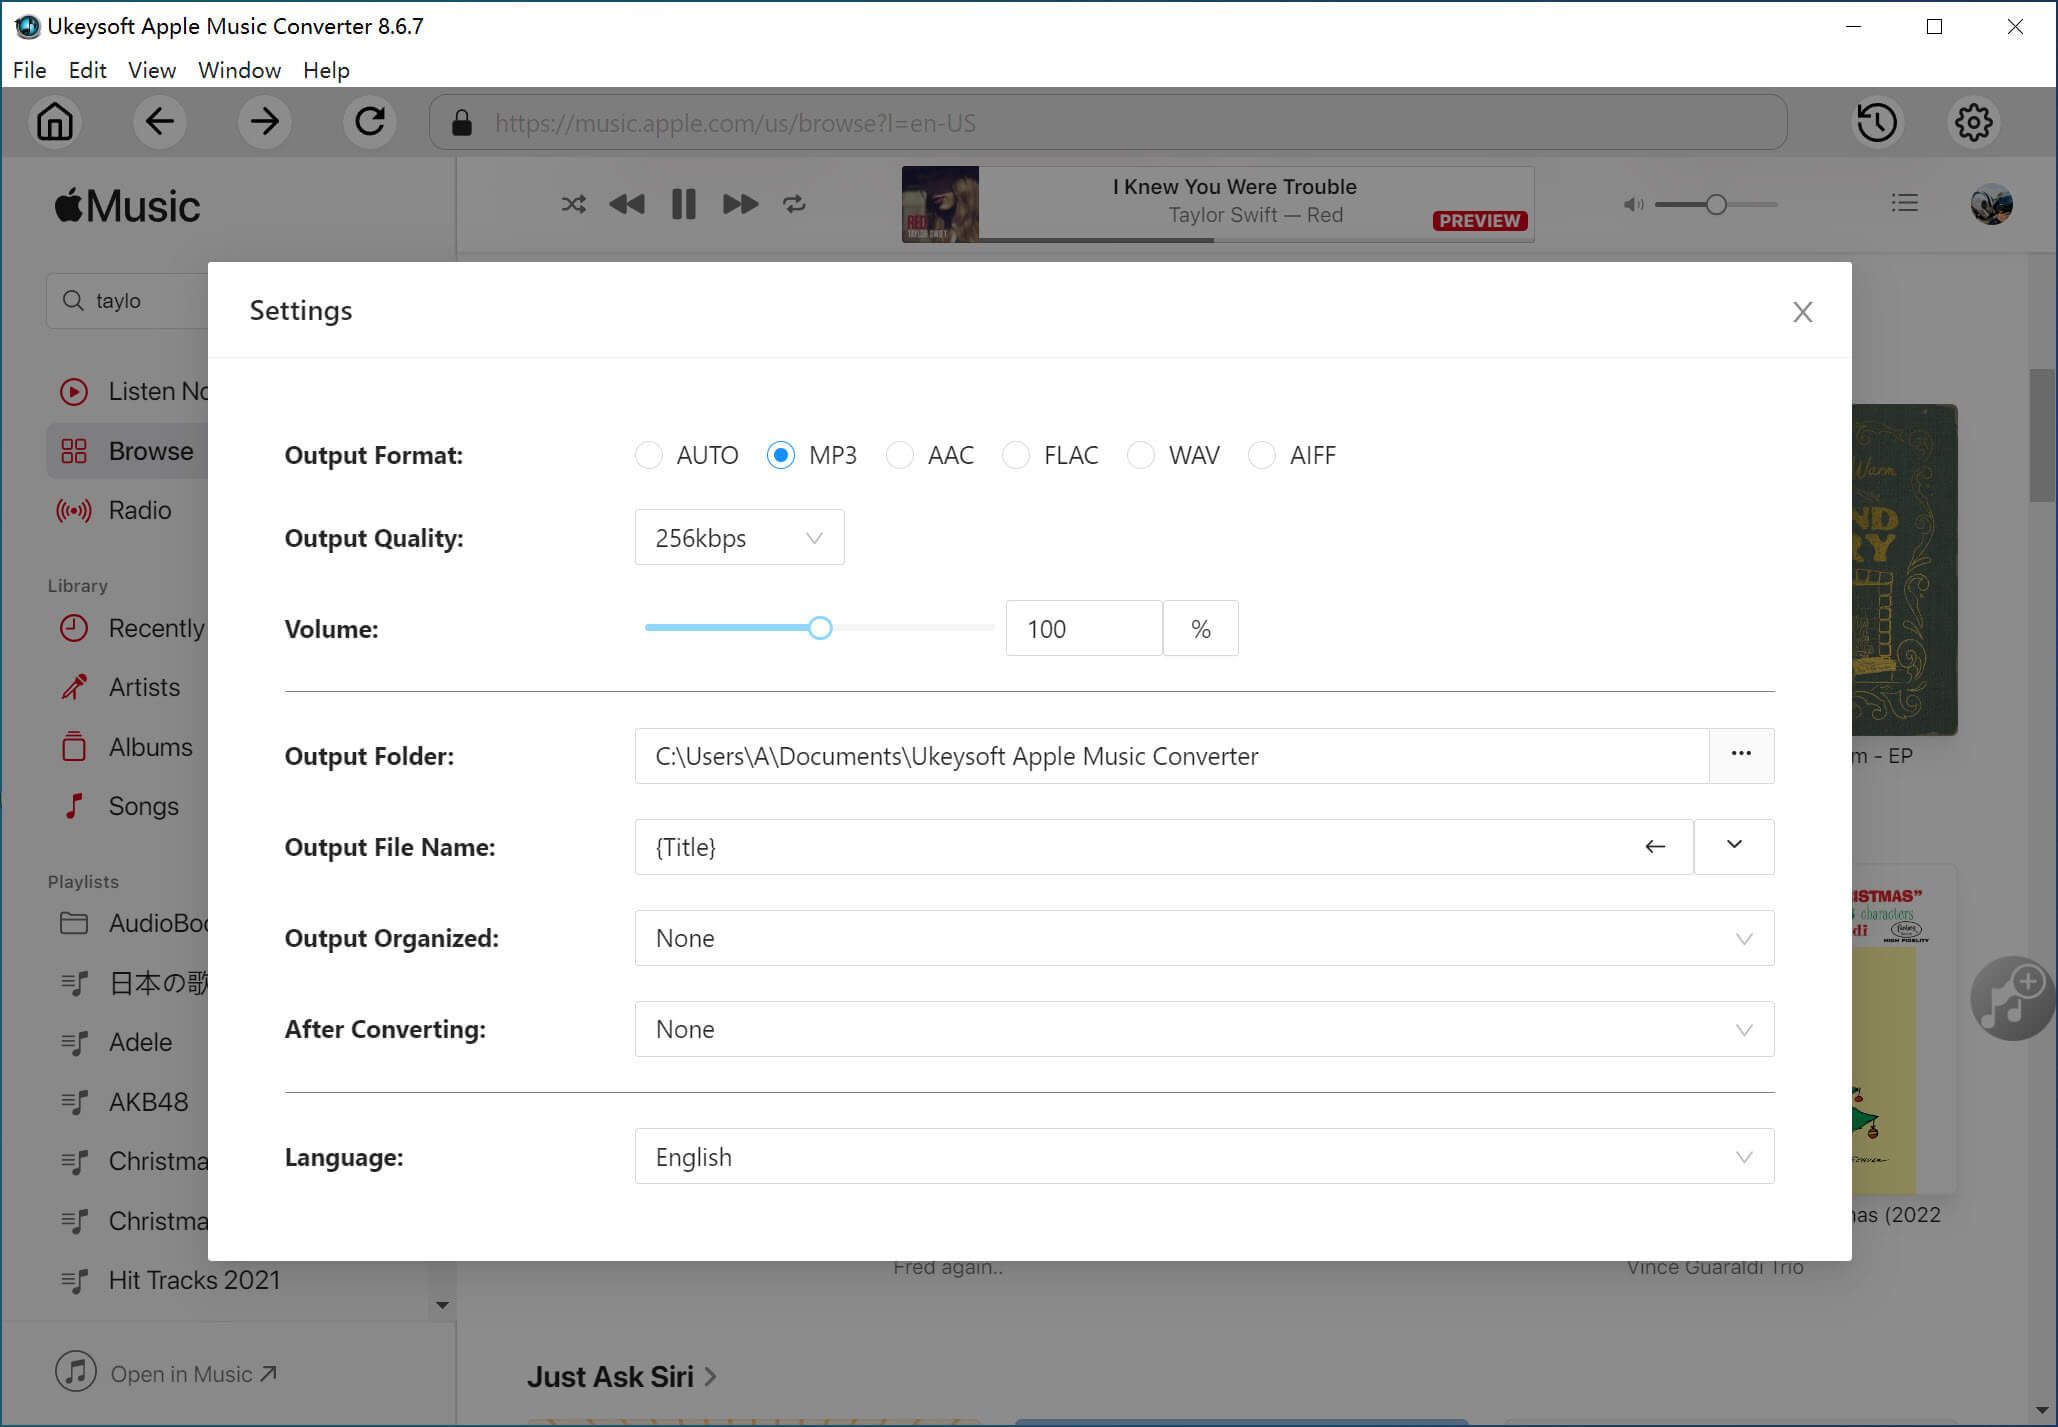
Step 3. Select the output format
After selecting the M4P file, select the output format at the bottom of the main window. Profile settings are automatically adjusted based on the selected output format. You can also set parameters to your liking. The default choice is MP3.
Step 4. Start downloading Apple Music to PC
Simply click on the "Convert" button to start converting and downloading Apple Music to your computer.
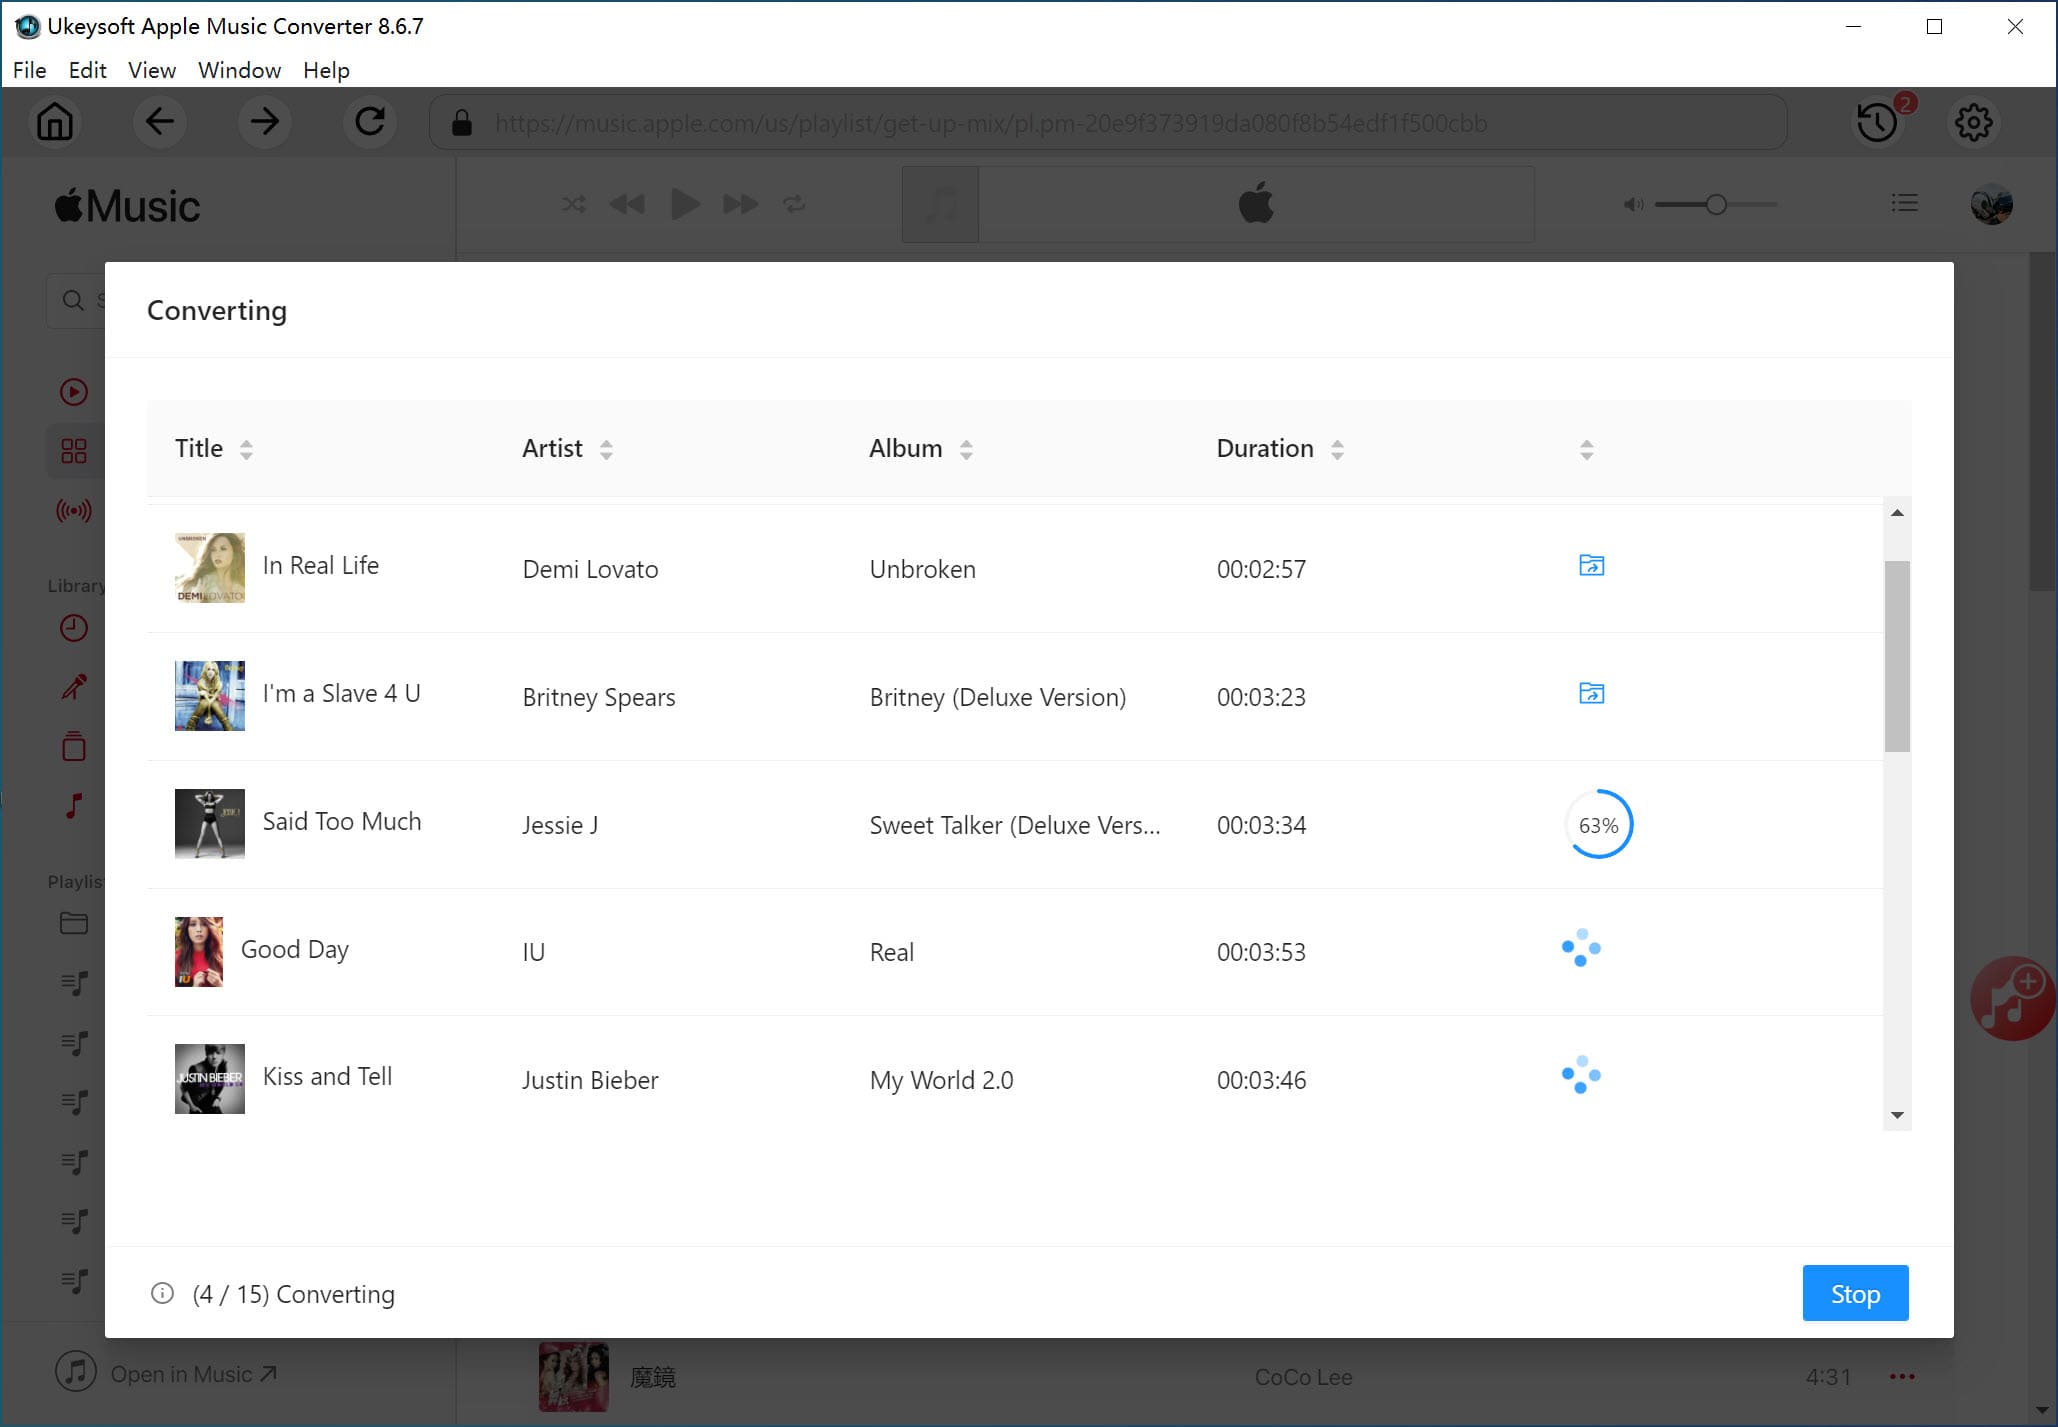
Once the conversion is complete, you can find the converted Apple Music songs in the destination folder and save them permanently, although the subscription expires. You can also transfer them to your hard drive for backup.

Prompt: you need to log in before you can comment.
No account yet. Please click here to register.

Porducts
Solution
Copyright © 2026 UkeySoft Software Inc. All rights reserved.


No comment yet. Say something...