By
Justin SabrinaUpdated on May 30, 2025
Summary
Do you want to burn Apple Music playlist to CD? This article will walk you through the guide to convert Apple Music tracks to CD-compatible formats, and ways to burn Apple Music songs on computer in 4 ways.
Question: "Can I burn music from Apple Music to a CD? I want to play Apple Music in my car while driving. Any suggestion?"
Answer: Yes. You can burn Apple Music songs to CDs, but you'll need the help of a third-party tool.
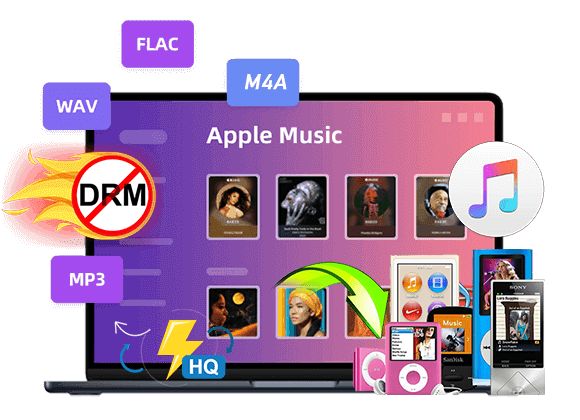
Are you an Apple Music lover? Many users prefer to burn a CD from Apple Music for backup, car playback, or personal collections. However, all Apple Music tracks from the library are under a particular DRM protection technology and encoded in M4P format to restrict copying and burning. As a result, those Apple Music tracks can only be accessible within the Apple Music app or iTunes. When the subscription ends, all your Apple Music downloads will be disabled and inoperable. In a word, you can't burn Apple Music songs to CD directly with these sources even though you've fully downloaded the songs.
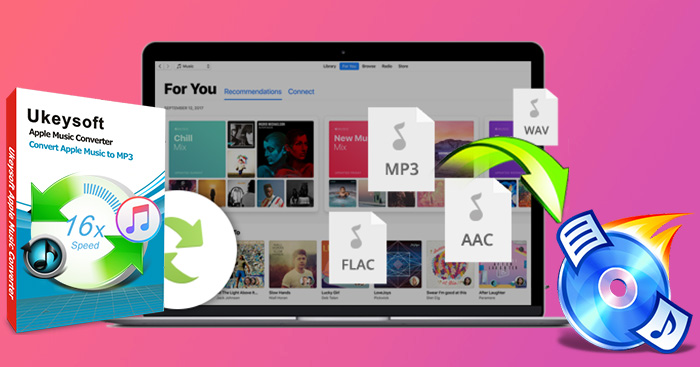
So how to burn Apple music onto a disc exactly? To accomplish this task, you need to remove Apple Music and convert Apple Music to audio CD-supported formats, such as MP3 and WAV. This job can be perfectly solved with third-party Apple Music converter, such as UkeySoft Apple Music Converter. Keep reading to learn more!
CONTENTS
Part 1. Burn Apple Music to CD (iTunes Store Purchases Only)
If you have previously purchased DRM-free songs from the iTunes Store, you're in luck. You can burn these songs onto a CD directly using iTunes.
To burn an MP3 disc, all songs on the disc must be in MP3 format. If your playlist contains songs in other formats, such as songs purchased from the iTunes Store, you need to convert them to MP3 format before you can burn them to disc.
- From Apple iTunes User Guide
Preparation: Convert iTunes Songs to MP3 or WAV
Step 1.
Download your purchased songs from iTunes Store.
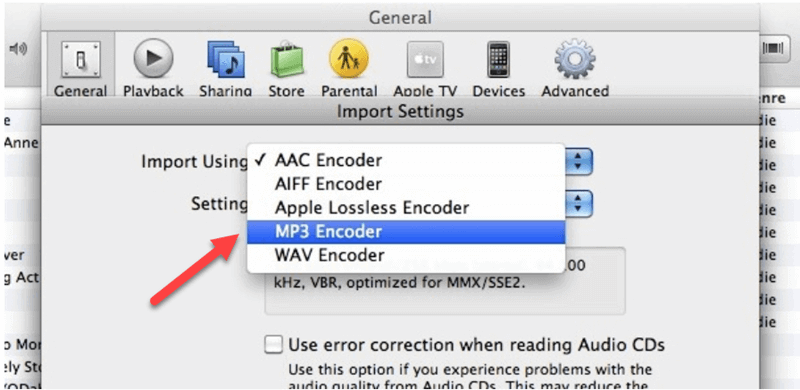
Step 2.
Then click "Edit" > "Preference" > "General" > "Import Settings".
Step 3.
Choose "MP3 Encoder" or "WAV Encoder" option.
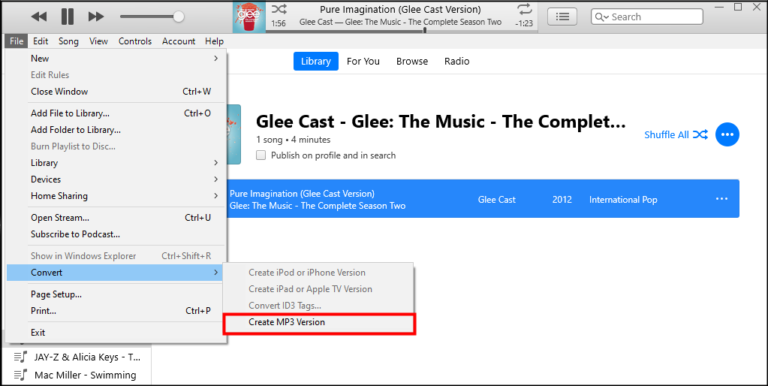
Step 4.
Select the iTunes songs, go to "File" > "Convert" > "Create MP3 Version" or "Create WAV Version.
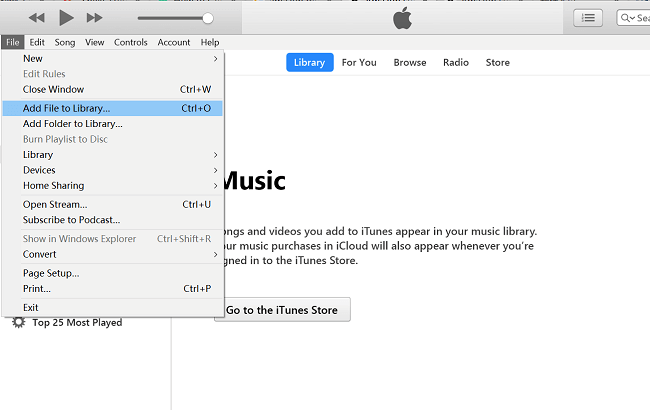
How to Burn Purchased iTunes Music to CD
Step 1.
Launch iTunes app, and click on "File" > "New" > "Playlist" to create a new playlist, and simply rename the new created playlist.
Step 2.
Drag the DRM-free iTunes songs (in MP3 or WAV format) you want to burn to disc into the newly created playlist.
Step 3.
Insert a physical CD into the CD-Rom of your computer and right click the playlist > choose "Burn Playlist to Disc" > "Burn" to start burning your Apple Music songs to CD.
Step 4.
In the pop-up window, choose your preferred disc format: Audio CD, MP3 CD, or Data CD. Select 'Audio CD" for car stereos or home CD players.
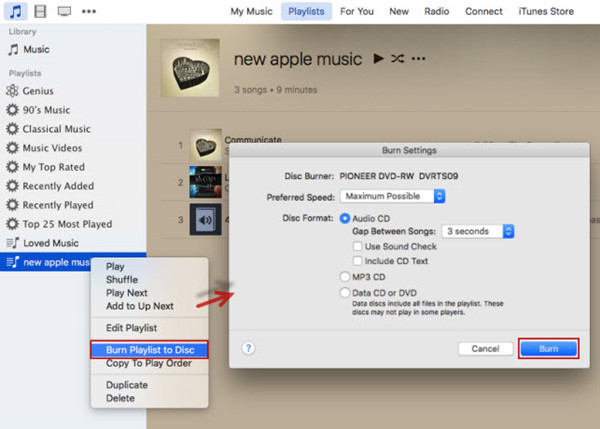
Step 5.
Click "Burn" to begin the burning process.
Part 2. Tool You Need Before Burning CD with Apple Music
As we mentioned above, Apple Music tracks are DRM-encrypted and in M4P format. You need to convert them into a common format such as WAV or MP3 first. This is where a reliable Apple Music to CD Converter comes into play.
Pro Tricks for Burning Apple Music to CD:
- UkeySoft Apple Music Converter for Mac/Windows
- Windows PC(Windows Vista/7/8/8.1/10) or Mac(OS X 10.11 or above) with disc drive
- Apple ID with Apple Music subscription
- A CD burning software such as iTunes, VLC, WMP, etc.
- A blank CD disk
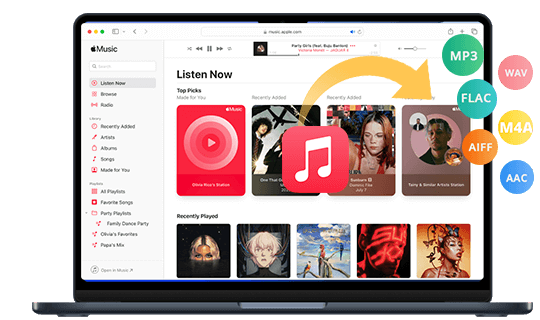
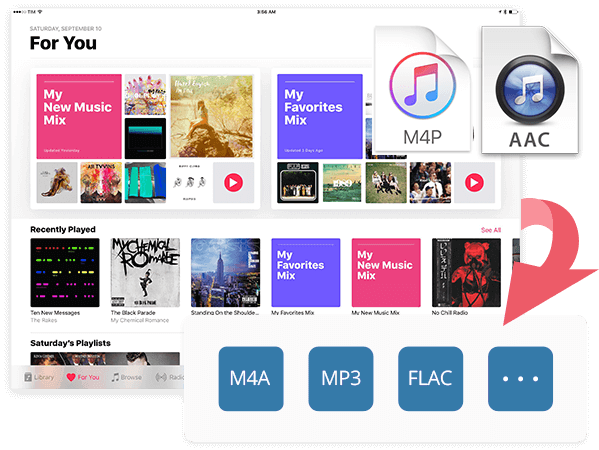
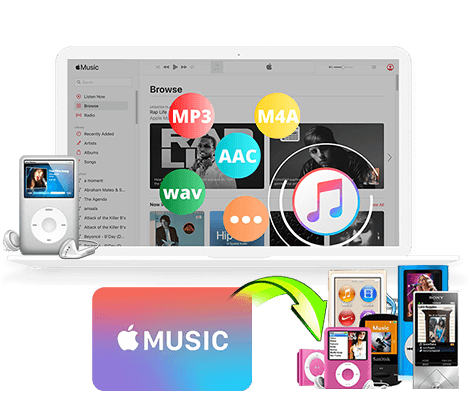
UkeySoft Apple Music Converter is designed to remove DRM from Apple Music songs, playlist, songs, albums and free up your Apple Music library. It can convert Apple Music to MP3, WAV, M4A, AAC, FLAC or AIFF while preserving the original ID tags and CD quality. It comes with an embedded Apple Music web player, which allows users to search and add any song, album or playlist directly within the web player.
Another key feature is that the program is able to process batch conversion with up 10X faster speed. With this software, you can keep your favorite Apple Music tracks permanently, and burn them into a CD or save them in USB drive, external drive, SD card without limitations.
UkeySoft Apple Music Converter
- Built-in Apple Music web player, no iTunes/Music app needed
- Remove DRM protection from Apple Music songs, playlists, albums
- Convert Apple Music tracks to MP3, WAV, AAC, FLAC, M4A, AIFF
- Batch conversion supported, and 10X faster speed
- Preserve original audio quality and metadata
- Define the file title and classify the output files
Tip: System Requirements:
Windows 7 or later on 64bit required
Tutorial on How to Convert Apple Music to MP3/WAV for Buring to CDs?
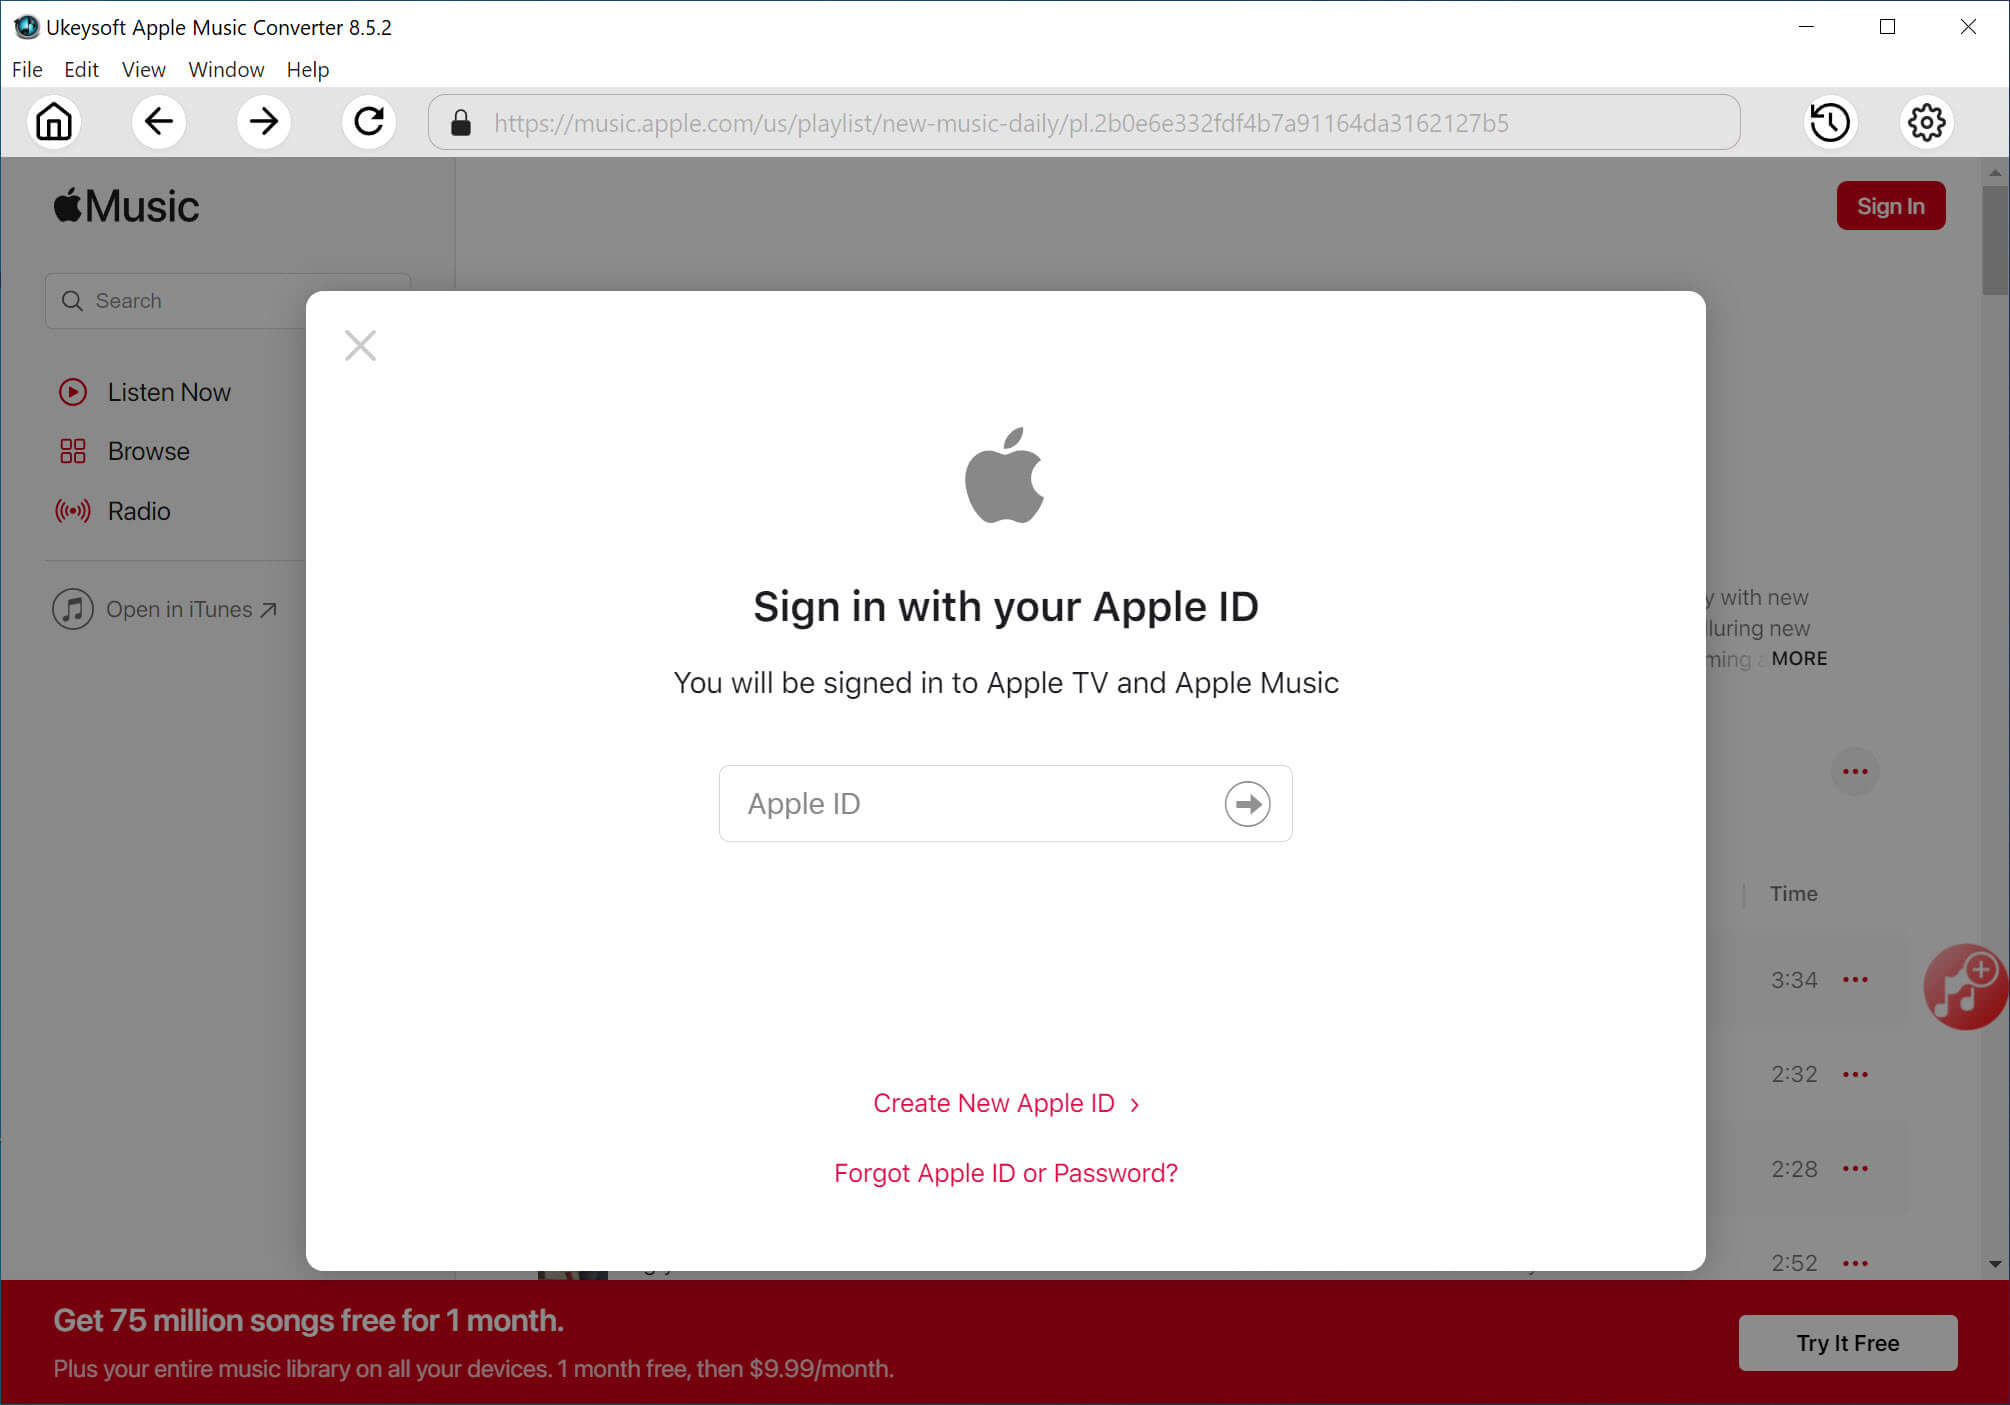
Step 1. Start UkeySoft and Log In Apple Music Account
Download and launch the UkeySoft Apple Music Converter program on your computer. Sign in to your Apple ID to enter its built-in web browser.
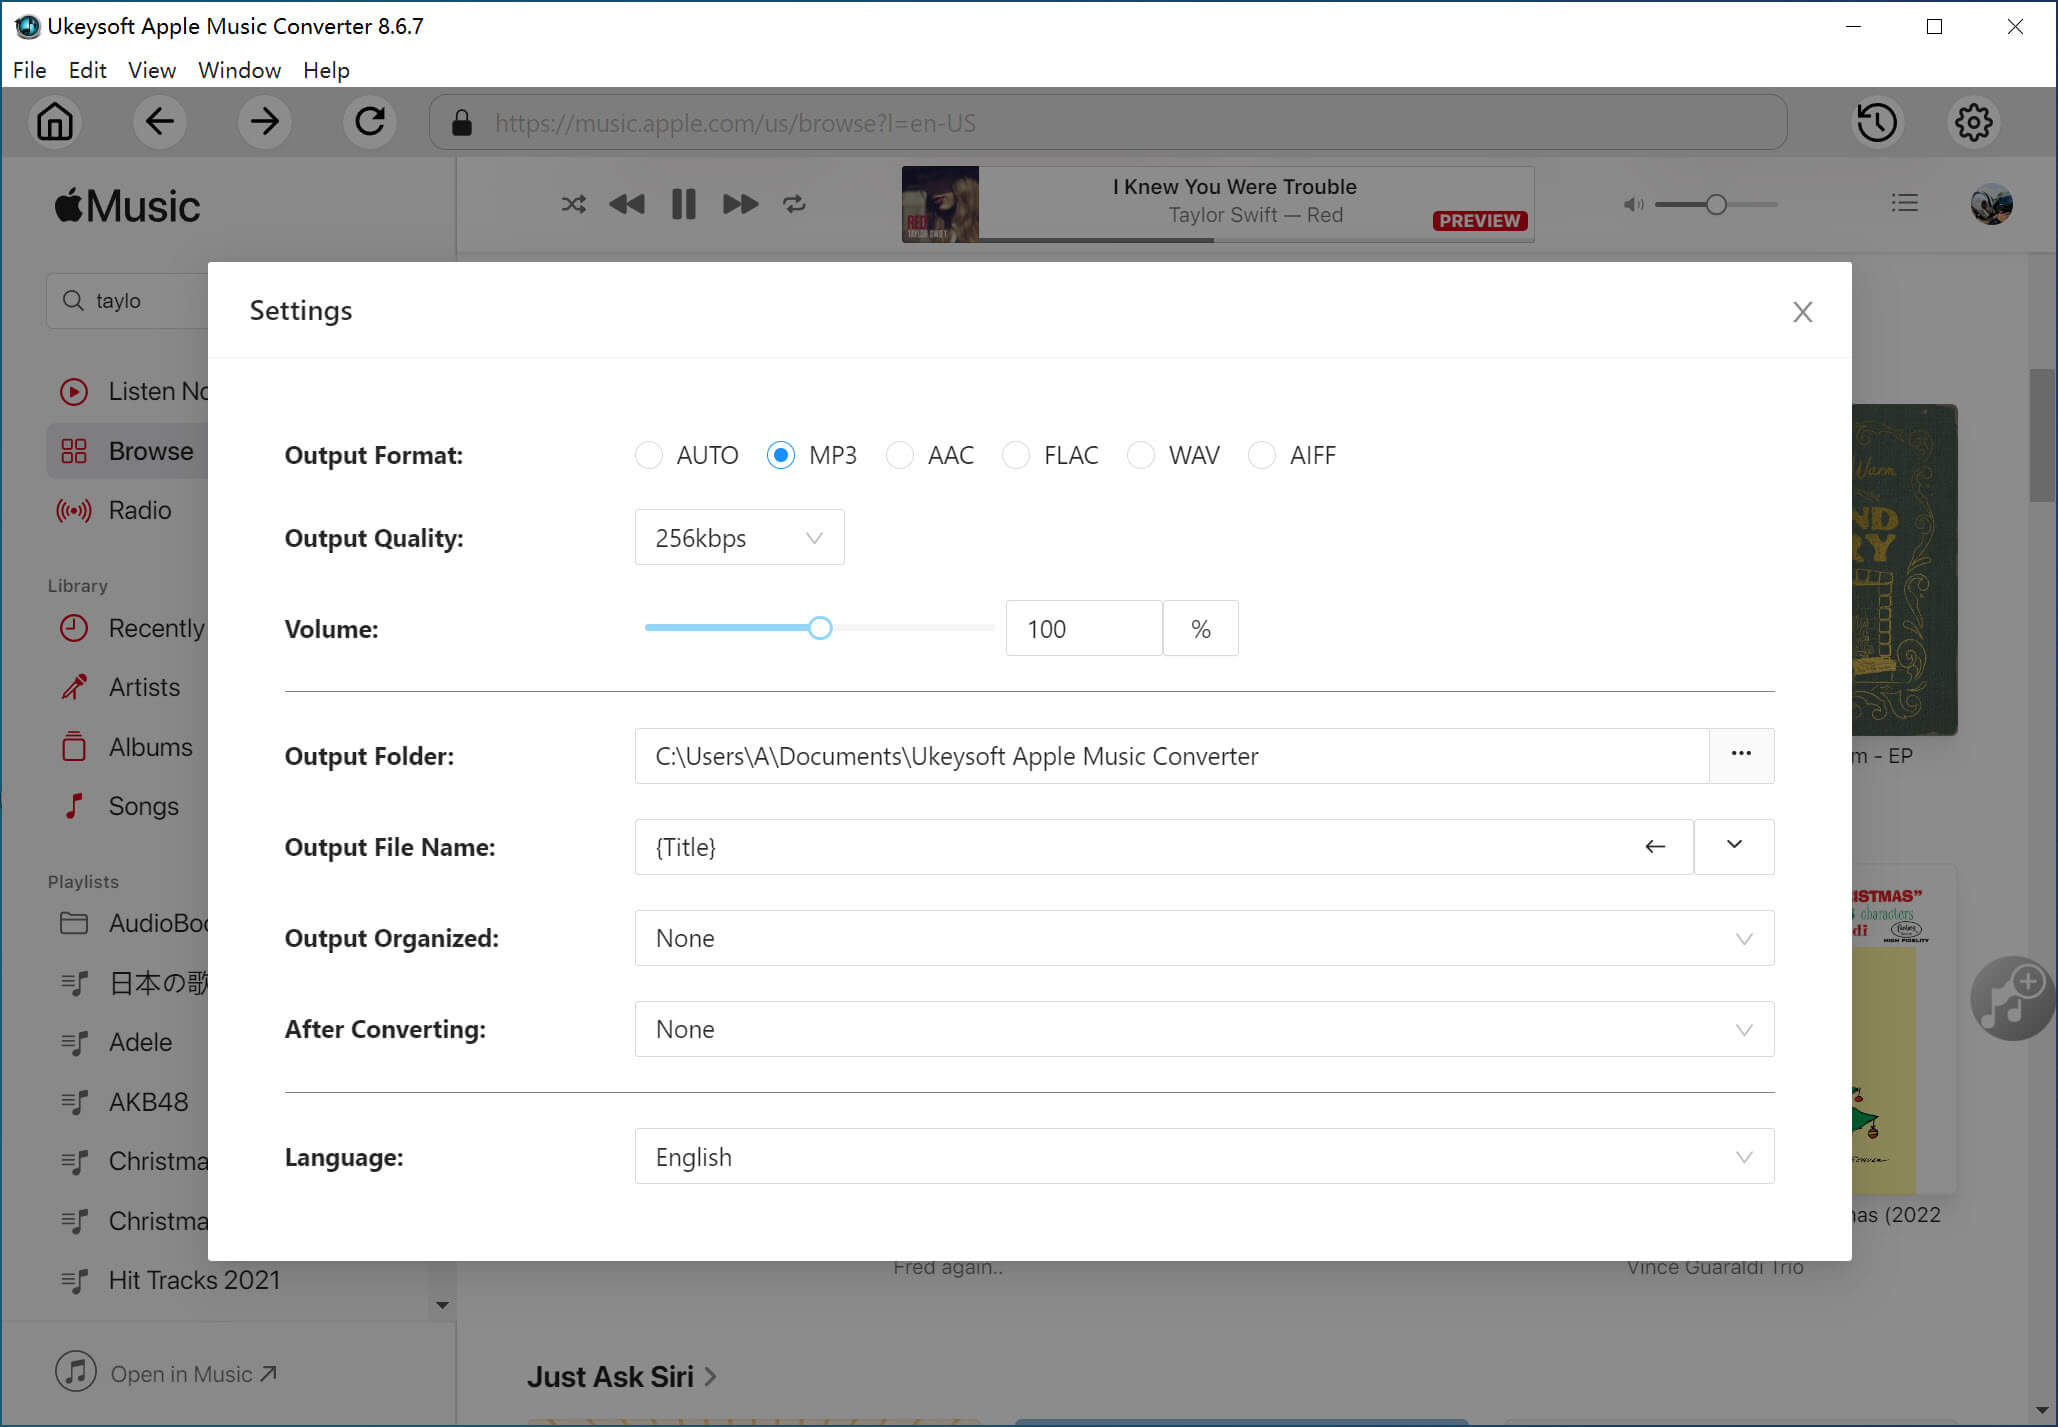
Step 2. Choose MP3 or WAV as Output Format
Access the settings window by clicking the "Gear" icon. To burn Apple Music to CDs, you need to change the output format to MP3 or WAV from default M4A. Meanwhile, you may also select the output folder, output quality and more settings.
Step 3. Add Apple Music Songs
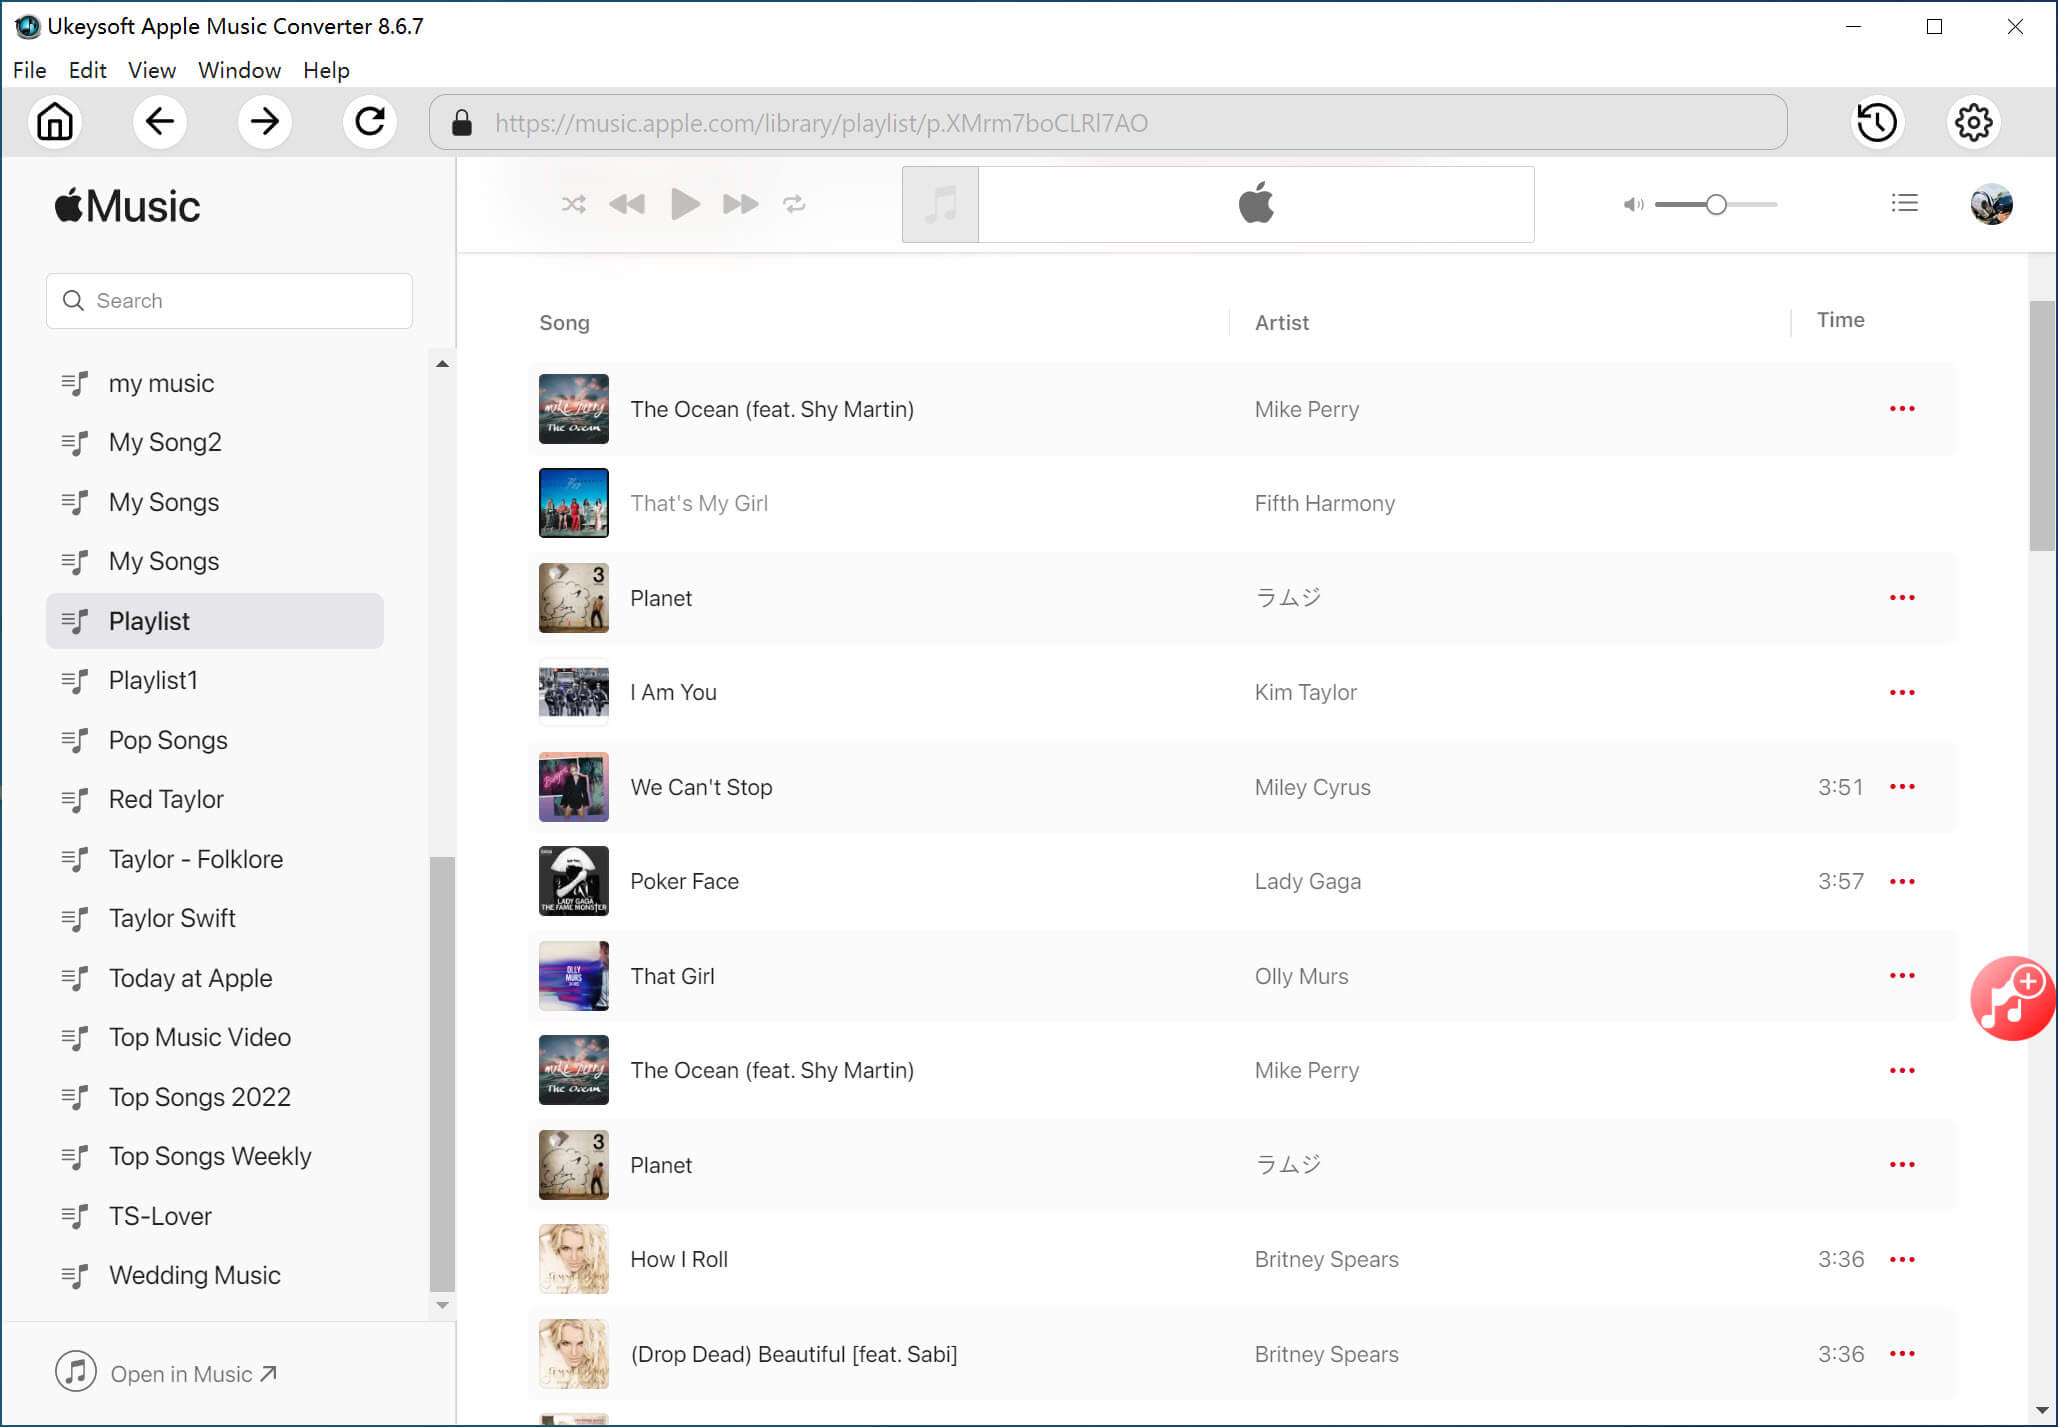
Open any Apple Music playlist, album, artist, you can use the search bar or browse to find your or desired songs, and hit on the red "+" icon to load the music items to the converter.
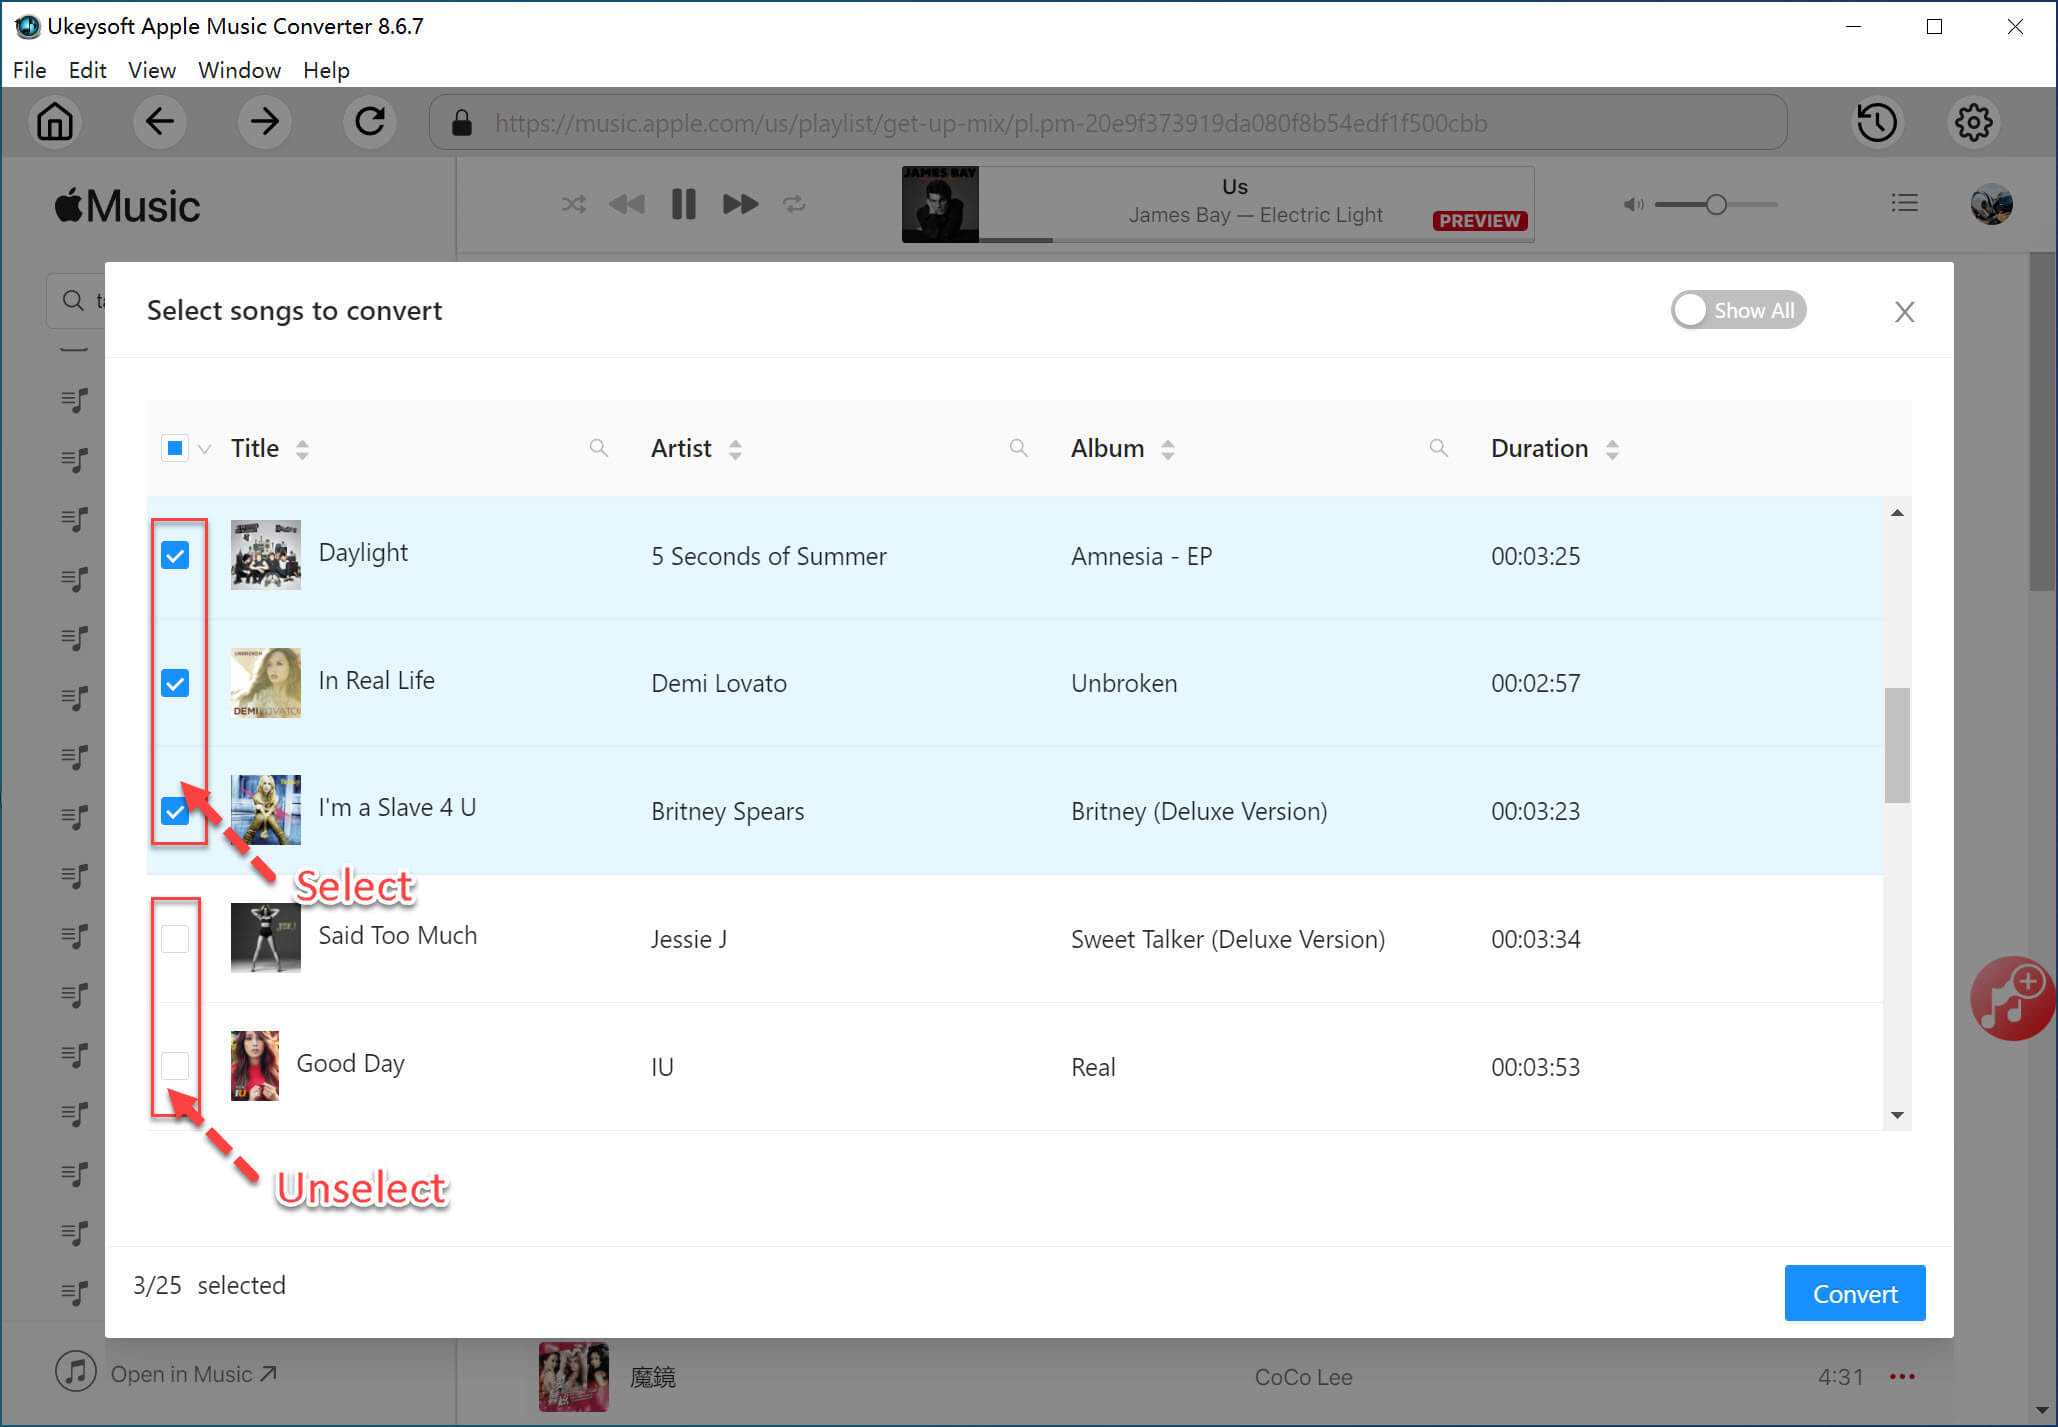
Before conversion, check and confirm the songs you want to convert. Uncheck the ones you don't want.
Step 4. Start to Convert Apple Music to MP3/WAV
Click "Convert" button to start the conversion process. Click "Convert" button to start converting Apple Lossless to MP3.
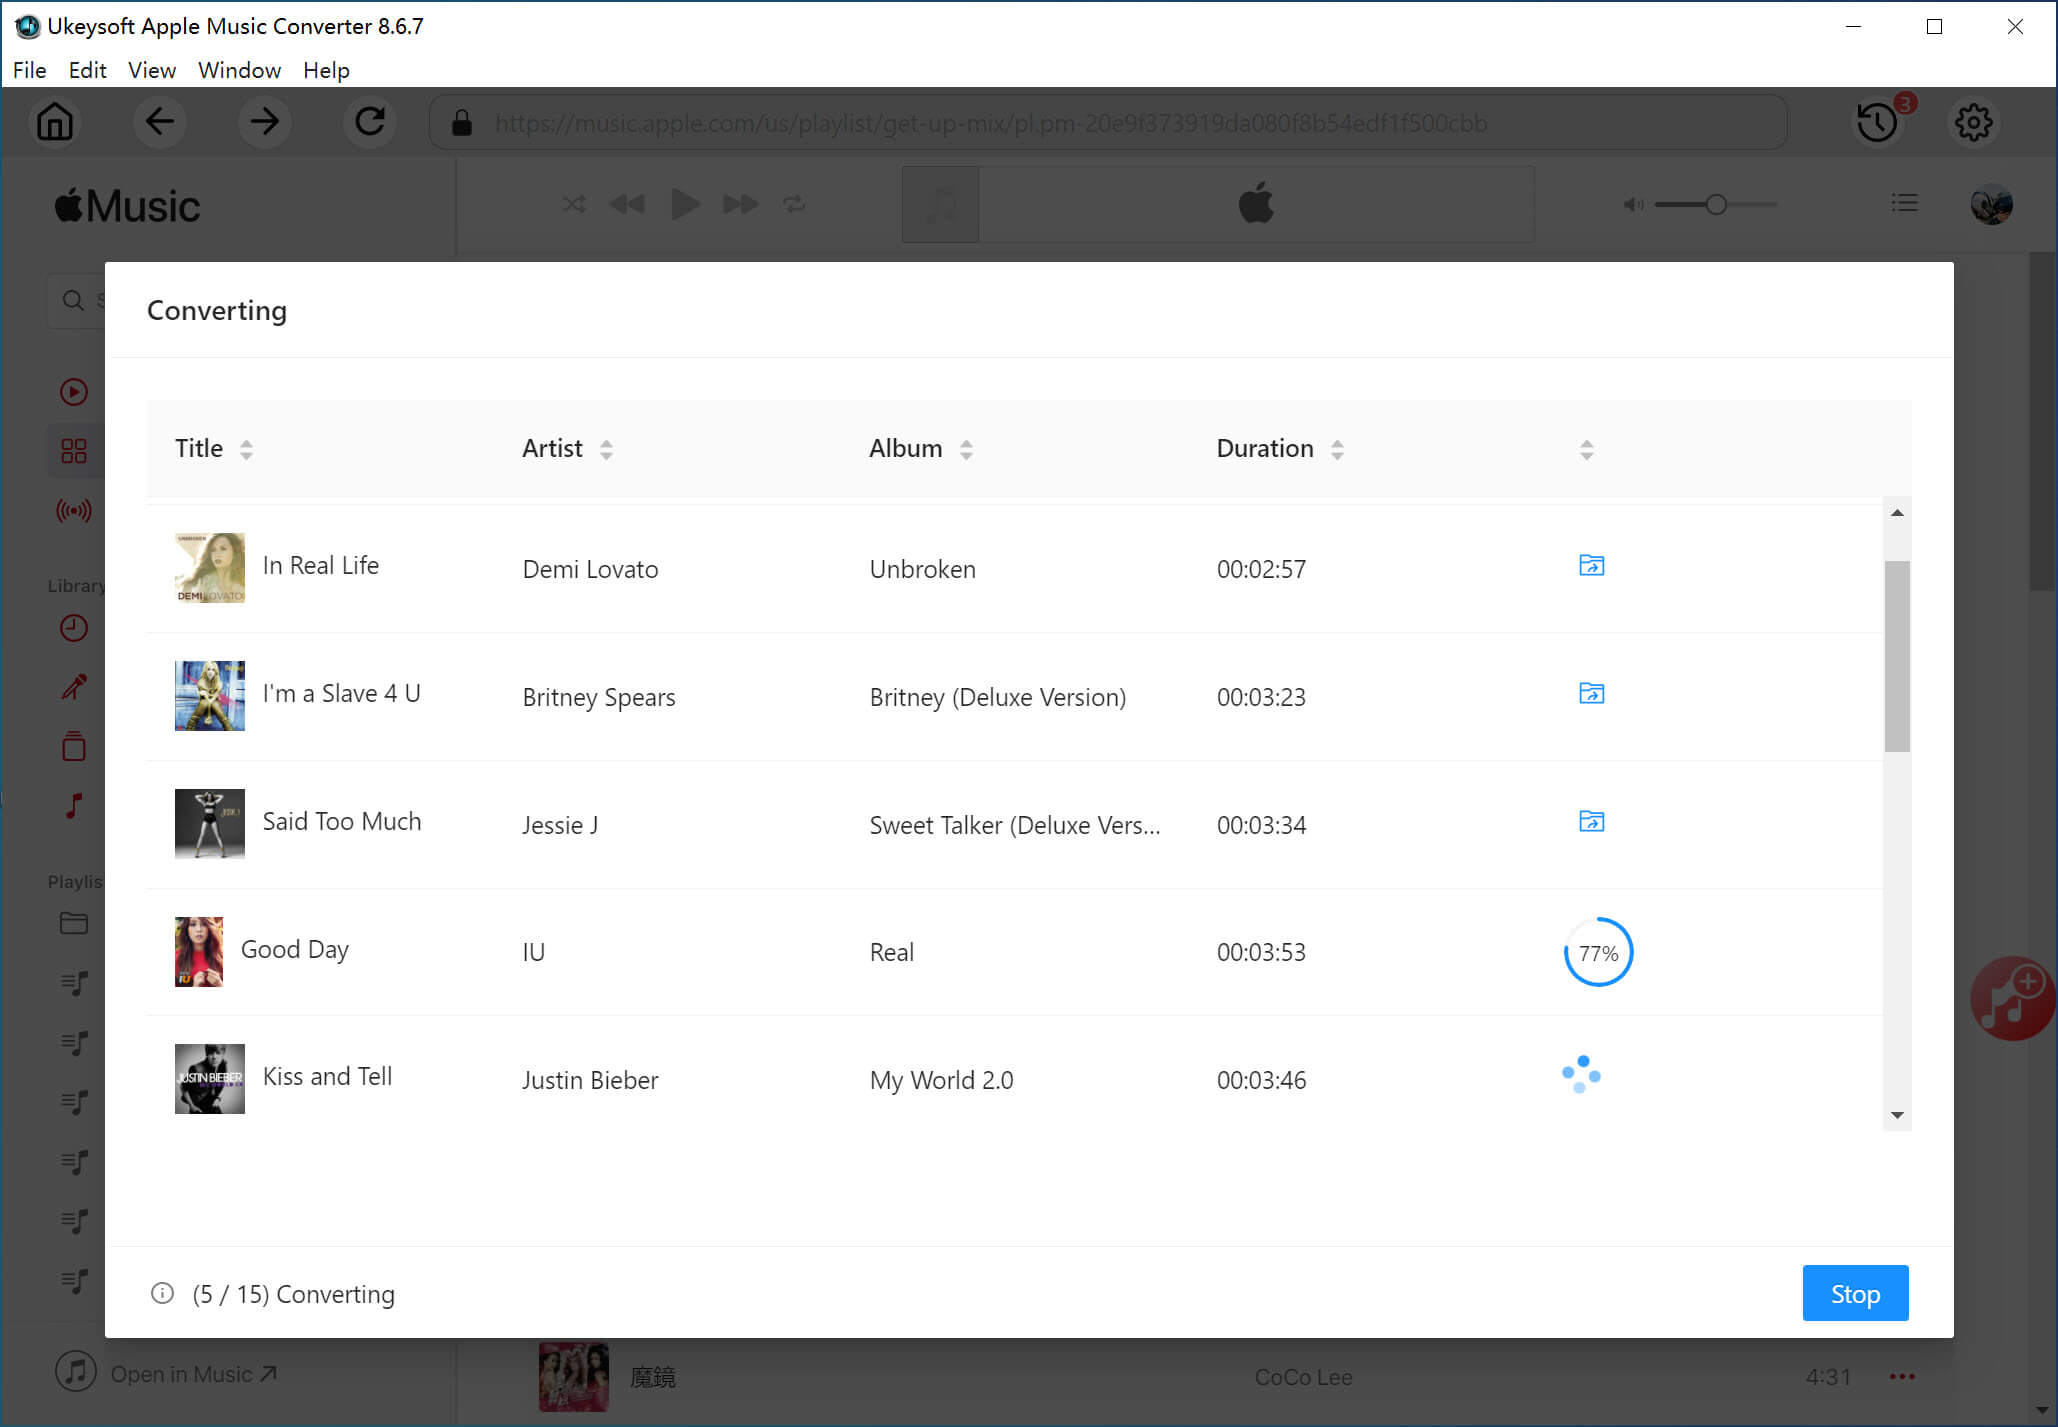
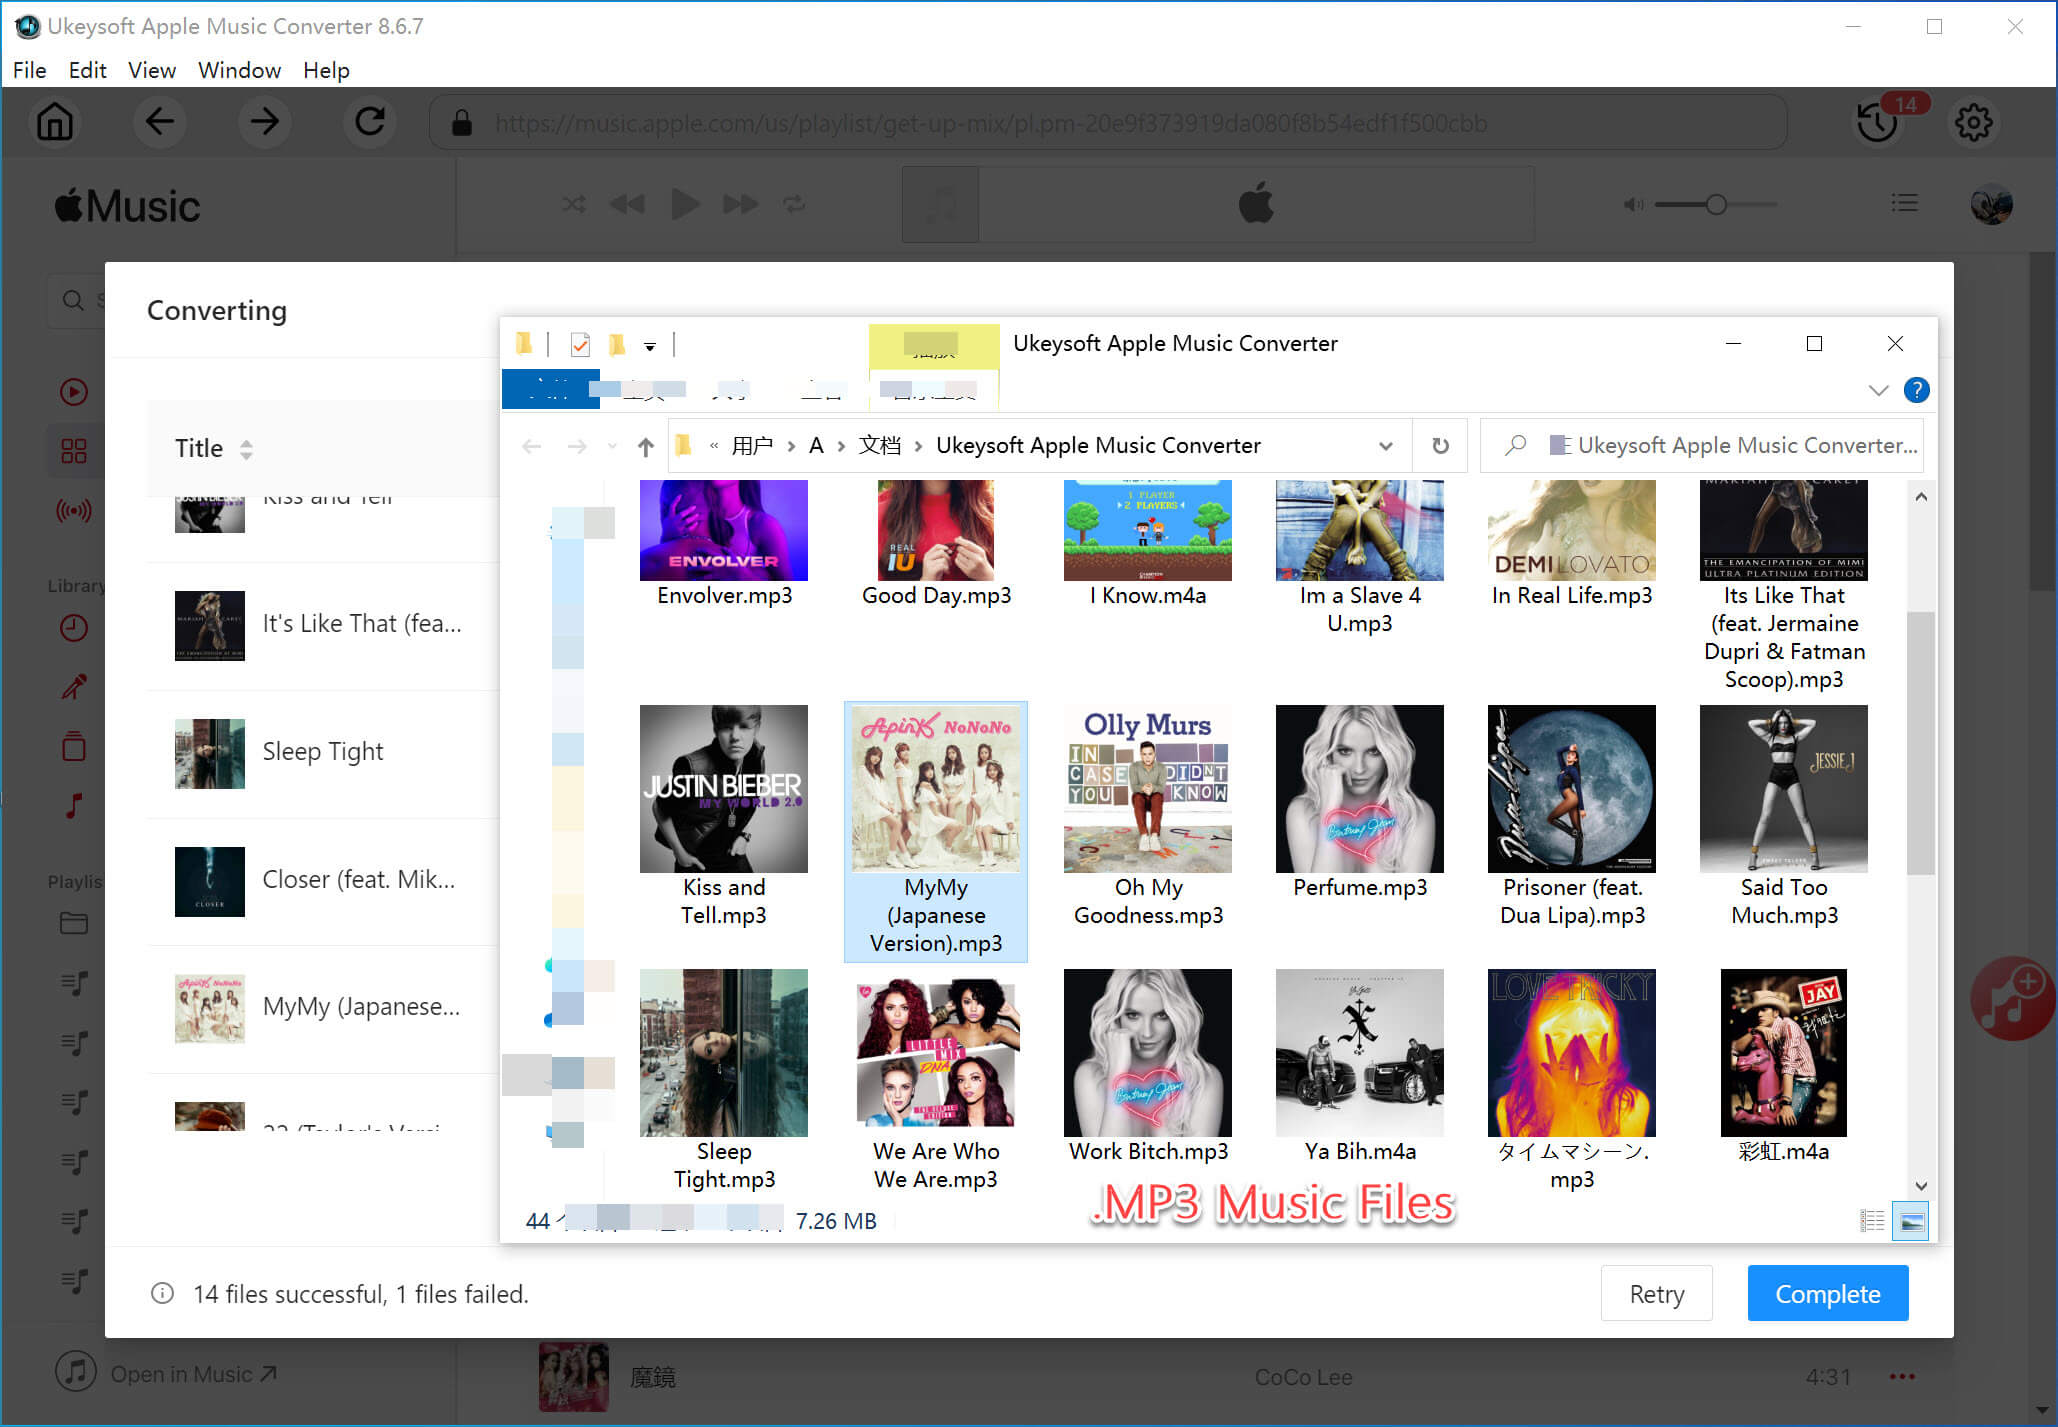
Step 5. Get Output Apple Music Files
Once done, your Apple Music songs will be DRM-free and ready to burn. Click the "Clock" icon and then hit the "Blue Folder" icon. You will be navigated to the output folder, get the converted Apple Music files!
Part 3. How to Burn Apple Music Songs to CD? (4 Ways)
Once you've used an Apple Music to CD Converter like UkeySoft Apple Music Converter and convert your Apple Music songs to WAV or MP3, you can easily burn those Apple Music songs to CD on your computer using different software tools. Check it out!
If your computer doesn't have a CD/DVD Rom, you can also use an external portable CD-Rom, you also can copy the converted Apple Music to USB flash drive, SD card and other external hard drive for backup.
#1. Use iTunes
You can burn the Apple Music tracks to CD in iTunes or Music app. We have introduced the detailed guide above. So you can turn back to Part 1 to get more tips. Remember to import the converted Apple Music MP3/WAV files to your iTunes/Music library before you start.
#2. Use Windows Media Player
Except to using iTunes to burn the DRM-free Apple Music songs to CD on Windows PC, you can also use Windows Media Player to burn the converted Apple Music to CD on Windows 11/10/8/7/XP. Windows Media Player is a free CD burner for PC, let’s teach you how to burn your converted Apple Music songs(.mp3) to CD disc using Windows Media Player.
Step 1.
Insert a blank CD onto your computer.
Step 2.
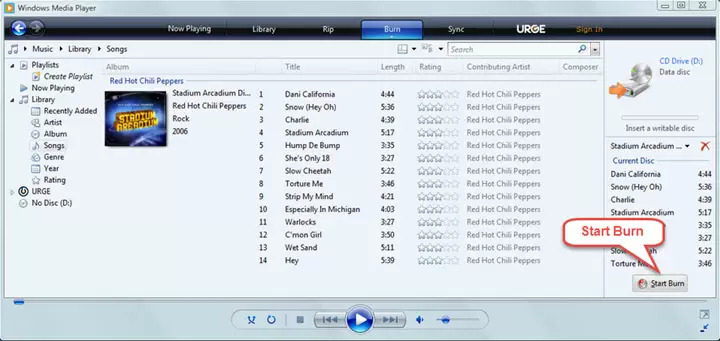
Launch the Windows Media Player on PC, switch to media list and click "Burn" on the tab.
Step 3.
Add the converted Apple Music songs to the burn list.
Step 4.
Click the "Burn option" and choose Audio CD.
Step 5.
Once everything is set, click the "Start Burn" button to start burning Apple Music files to CD.
Step 6.
Wait until the burning process is complete then the disc will automatically eject afterwards.
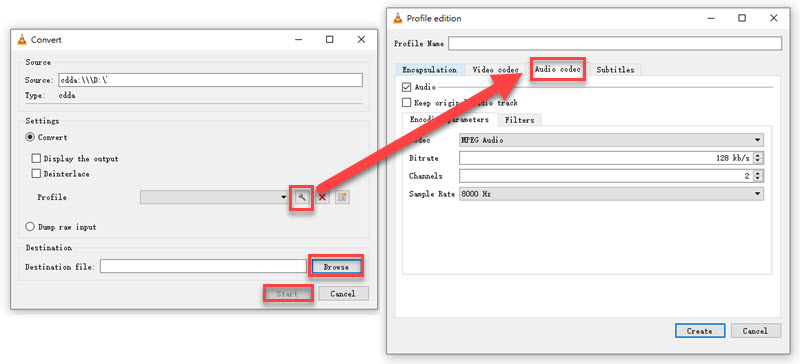
#3. Use VLC Media Player
VLC Media Player is a free, open-source, cross-platform multimedia player. VLC also includes basic CD burning capabilities, making it a handy tool for burning CDs from your Apple Music collection.
Step 1.
To begin with, insert a blank CD to your computer.
Step 2.
Open VLC on your Windows PC, Mac or Linux, and click on "Media" > "Convert/Save".
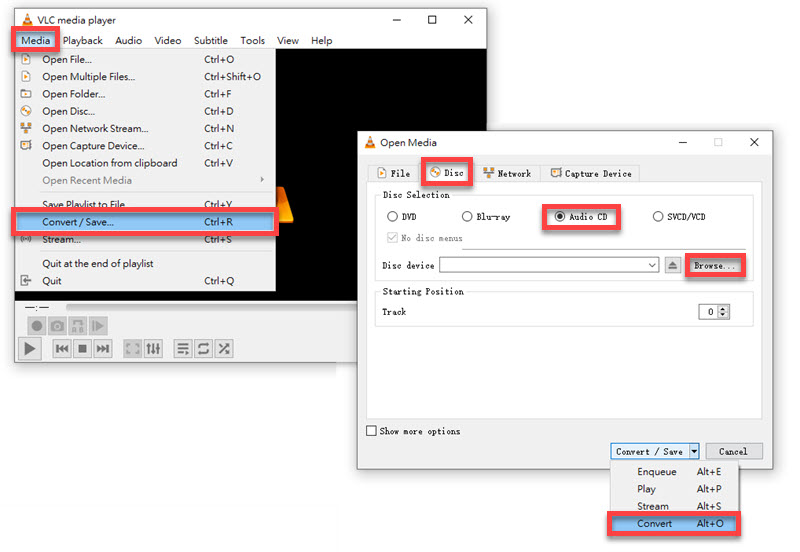
Step 3.
Tap on the "Tool" icon to go to the "Profile edition" window.
Step 4.
Choose Audio CD as the profile and set the bitrate, channels, sample rate, etc. Tap "Create" to save the changes.
Step 5.
Click "Browse" to add the converted Apple Music files, press on "Start" to burn Apple Music songs to CD.
#4. Use ImgBurn (Windows)
ImgBurn is a free, lightweight, and professional disc-burning software, available on both Windows and Mac. It's widely regarded as one of the best free burning tools for both beginners and advanced users. So, you can use it to burn the converted Apple Music songs to CD.
Step 1.
Download and launch ImgBurn on your computer.
Step 2.
Insert a blank CD and select "Write files/folders to disc" mode.
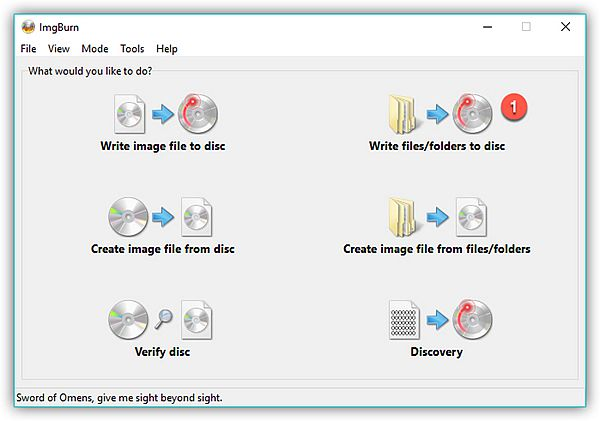
Step 3.
Click on a "Folder" icon to browse and add folder where Apple Music music files are stored.

Step 4.
If ready, click on the below "folder-to-disc-shaped" button to begin burning Apple Music songs to CD. Then, it will pop up a window, click "Yes" to confirm and wait for the burning process to complete.

When it's done, you can enjoy your favorite Apple Music songs with car CD player or home CD player at any time, even without network connection!
Conclusion
Apple Music provides high-quality streaming with millions of songs. While Apple Music tracks are DRM-protected by default, this comprehensive guide provided step-by-step instructions to burn Apple Music songs to CD on computer. With the help of UkeySoft Apple Music Converter, you can quickly convert Apple Music playlists or tracks to a CD-supported format such as WAV or MP3. Whether you want to burn Apple Music playlists to CD or just a few favorite tracks, you can easily create your custom music CD! Then, you can enjoy your Apple Music collections in the car or on any device you want. Now, free download this powerful tool to have a try!

Apple Music Converter

Justin Sabrina has always had great enthusiasm for writing, programming and web development. He likes writing about software and technology, his works are featured on some tech blogs or forums like Tom's Hardware, CNET, etc.


No comment yet. Say something...